

How to Style Curly Hair With Products: A Routine Guide
You've bought the curl cream everyone raves about, followed the tutorial word for word, and still ended up with frizz by noon or curls so weighed down they barely move. That's not a you problem. Styling curly hair with products only works when the products and the order you apply them in actually match your curl pattern and porosity. Random layering gets random results.
This guide breaks down exactly how to build a routine that holds up, from wash to dry, so your curls stay defined instead of falling apart or clumping into a helmet. You'll learn what each product actually does, the sequence that keeps them from canceling each other out, and how to adjust based on how your hair behaves day to day.
We'll walk through the full process step by step, covering curly hair styling products like leave-ins, gels, and creams, plus the techniques that make them work together instead of against each other. If you've been guessing your way through wash day, this is where you stop guessing and start getting consistent definition you can actually count on.
What you need before you start styling curly hair
Before you touch a single product, get your setup right. Most bad wash days come from missing a step in prep, not from a bad gel. You need to know your hair's starting condition, have the right tools on hand, and stock a basic product lineup that covers the four jobs every curl routine has to do: cleanse, condition, define, and hold. Skip this groundwork and even the best curly hair styling products will underperform.
Know your hair's starting point
Check two things before you build a routine: porosity and density. Porosity tells you how fast your hair absorbs and loses moisture, and it determines how heavy or light your products should feel. Do a quick strand test: drop a clean strand of hair into a glass of water. If it sinks fast, you have high porosity and need richer creams and butters. If it floats for minutes, you have low porosity and need lighter, water-based leave-ins applied to damp hair so product doesn't just sit on top.
Density is simply how much hair you have per square inch of scalp, and it tells you how much product you'll actually need. Thin, low-density curls get weighed down by heavy layering, while thick, high-density curls often look underwhelmed unless you use enough product and work it through in sections.
Your porosity and density decide how much product you need and how heavy it should be, not the brand on the label.
Gather your tools
Products do half the work. Technique and tools do the rest. Have these on hand before wash day:

- A microfiber towel or an old cotton t-shirt to scrunch out water without roughing up the cuticle
- A wide-tooth comb or detangling brush for use only on soaked, conditioner-coated hair
- A spray bottle filled with water for refreshing curls and re-wetting sections mid-style
- Clips (duckbill or claw) to section hair while you apply product evenly
- A diffuser attachment for your blow dryer if you plan to speed-dry curls without disturbing the pattern
Skipping the microfiber towel is one of the most common mistakes. Regular bath towels have loops that snag the cuticle and cause frizz before you've even applied product.
Stock the basic product lineup
You don't need twenty products. You need one from each core category, chosen to match the porosity and density you identified above. Here's the minimum lineup and what each one is actually for:
| Product category | What it does | Best for |
|---|---|---|
| Curl-friendly shampoo | Cleanses scalp without stripping natural oils | All curl types, especially before deep conditioning |
| Rinse-out conditioner | Adds slip, softens strands, eases detangling | Every wash day, non-negotiable |
| Leave-in conditioner | Locks in moisture before styling products go on | Low to high porosity, adjust thickness accordingly |
| Curl cream or custard | Defines clumps and smooths the cuticle | Medium to high porosity, looser to medium curl patterns |
| Gel | Holds the curl pattern and controls frizz | Nearly everyone, especially high humidity climates |
Buy travel sizes first if you're testing a new line. It's cheaper to find out a curl cream is wrong for your hair with a two-ounce bottle than a family-size tub.
Set the right expectations
Once you know your porosity, density, and have your tools and products lined up, you're ready to move into the actual routine. Expect the first few wash days to feel like trial and error. Even with the right prep, you'll likely tweak product amounts and order over two or three washes before you land on what works. That's normal, and it's a lot faster than guessing blind, which is what most people do without ever checking porosity or density in the first place.
Step 1. Identify your curl type and hair needs
Before you reach for a single bottle, figure out which curl family you're actually working with. The curly hair typing system runs from 2A (barely-there waves) to 4C (tight, densely packed coils), and where you land changes almost every decision that follows, from how much water your hair needs to how heavy a cream it can handle. Skipping this step is why so many people end up styling curly hair with products meant for a completely different pattern than their own.
Match your pattern to a category
Grab a mirror, look at freshly washed, air-dried hair (not styled, not brushed out), and compare it to the ranges below. Most heads have two or three patterns mixed together, so identify the dominant one and the secondary one.
| Curl type | What it looks like | General product weight |
|---|---|---|
| 2A-2C | Loose S-waves to defined waves | Light, mousse or light gel |
| 3A-3B | Springy loose to tight ringlets | Medium, curl cream plus gel |
| 3C-4A | Tight corkscrews to springy coils | Medium to rich, cream-gel combo |
| 4B-4C | Z-pattern coils, less defined curl shape | Rich butters and creams, heavier gels |
The tighter your curl pattern, the more product weight it can handle without going flat.
This is the opposite of what most beginners assume. Looser waves get overwhelmed by heavy butters fast, while tight coils often look under-moisturized because people are scared to use
Step 2. Cleanse with a curl-friendly shampoo
Cleansing is where most curl routines go wrong before they even start. Regular shampoo is built to strip oil fast, which works fine for straight hair that gets oily at the roots but leaves curls parched and prone to frizz within hours. Curly hair styling products applied on top of a stripped scalp are fighting an uphill battle from the first step, so getting the wash right matters more than any cream or gel you'll use later.
Choose a sulfate-free formula
Look for a shampoo labeled sulfate-free, and check the ingredient list for sodium lauryl sulfate or sodium laureth sulfate, the two most common harsh detergents. These ingredients create the big lather people associate with "clean" hair, but that lather comes from stripping away the natural oils curls need to stay soft and defined. The American Academy of Dermatology notes that overly frequent or harsh cleansing can dry out hair and scalp, which is exactly what curly hair can least afford. A sulfate-free cleanser still removes product buildup and dirt, just without leaving your curls feeling like straw.
A sulfate-free shampoo cleans your scalp without stripping the moisture your curls depend on.
Wash less often, but wash well
Most curl types don't need daily washing. Two to three times a week is plenty for medium to high porosity curls, while low porosity or finer curls might stretch to once a week before oil buildup becomes a problem. Focus the shampoo on your scalp, where oil and product residue actually accumulate, and let the sudsy runoff clean the lengths as you rinse. Scrubbing shampoo through your ends the way you would with straight hair just roughs up the cuticle and invites frizz.
Apply with the right technique
How you physically wash matters almost as much as what's in the bottle. Follow this sequence on wash day:
- Section hair into two or four parts before wetting, so product reaches the scalp evenly
- Apply shampoo directly to the scalp in small dollops, not by rubbing a handful through the whole head
- Massage with fingertips in small circles, never nails, to avoid scalp irritation
- Let the lather run down the lengths naturally while rinsing, rather than re-lathering the ends
- Rinse with lukewarm to cool water, since hot water opens the cuticle more than curls can handle
Sectioning before you start keeps water and shampoo from just running down the surface of dry sections, which is a common reason people feel like they need more product than they actually do. Once the scalp is clean and the lengths have had their light rinse, you're ready to move into conditioning, which is where the real moisture work of the routine begins.
Step 3. Condition for moisture and slip
Conditioner does the heavy lifting that shampoo can't. It replaces the moisture and slip your curls need to survive detangling, styling, and a full day of movement without snapping or frizzing. Skipping a rich rinse-out conditioner or rushing through it is one of the fastest ways to undo the good work you just did at the sink, since dry curls tangle more, break more, and hold styling products worse.
Match the formula to the porosity you identified earlier. High porosity curls need conditioners with proteins and fatty alcohols that fill in gaps in the cuticle, while low porosity curls do better with lighter, humectant-based formulas that won't sit on top of the strand without absorbing. Curly hair styling products applied later can only work with what the conditioner leaves behind, so this step sets the baseline for everything that follows.
Conditioner isn't optional softness, it's the moisture reserve your curls draw from all day.
Detangle while the conditioner is still in
Detangling on dry or freshly rinsed hair causes more breakage than almost any other step in the routine. Do it while conditioner is still coating the strands, since the slip reduces friction and lets knots slide out instead of ripping through. Work through hair with this sequence:
- Apply a generous amount of conditioner and let it sit for two to three minutes
- Flip your head forward and finger-detangle from the ends up, never starting at the roots
- Follow with a wide-tooth comb only after fingers have cleared the major knots
- Section as you go so you're not re-detangling hair you already cleared
Working from the ends up matters more than most people realize. Starting at the roots pushes every tangle downward into one dense knot at the bottom, which takes far longer to clear and does real damage.
Consider a deep conditioner once a week
A weekly deep conditioning treatment goes further than a daily rinse-out, especially for high porosity or color-treated curls that lose moisture fast. Leave a deep conditioner or mask on for fifteen to twenty minutes, ideally with a plastic cap to trap heat and help the product penetrate the cuticle rather than sit on the surface.
Rinsing technique closes out this step and affects how the next products behave. Finish with cool water to help flatten the cuticle, and don't rinse conditioner out completely. Leaving a light film of slip in your hair, sometimes called "conditioner rinsing" instead of a full rinse, gives leave-in products something to grab onto instead of starting from a completely stripped surface.
Step 4. Apply a leave-in conditioner
A leave-in conditioner is the bridge between the moisture you just locked in and the styling products still to come. It seals in the slip from your rinse-out, adds another layer of hydration for high porosity or dry curls, and gives creams and gels something soft to grip instead of raw, thirsty strands. Skip it, and even the best curly hair styling products will sit on top of your hair instead of blending into it, which is exactly when clumps look pasty or crunchy instead of soft and defined.
Apply the leave-in to soaking wet hair, right after you've rinsed most of the conditioner but left that light film behind. Working on dripping hair matters because water helps distribute the product evenly and stretches the cuticle open just enough to let it absorb instead of coat. Squeeze out excess water first with your hands or a microfiber towel so you're not diluting the product, then apply section by section rather than dumping it on top of your whole head at once.
A leave-in works into wet hair, not on top of it, so timing matters as much as the product itself.
Choose the right texture for your porosity
Low porosity hair needs a lighter, water-based leave-in that won't sit on the surface and leave strands feeling greasy by hour two. High porosity hair can handle a creamier leave-in with added oils or butters, since the cuticle absorbs it fast and the extra richness actually gets used instead of wasted. If your leave-in feels heavy no matter how little you use, it's probably formulated for a porosity level below your own.
Apply it the right way
Use this sequence to get even coverage without overloading any one section:
- Divide soaking wet hair into four to six sections using clips
- Rake a dime to quarter-size amount through each section from mid-length to ends
- Smooth a small amount over the roots last, since scalp buildup happens faster than at the ends
- Finger-comb each section once to distribute evenly before moving to the next
Working section by section keeps you from over-applying to the crown while under-applying at the nape, which is one of the most common reasons curls look uneven from root to end. Fine or low-density hair should use a lighter hand throughout, since even a good leave-in turns limp if you use more than your density can support. Once every section is coated, you're ready to build on top of it with the products that actually shape and hold the curl.
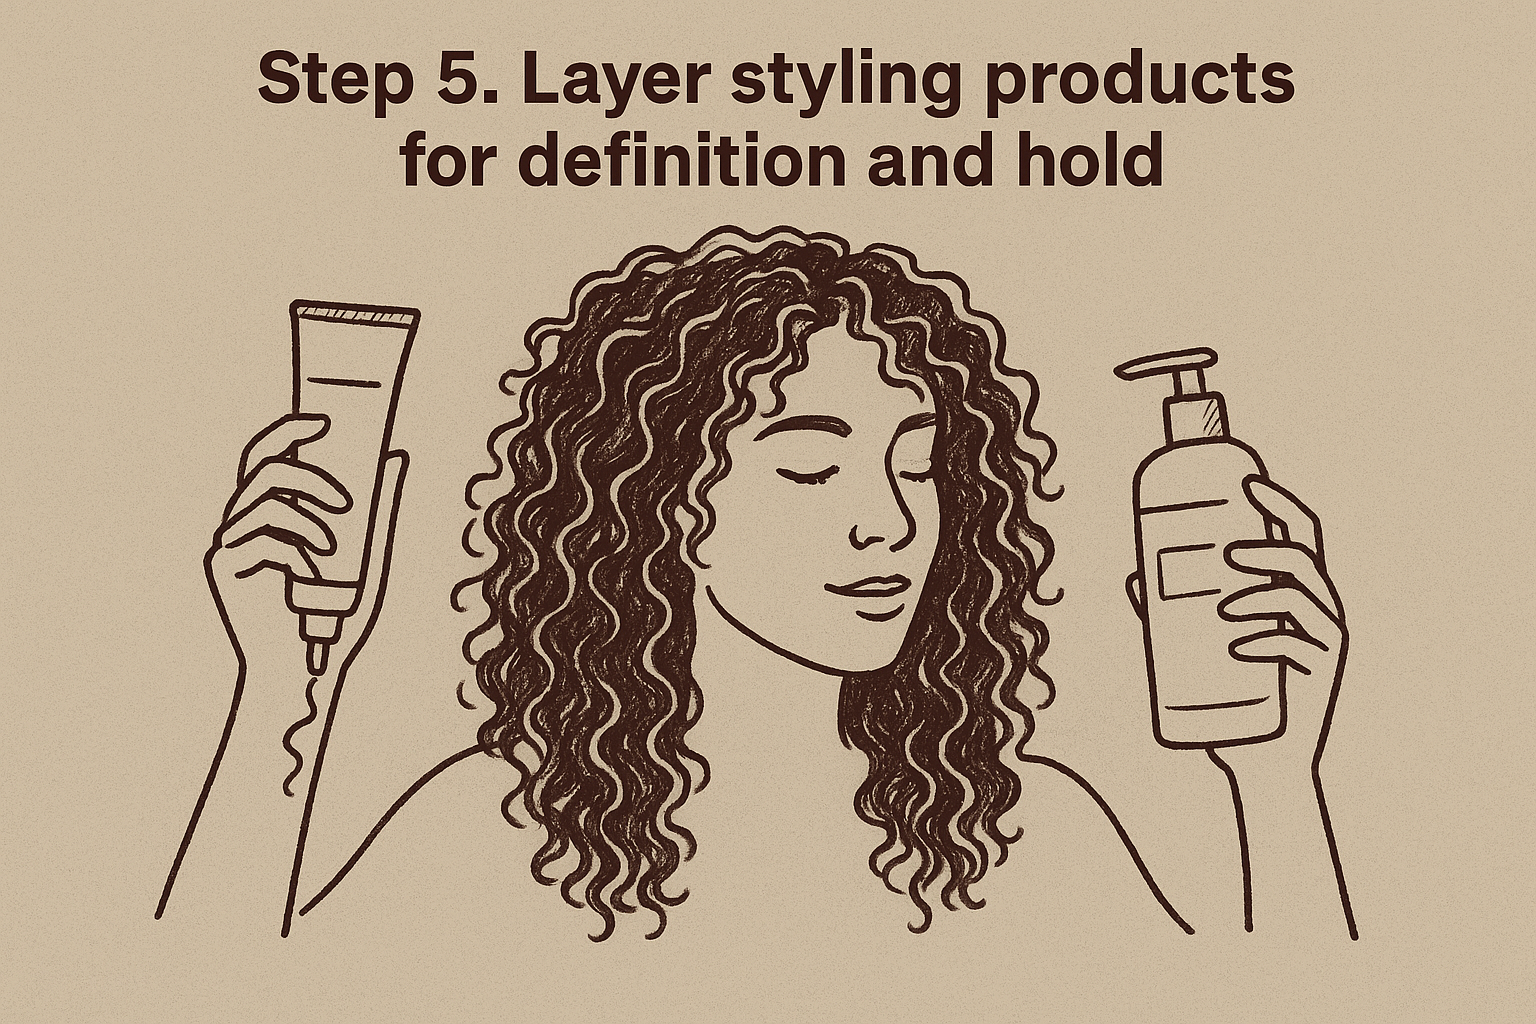
Step 5. Layer styling products for definition and hold
This is where your curl pattern actually takes shape. Curl cream and gel work together, not interchangeably, and the order you apply them in determines whether you get soft, bouncy definition or a stiff, crunchy cast that never softens up. Most people either skip one product entirely or pile both on at once, which is why clumps look muddy instead of separated. Layering with intention is the difference between styling curly hair with products that complement each other and products that just compete for space on the strand.
Pick the right order for your hair
Curl routines generally follow one of two sequences, and which one works better depends on your porosity from earlier in this guide.
| Method | Order | Best for |
|---|---|---|
| LOC | Leave-in, Oil, Cream | Low to medium porosity, drier climates |
| LCO | Leave-in, Cream, Oil | High porosity, hair that loses moisture fast |
Since you've already applied your leave-in in the last step, the only real decision left is whether an oil goes before or after your cream. Low porosity curls benefit from an oil first to seal the cuticle before the water-based cream goes on top. High porosity curls do better sealing with oil last, since the cream needs to absorb into a more open cuticle before anything locks it in.
Layering order matters as much as the products themselves, because the wrong sequence blocks absorption instead of building it.
Apply cream for definition
Work the cream through soaking wet, sectioned hair using a raking motion with your fingers, moving from roots to ends in one smooth pass per section. Raking distributes product evenly and starts encouraging strands to clump together into defined curls rather than separating into frizz. Follow the rake with a scrunching motion, cupping sections in your palm and pushing upward toward the scalp, which activates the curl pattern instead of just coating it.
Seal with gel for hold
Gel goes on last because its job is to lock the shape your cream just created, not to define on its own. Apply a small amount per section using the same rake-and-scrunch technique, and don't be afraid of a heavier hand if you have high density or looser waves that need extra hold to survive the day. The gel will feel stiff and crunchy once it dries, and that's expected. Scrunching out the cast once hair is fully dry breaks the stiffness apart and reveals the soft, defined curl underneath. If you want a lineup built specifically for this kind of layering, Scatter's upcoming styling products are designed around exactly this sequence, so definition and hold work with your curl instead of against it.
Step 6. Dry your curls the right way
How you dry your curls decides whether all that product layering actually holds or collapses into frizz within the hour. Wet curls are at their most fragile and most impressionable, meaning whatever shape they dry in is roughly the shape you're stuck with until the next wash. Curly hair styling products need time and the right drying method to set properly, so rushing this step or handling curls roughly undoes most of the work from steps four and five.
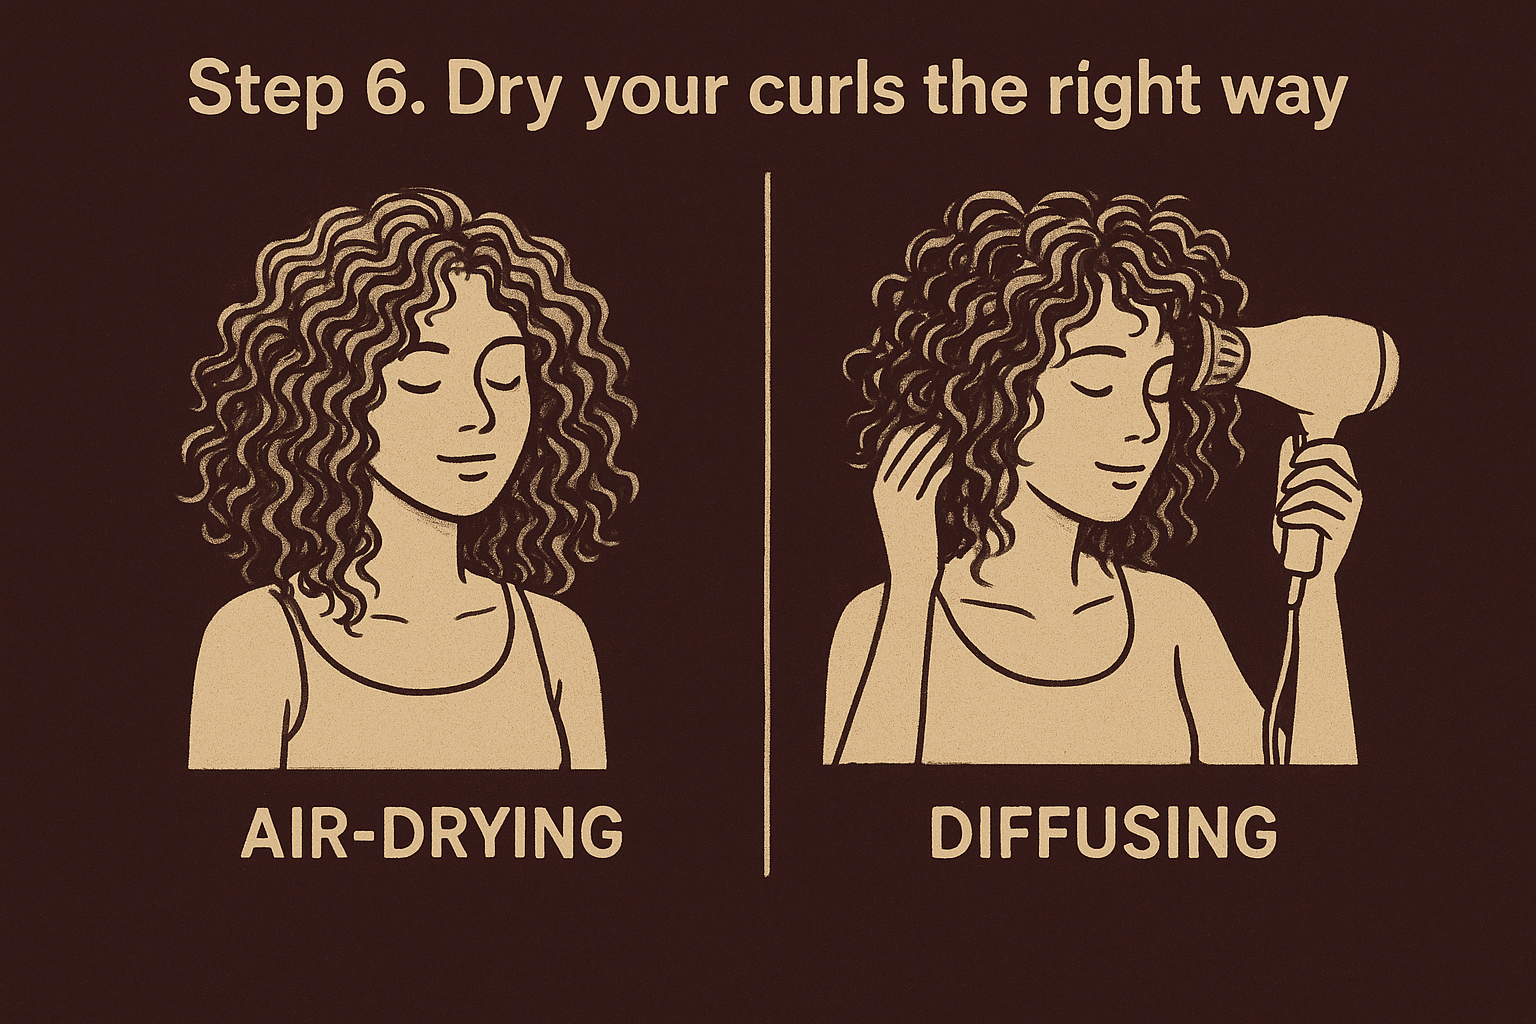
Choose air-drying or diffusing
Both methods work, but they suit different lifestyles and porosity levels. Air-drying is gentler and cheaper, while diffusing speeds things up and can add extra volume for finer or low-density curls that go limp waiting to dry naturally.
| Method | Time | Best for | Trade-off |
|---|---|---|---|
| Air-drying | 2-6 hours | Low porosity, thick curls, minimal heat exposure | Slower, cast may take longer to set |
| Diffusing | 15-25 minutes | Fine or low-density curls, time-limited routines | Requires heat management to avoid frizz |
The drying method matters less than leaving your curls alone once you've chosen one.
If you diffuse, keep the dryer on low or medium heat and cup sections in the diffuser bowl rather than moving it around constantly, which disturbs the clumps you just created. Hover close to the scalp first to dry roots and reduce shrinkage-driven frizz, then work down toward the ends.
Try plopping for extra definition
Plopping wraps freshly styled, dripping hair in a microfiber towel or cotton t-shirt to absorb excess water while curls set into their clumped shape. Lay the towel flat, flip your head forward so hair falls into the center, then wrap the sides up and secure it like a turban. Leave it on for ten to twenty minutes, longer for thicker or high-density hair that holds more water. Plopping works especially well right after step five, before any drying tool touches your hair, because it removes water weight without disturbing the cream and gel underneath.
Resist touching curls while they dry
Touching, scrunching, or repositioning curls mid-dry is the single fastest way to introduce frizz after all this careful layering. Curls need to reach what's called the "cast" stage, meaning the gel has fully hardened, before you can safely scrunch it out. Check by lightly pressing a section between two fingers; if it still feels tacky or damp, it needs more time. Once the cast is bone dry, scrunch upward from the ends toward the roots in short bursts to break the stiffness and release soft, separated curls. Skipping this final scrunch leaves hair looking crunchy all day, which is the most common complaint people have about gel that actually worked exactly as intended.
Step 7. Refresh your curls between wash days
Curls rarely look as good on day two as they did fresh out of the diffuser, but that doesn't mean you need a full wash to fix them. A curl refresh revives clumps that have loosened, smooths flyaways at the roots, and stretches the time between wash days without the frizz and dryness that come from just brushing dry curls back into shape. Refreshing well is part of what makes styling curly hair with products sustainable day to day instead of a routine you only manage right after the shower.
Revive with water and a light product
Start with your spray bottle, not the tap. Mist sections lightly until they're damp but not soaked, since resoaking dry hair too aggressively can strip the definition that's still holding on underneath the frizz. Work in the same order every time so you build muscle memory:
- Section hair the way you did on wash day, working in four to six parts
- Mist each section until damp, focusing on the roots where curls loosen first
- Rake in a small amount of leftover leave-in or a dedicated refresher spray
- Scrunch upward gently to reactivate any remaining cast
- Air-dry or diffuse on low heat for a few minutes to reset the clumps
A refresh should revive the curl you already styled, not restyle your hair from scratch.
Use less product than you think you need. Curls that already have some cream and gel on them from wash day only need a small top-up, and overloading them at this stage is what causes the greasy, weighed-down look people mistake for a bad hair day.
Protect curls overnight
What happens while you sleep matters as much as what happens in the morning. A silk or satin bonnet and pillowcase cut down on the friction that flattens curls and pulls moisture out of the cuticle overnight, unlike cotton, which absorbs both moisture and product. Gathering hair into a loose pineapple, a high, loose ponytail on top of the head, keeps curls from getting crushed against the pillow while still letting them fall into shape in the morning.
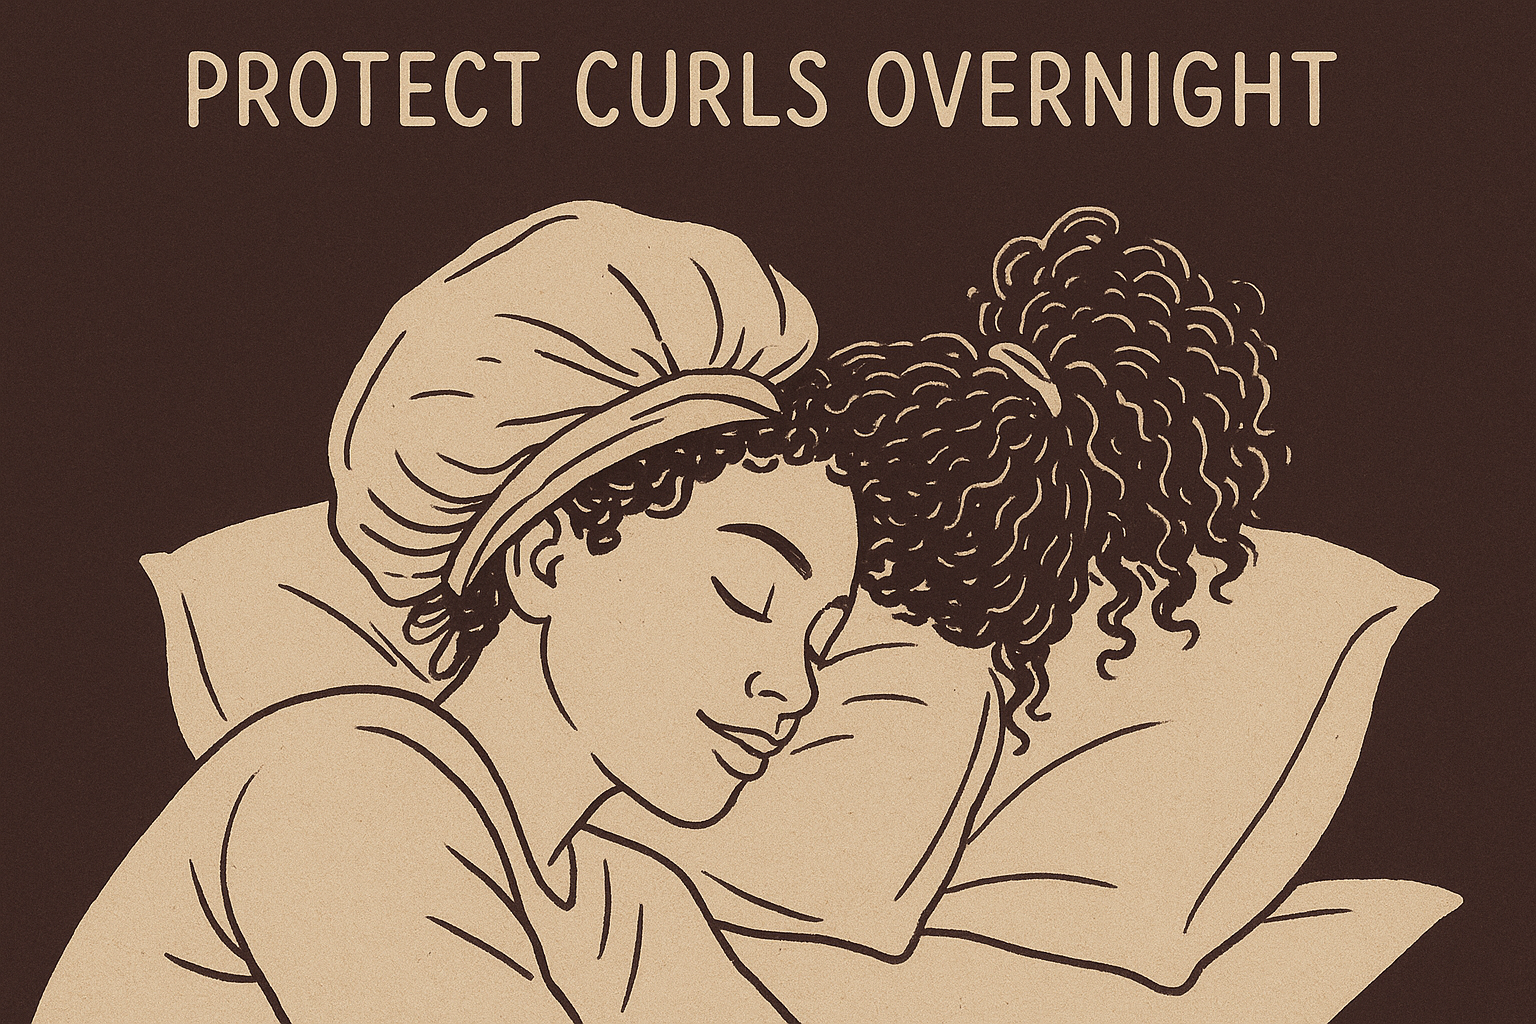
Finer or lower-density curls sometimes do better with several smaller pineapples around the head instead of one on top, since a single high ponytail can flatten the crown. Test both approaches over a week and see which one leaves you with less frizz to fix in the morning.
Know when to stop refreshing and just wash
Refreshing has a limit. Once product buildup makes curls feel coated rather than soft, or the scalp starts to feel itchy or oily, that's your cue to wash rather than mist again. Pushing a refresh past two or three days usually leaves you fighting buildup instead of frizz, and no amount of extra leave-in fixes that.
Tools and fixes for common curl problems
Even a solid routine runs into snags, and most curl problems trace back to one of a handful of causes. Knowing what's actually wrong saves you from throwing more product at an issue that a technique fix or a fifteen-dollar tool would solve faster. Here's a quick reference for the complaints that come up most when people are styling curly hair with products and something still isn't clicking.
Diagnose the problem first
Grab this table before you change anything about your product lineup. Most of these issues get fixed by adjusting one variable, not by rebuilding your whole routine.
| Problem | Likely cause | Fix |
|---|---|---|
| Frizz by midday | Cast broke too early, or towel-dried too roughly | Switch to a microfiber towel, extend diffuse time |
| Crunchy, stiff curls that never soften | Skipped the final scrunch-out | Scrunch upward once hair is bone dry, not damp |
| Flat roots, full ends | Product weight too heavy for density, or applied wrong at scalp | Use root clips while drying, lighten leave-in at crown |
| Greasy, weighed-down look | Overusing oil or cream for your porosity | Cut back to a dime-size amount, reassess porosity |
| Curls look separated, not clumped | Not enough product, or fingers used instead of raking | Rake product in sections, don't finger-comb through everything |
| Product buildup, dull curls | Skipping clarifying wash | Clarify every four to six weeks |
Most curl problems trace back to one variable, not a failed routine.
Fix flat roots without extra product
Root clips, sometimes called curl clips or root clamps, hold hair lifted at the scalp while it dries, which prevents the flattening that happens when wet hair rests against your head for hours. Clip small sections at the crown right after you finish styling, before any drying tool touches your hair, and leave them in until the cast has fully set. This works especially well for finer or lower-density curls that tend to look full at the ends but limp on top.
Clarify before buildup takes over
Gels and creams leave residue behind even when you're using the right amount, and that residue eventually blocks moisture from getting in. A clarifying shampoo once every four to six weeks strips that buildup without you needing to guess whether it's the leave-in or the gel causing dullness. Skip clarifying too long and you'll end up chasing frizz with more product, which only adds to the layer that's already sitting on your strands.
Keep a short troubleshooting kit on hand
A few extras solve most on-the-spot problems: a small spray bottle for spot-refreshing one flat section, a travel-size clarifying shampoo for buildup emergencies, and root clips for wash day. None of these replace your core lineup, but they catch the small failures before they turn into a full redo.
Making your curl routine stick
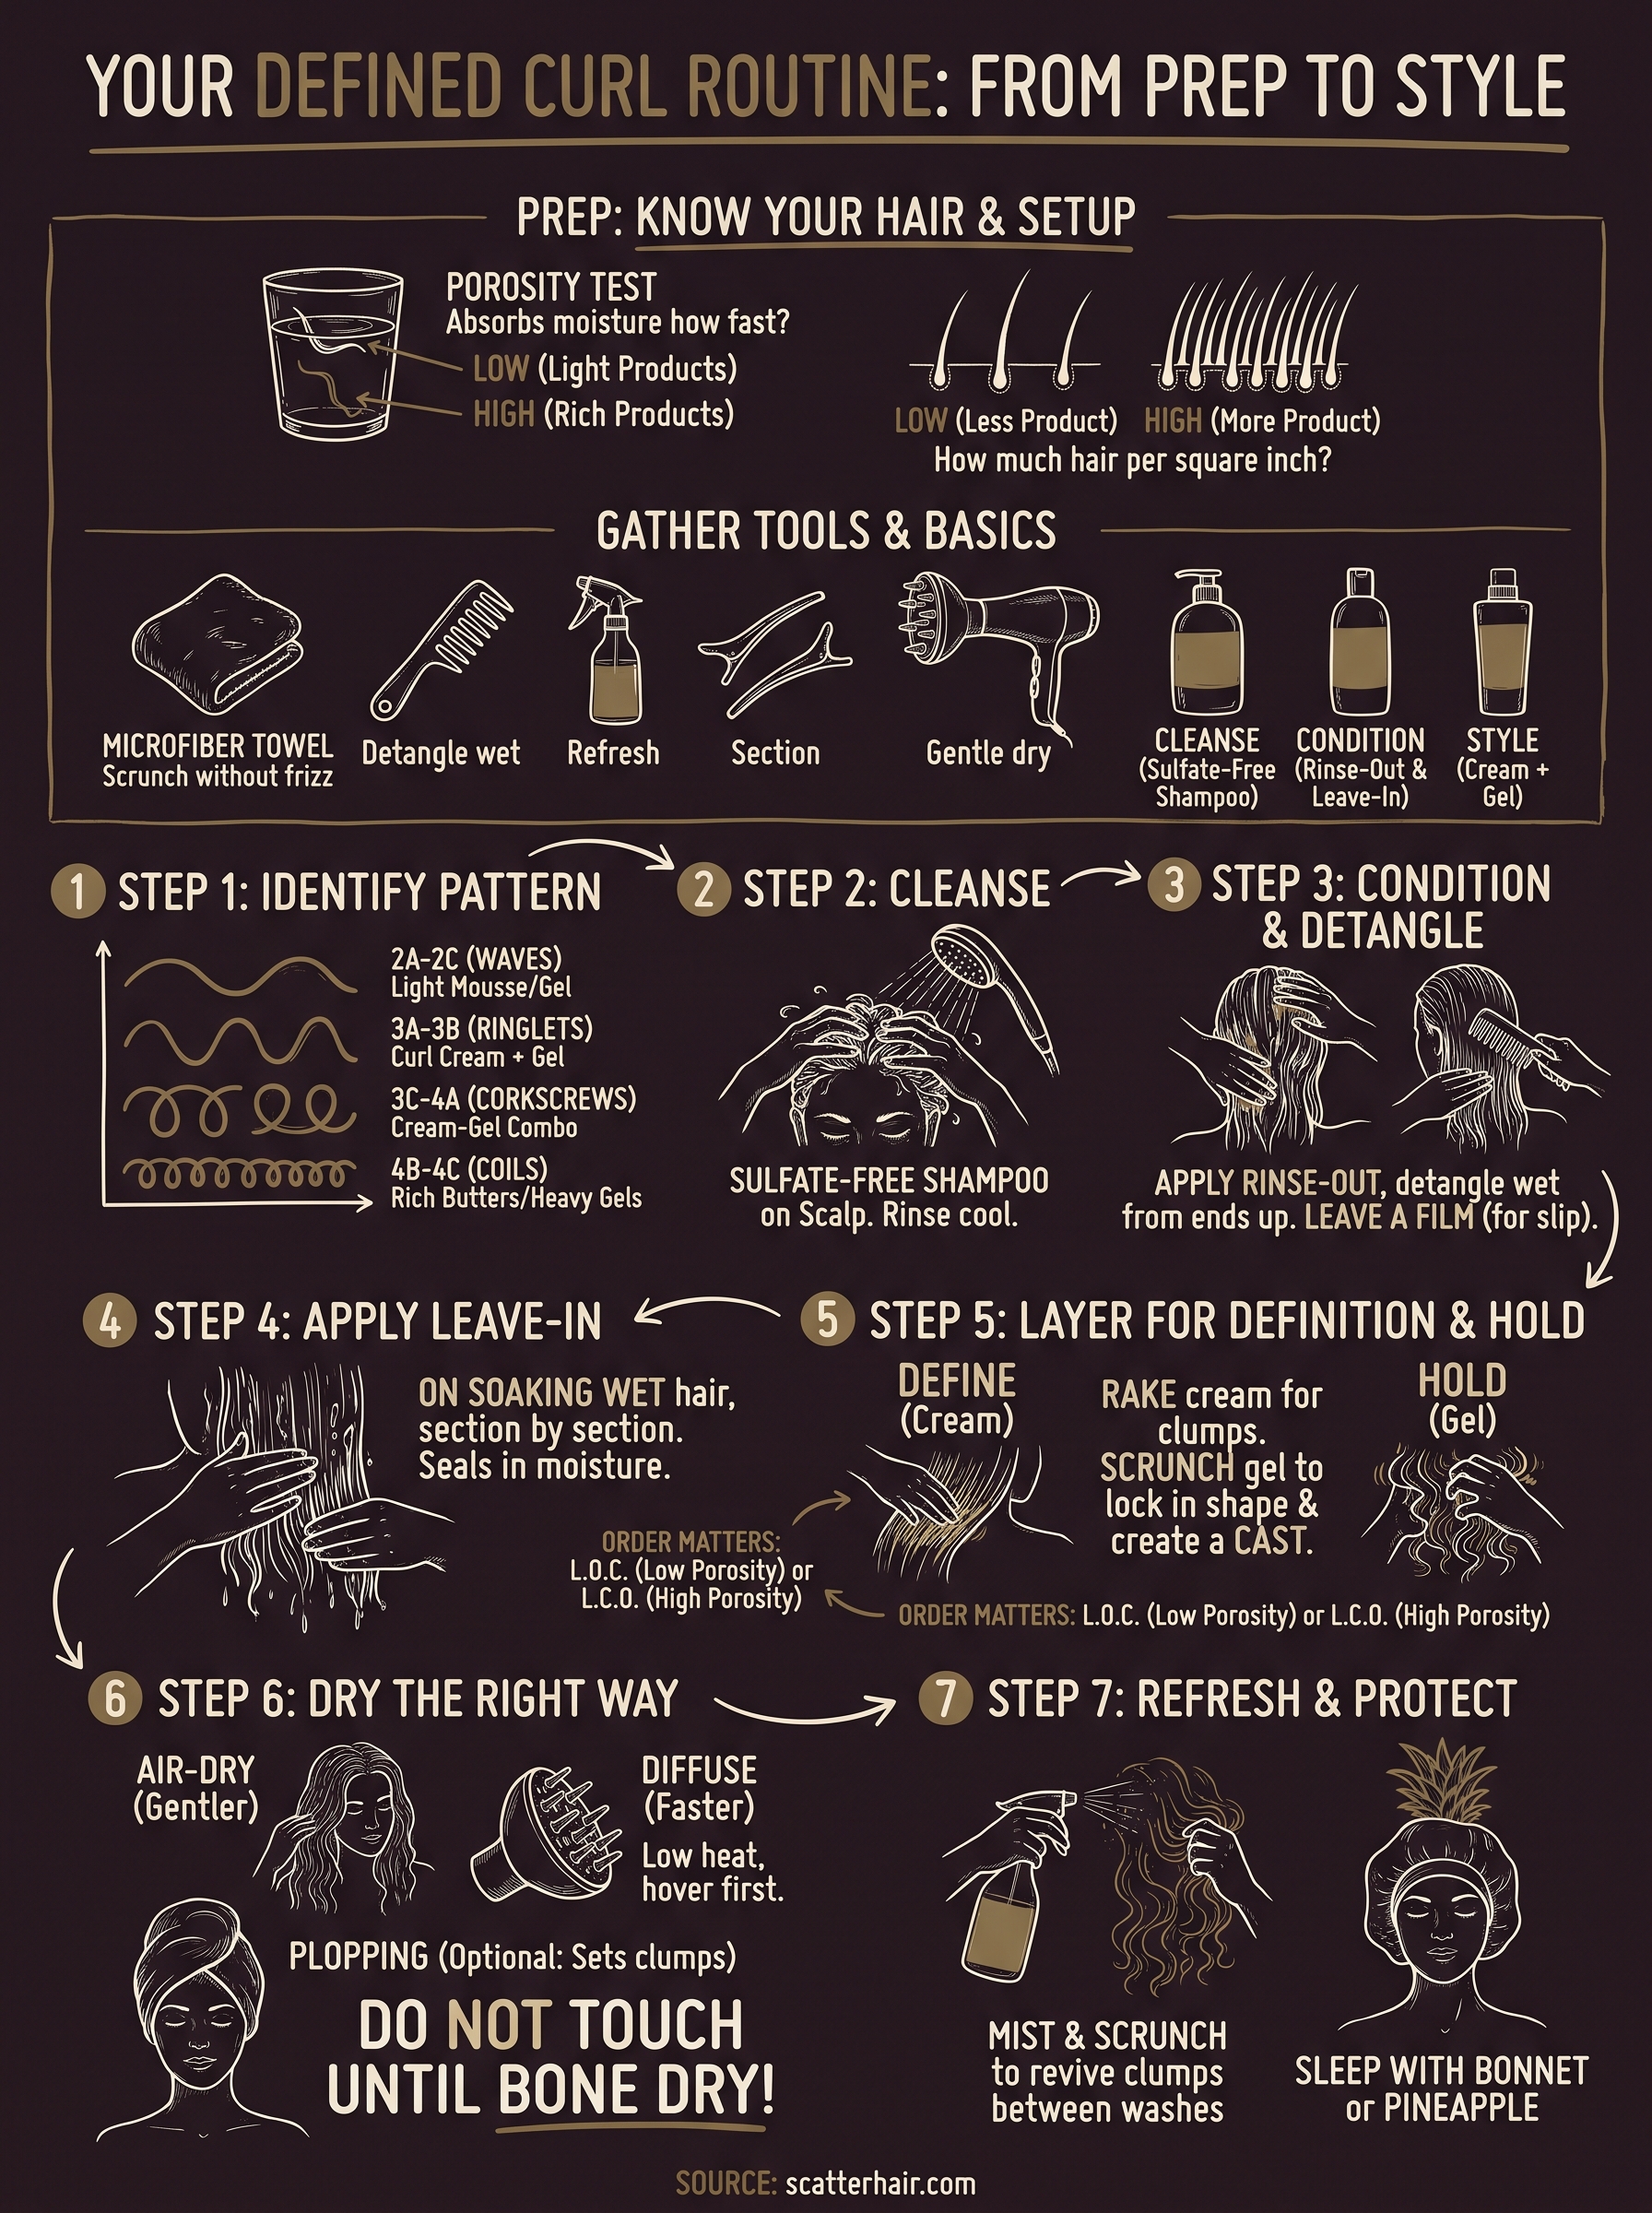
A good curl routine isn't about finding one miracle product. It's about matching porosity and density to the right formulas, then layering them in an order that actually works with your hair instead of against it. You've now got the full sequence, from cleansing through refreshing, plus the fixes for when something goes sideways mid-week. The only thing left is repetition. Your first few wash days will involve tweaking amounts and timing, and that's expected even with everything laid out here.
Stick with it past the trial-and-error phase, and styling curly hair with products stops feeling like a gamble every time you step out of the shower. If you're still hunting for a lineup built specifically for textured hair and this kind of layering, keep an eye on Scatter's upcoming styling products and sign up for early access before launch.