

How Much Heat Protectant to Use Without Weighing Hair Down
Too little heat protectant and you're basically frying your hair unprotected. Too much and your style falls flat under the weight of product buildup. Figuring out how much heat protectant to use is one of those details that sounds simple but trips up a lot of people, especially if you have textured hair that already demands more thought when it comes to styling.
Here at scatterhair, we're building styling products specifically for textured hair that actually perform without the guesswork. Getting the right amount of heat protectant down is a skill that matters now and will matter just as much when our line drops. Proper application keeps your hair shielded from damage while letting your style move and breathe the way it should, no crunch, no grease, no compromise.
This guide breaks down exact amounts based on your hair length, thickness, and texture, plus application techniques that give you full coverage without weighing anything down. Whether you're flat ironing, blow drying, or curling, you'll walk away knowing exactly how much product your hair actually needs.
What heat protectant does and why amount matters
Heat protectant creates a protective barrier between your hair and the heat source. When you apply it, the product coats the hair shaft and slows down the rate at which moisture escapes during styling. Without that barrier, direct heat from a flat iron or blow dryer strips water from the cortex rapidly, which leads to split ends, breakage, and a dull finish over time. The amount you use directly controls how effective that barrier actually is.
How heat protectant works on textured hair
Textured hair, whether coily, wavy, or curly, has a cuticle layer that raises and lowers more dramatically with moisture and heat changes than straight hair does. This makes the cuticle more exposed during heat styling, so protection is more critical with textured hair than with any other type. A well-applied heat protectant fills in the gaps along the cuticle, reducing friction from styling tools and slowing heat transfer to the cortex underneath.
The goal is full, even coverage across every strand, not just the surface layer you can see.
Most heat protectants use silicones, proteins, or film-forming polymers to build that barrier. Silicone-based formulas tend to add smoothness and shine. Protein-based ones reinforce the strand structure. Polymer formulas create a flexible film that moves with the hair. Each type distributes differently across the shaft, which is part of why knowing how much heat protectant to use depends on what formula you're working with.
Why too much and too little both cause real problems
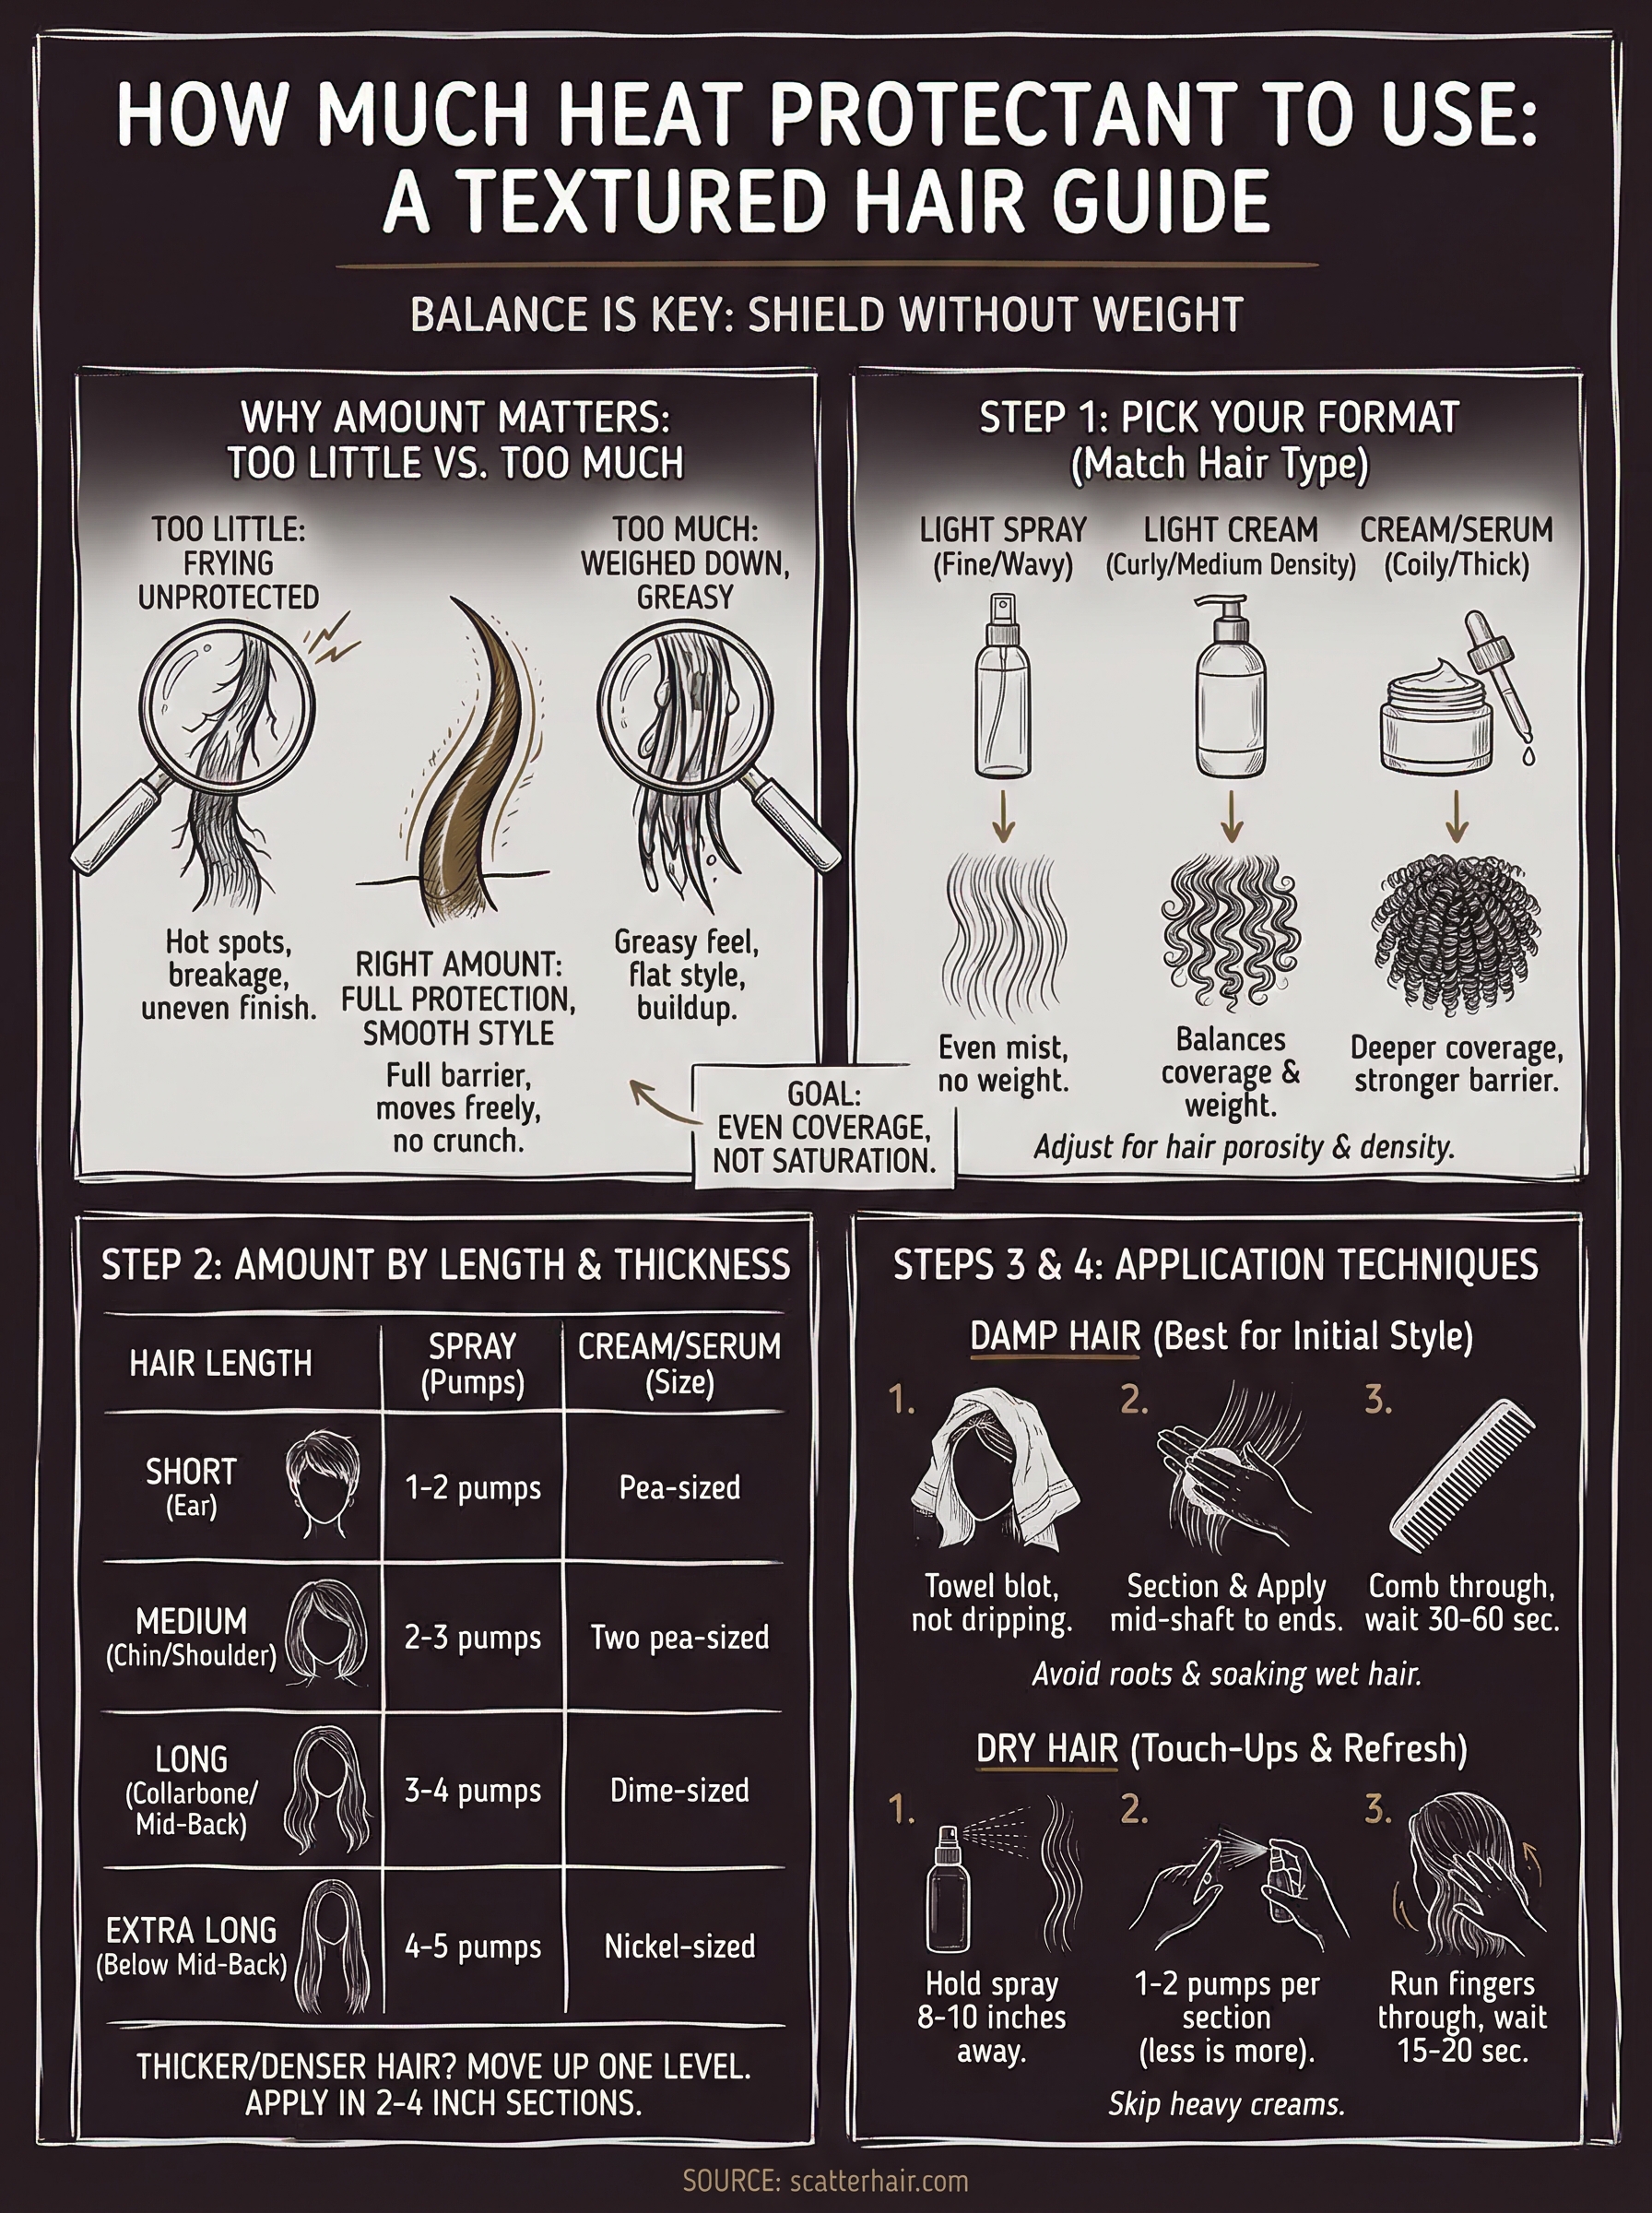
Using too little means uneven coverage, and the sections you missed are getting direct heat exposure every single time you style. Over time, those weak points show up as breakage, frizz that refuses to smooth out, and split ends that travel up the shaft. Using too much, on the other hand, saturates the hair with product, which makes it harder to style and leaves a greasy or stiff texture once heat hits it.
| Amount used | Common result |
|---|---|
| Too little | Hot spots, breakage, uneven finish |
| Right amount | Full protection, smooth style, no buildup |
| Too much | Greasy feel, weighed-down hair, product buildup |
Step 1. Pick the right heat protectant format
The format you choose directly affects how much heat protectant to use and how evenly it distributes across your hair. A spray spreads fast and light. A cream delivers more concentrated coverage. An oil or serum sits heavier on the strand. Before you think about quantity, match the format to your hair type so the product can actually do its job without overloading your strands.
Choosing the wrong format is the fastest way to either under-protect your hair or end up with product weighing everything down.
How to match format to your hair type
Textured hair varies widely, so no single format works for everyone. Fine or low-density curls absorb lightweight sprays well because the product disperses in a thin, even mist without adding excess weight. Thick, coily, or high-porosity hair usually needs a cream or serum because those strands require more product to reach full coverage, and they can handle the extra weight without going limp.
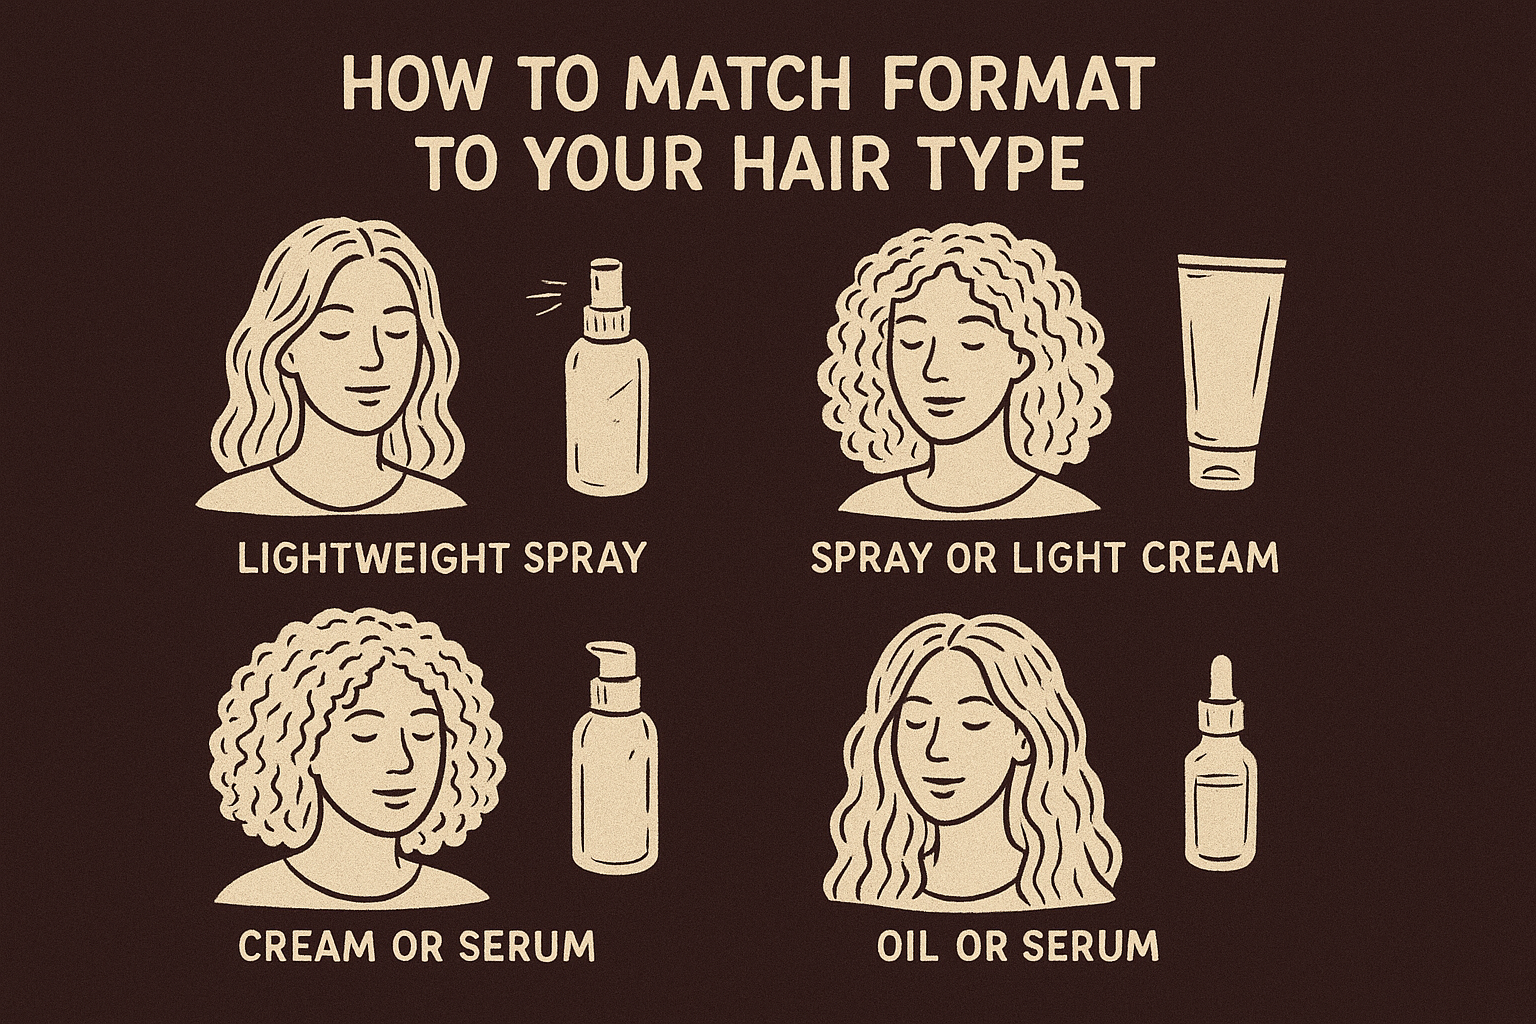
| Hair type | Best format | Why it works |
|---|---|---|
| Fine, wavy | Lightweight spray | Even mist, no weight added |
| Curly, medium density | Spray or light cream | Balances coverage and weight |
| Coily, thick, or high-porosity | Cream or serum | Deeper coverage, stronger barrier |
| Natural with extensions | Oil or serum | Coats both natural and added strands |
Pick your format based on how your hair actually responds to product, not just what the label suggests. Getting this right first means you need far less product overall to achieve complete coverage.
Step 2. Use the right amount for your hair length
Hair length is one of the most reliable reference points when figuring out how much heat protectant to use. The longer your hair, the more surface area needs coverage, and the more product you need to distribute evenly across every strand without overloading any single section.
Start with less than you think you need, then add a small amount to any sections that feel dry or uncoated after the first pass.
Amount guidelines by hair length
The numbers below give you a practical starting point. Your hair's thickness and density will push you toward the higher end of each range, while fine or low-density hair stays at the lower end. Apply in sections of two to four inches to get even distribution rather than concentrating all the product in one spot.
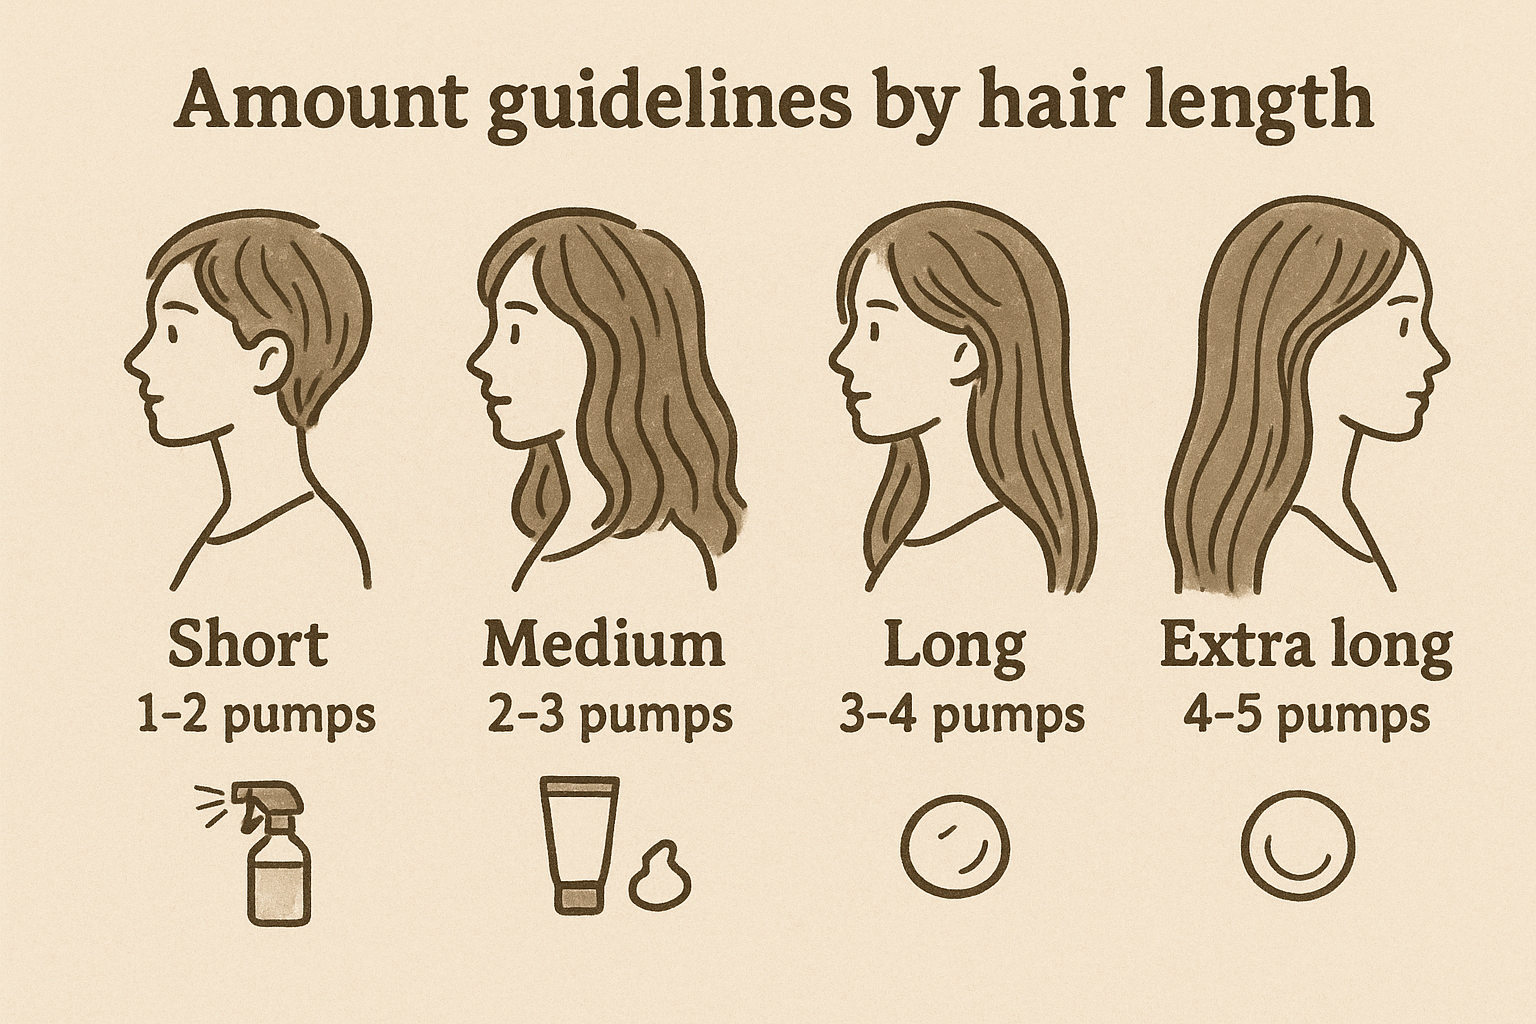
| Hair length | Spray | Cream or serum |
|---|---|---|
| Short (ear length or above) | 1-2 pumps | Pea-sized amount |
| Medium (chin to shoulder) | 2-3 pumps | Two pea-sized amounts |
| Long (collarbone to mid-back) | 3-4 pumps | Dime-sized amount |
| Extra long (below mid-back) | 4-5 pumps | Nickel-sized amount |
How to adjust for thickness and density
Length tells you where to start, but hair thickness and density shift how much product you actually need. If you have thick or coily strands packed tightly together, move up one level on the table above. Fine strands spread product faster and absorb less, so stay at the lower end of your length range to avoid buildup that leaves hair stiff or greasy after heat styling.
Step 3. Apply heat protectant on damp hair
Damp hair is the ideal starting point for heat protectant application because the product distributes more evenly across wet or slightly damp strands than it does on fully dry hair. The water already on the shaft helps the formula spread and penetrate before you even pick up a styling tool.
Apply heat protectant when your hair is about 70 to 80 percent dry, not dripping wet, for the best absorption and coverage.
How to apply on damp hair step by step
Knowing how much heat protectant to use on damp hair matters because moisture can mask how much product is actually sitting on each strand. Follow these steps to get even coverage without overloading your hair before the blow dryer touches it.
- Towel blot your hair until it stops dripping but still feels damp throughout.
- Divide your hair into two to four inch sections using clips.
- Apply your measured amount to each section, starting at mid-shaft and working toward the ends, then lightly pass through the roots.
- Comb or finger-detangle each section to spread the product evenly from root to tip.
- Wait 30 to 60 seconds before applying heat so the formula can absorb properly.
What to avoid when applying on damp hair
Applying heat protectant to soaking wet hair dilutes the formula and reduces how well it coats each strand. Piling product near the roots creates unnecessary buildup that makes hair feel heavy and greasy once you blow dry it, so keep your application focused on the mid-shaft and ends where heat damage tends to appear first.
Step 4. Apply heat protectant on dry hair and touch-ups
Not every styling session starts with freshly washed hair. When you're refreshing a style, touching up a section, or working on completely dry hair, you need a different approach to avoid buildup while still getting real protection. Knowing how much heat protectant to use on dry hair means using less than you would on damp hair, applied more precisely.
Less is more on dry hair. A small, targeted amount protects without weighing down a style that's already in place.
When dry application makes sense
You'll reach for heat protectant on dry hair when you're re-curling sections that have dropped, straightening a single piece, or refreshing a blowout. These situations call for a spray format because it disperses quickly and evenly without adding the weight that a cream or serum would on already-styled hair. Skip creams entirely here unless your hair is extremely thick or high-porosity.
How to apply for touch-ups step by step
Applying to dry hair requires a lighter hand and more targeted technique. Work section by section to keep product off areas that don't need it.
- Hold your spray 8 to 10 inches away from the section you're about to heat style.
- Use one pump per two-inch section for fine to medium hair, two pumps for thick or coily hair.
- Run your fingers through the section to distribute the product evenly before applying heat.
- Let the product sit for 15 to 20 seconds before touching it with any tool.
Keep your hair protected, not coated
Getting how much heat protectant to use right comes down to one principle: coverage, not saturation. You want every strand shielded, not every strand soaked. Pick the format that matches your hair type, measure based on your length and density, and apply in sections so no spot gets skipped or overloaded. Damp hair needs more product than dry hair, and touch-ups need a lighter hand than a full styling session from scratch.
Your hair should feel smooth and ready to style after applying heat protectant, not stiff, greasy, or weighed down. If it does, pull back on the amount next time and focus on more even distribution instead of more product. Small adjustments go a long way. At Scatter, we're building styling products that make this process easier for textured hair specifically, so sign up for early access and be the first to know when they drop.