

How to Brush Style Curly Hair for Volume, No Frizz
If you've ever grabbed a brush and watched your curls turn into a puffy, frizzy cloud, you already know the old rule: brushes and curls don't mix. But that rule only applies to dry hair and the wrong technique. How to brush style curly hair without wrecking your pattern comes down to timing, tools, and product, not avoiding the brush altogether.
Done right, brushing is actually one of the fastest ways to build volume at the root while keeping your curls defined instead of stretched out. The key is brushing wet or heavily conditioned hair, using a wide-tooth brush or detangler, and locking everything in place before it dries. Skip these steps and you're back to frizz and flat, shapeless curls by afternoon.
This guide walks through the exact process, from the products that set your foundation to the brushing motion that lifts roots without disturbing curl clumps, plus the drying method that keeps everything intact. You'll also see where most people go wrong and how to fix it, so your next wash day actually gives you the texture you're after.
What you need before you start brush styling
Gather your tools before you ever step into the shower, because brush styling curly hair only works if you can move fast while hair is still soaked and coated in product. Digging through a cabinet mid-wash-day, when your curls are already starting to dry, is how frizz creeps in. Set everything out on the counter first: brush, clips, and every product you plan to use, in the order you'll reach for them.
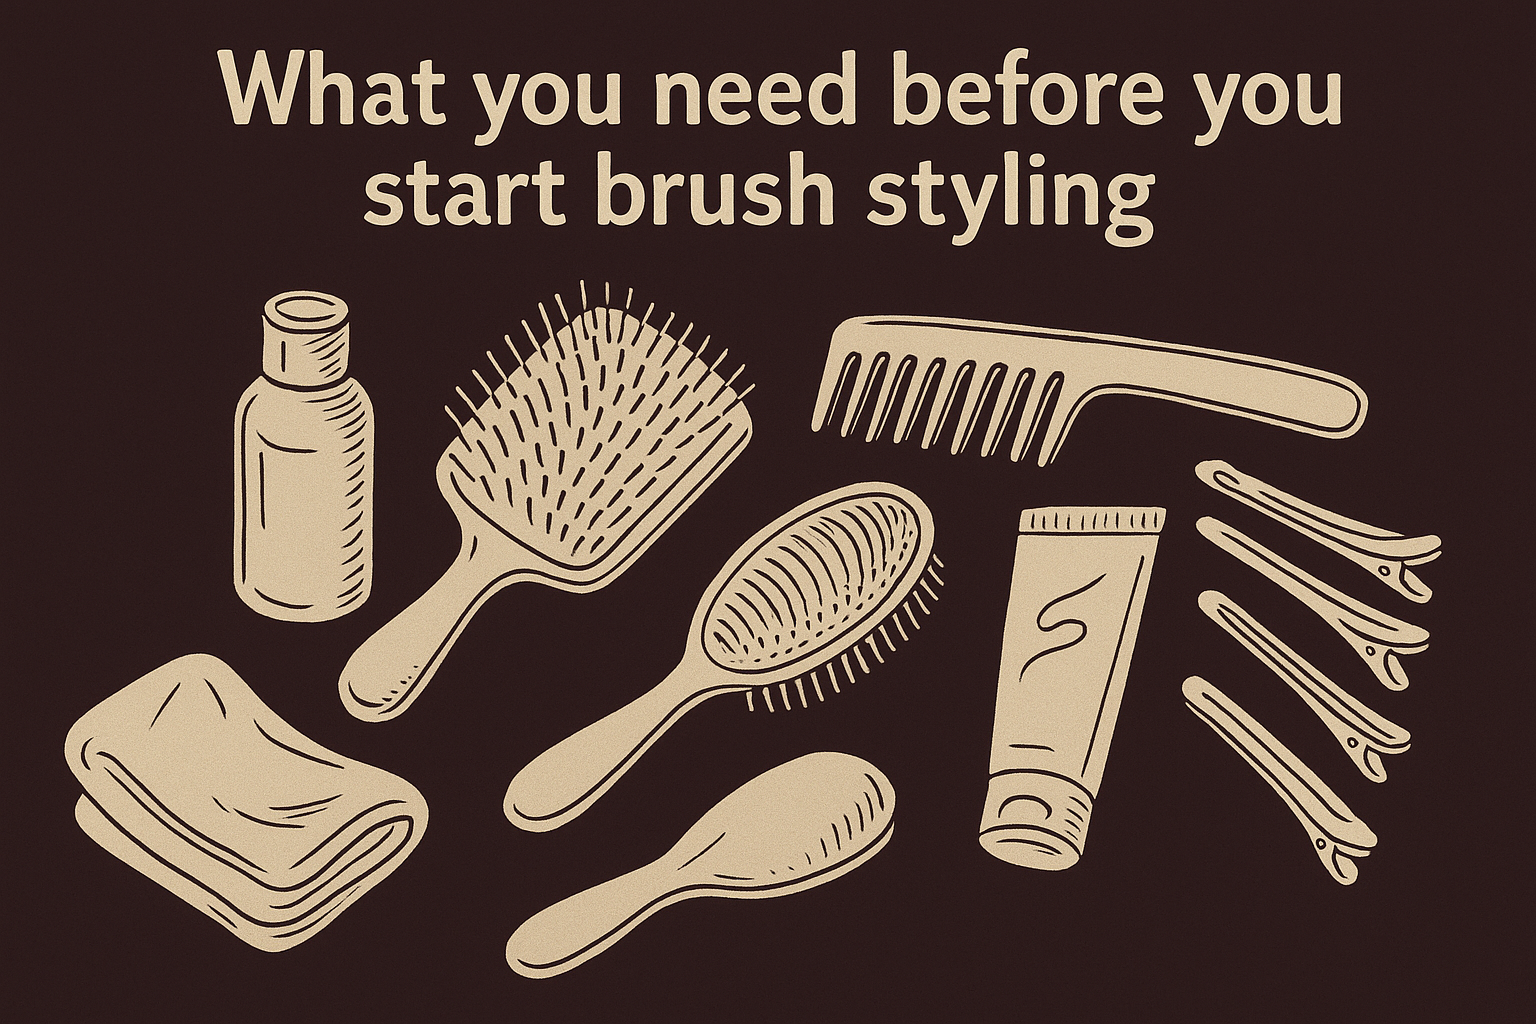
Your brush choice matters more than any other decision in this process. A Denman-style paddle brush with widely spaced, flexible nylon bristles is the standard for curl brushing because it separates hair without ripping through clumps. Skip anything with fine-tooth bristles or a boar bristle brush meant for straight hair. Those tear curl clumps apart and leave you with frizz instead of definition.
| Tool | Best for | Avoid if |
|---|---|---|
| Denman-style paddle brush | Root lift, clumping, even distribution | You have very fine, low-density curls |
| Wide-tooth comb | Initial detangling on soaking wet hair | You want tight, defined ringlets |
| Wet brush / detangler | Sensitive scalps, kids' hair | You're going for max volume |
The right brush on wet hair builds volume; the wrong brush on dry hair builds frizz.
Products come next, and this is where most people skimp. You need a slip-heavy leave-in conditioner to protect strands from the friction of brushing, plus a curl cream or gel with enough hold to keep the pattern you create. Thin, watery leave-ins won't cut it here. Look for something with slip you can actually feel between your fingers.
Round out your kit with four or five sectioning clips, a microfiber towel or cotton t-shirt for plopping, and a diffuser attachment if your dryer doesn't already have one. Sectioning clips keep density even as you work through the head, which matters more than people expect once you get to the brushing step. None of this needs to be expensive. It just needs to be the right category of tool, used at the right moment, on hair that's still wet enough to move.
Step 1. Prep damp hair with a leave-in and styler
Start in the shower, not after it. Squeeze out excess water so hair is soaking wet, not dripping, then apply your leave-in conditioner in sections from root to tip. This is the moment that determines whether brushing helps or hurts. Hair that's too dry grips the brush and frizzes; hair that's properly saturated lets the bristles glide through without pulling curl clumps apart.
Apply product in this order for the best curl definition without frizz:
- Leave-in conditioner, worked through with fingers first to detangle the worst knots
- A lightweight curl cream for moisture and slip
- A gel or mousse with medium-to-strong hold, applied on top
Each layer should go on before the previous one dries. Waiting too long between products means you're brushing partially dry hair, which is exactly what causes puffiness.
Brushing works because of the water and product underneath it, not the brush itself.
Don't rush the leave-in step to save time. A thin layer won't survive the friction of brushing, and you'll feel the difference immediately, hair that tugs and squeaks instead of gliding smoothly. If your curls tend to dry fast, work in smaller sections so the front of your head isn't half-dry by the time you reach the back. This is also the point to add any heat protectant if you plan to diffuse later, since it needs to be underneath the styler, not layered on top after everything else has set.
Step 2. Section your hair by density
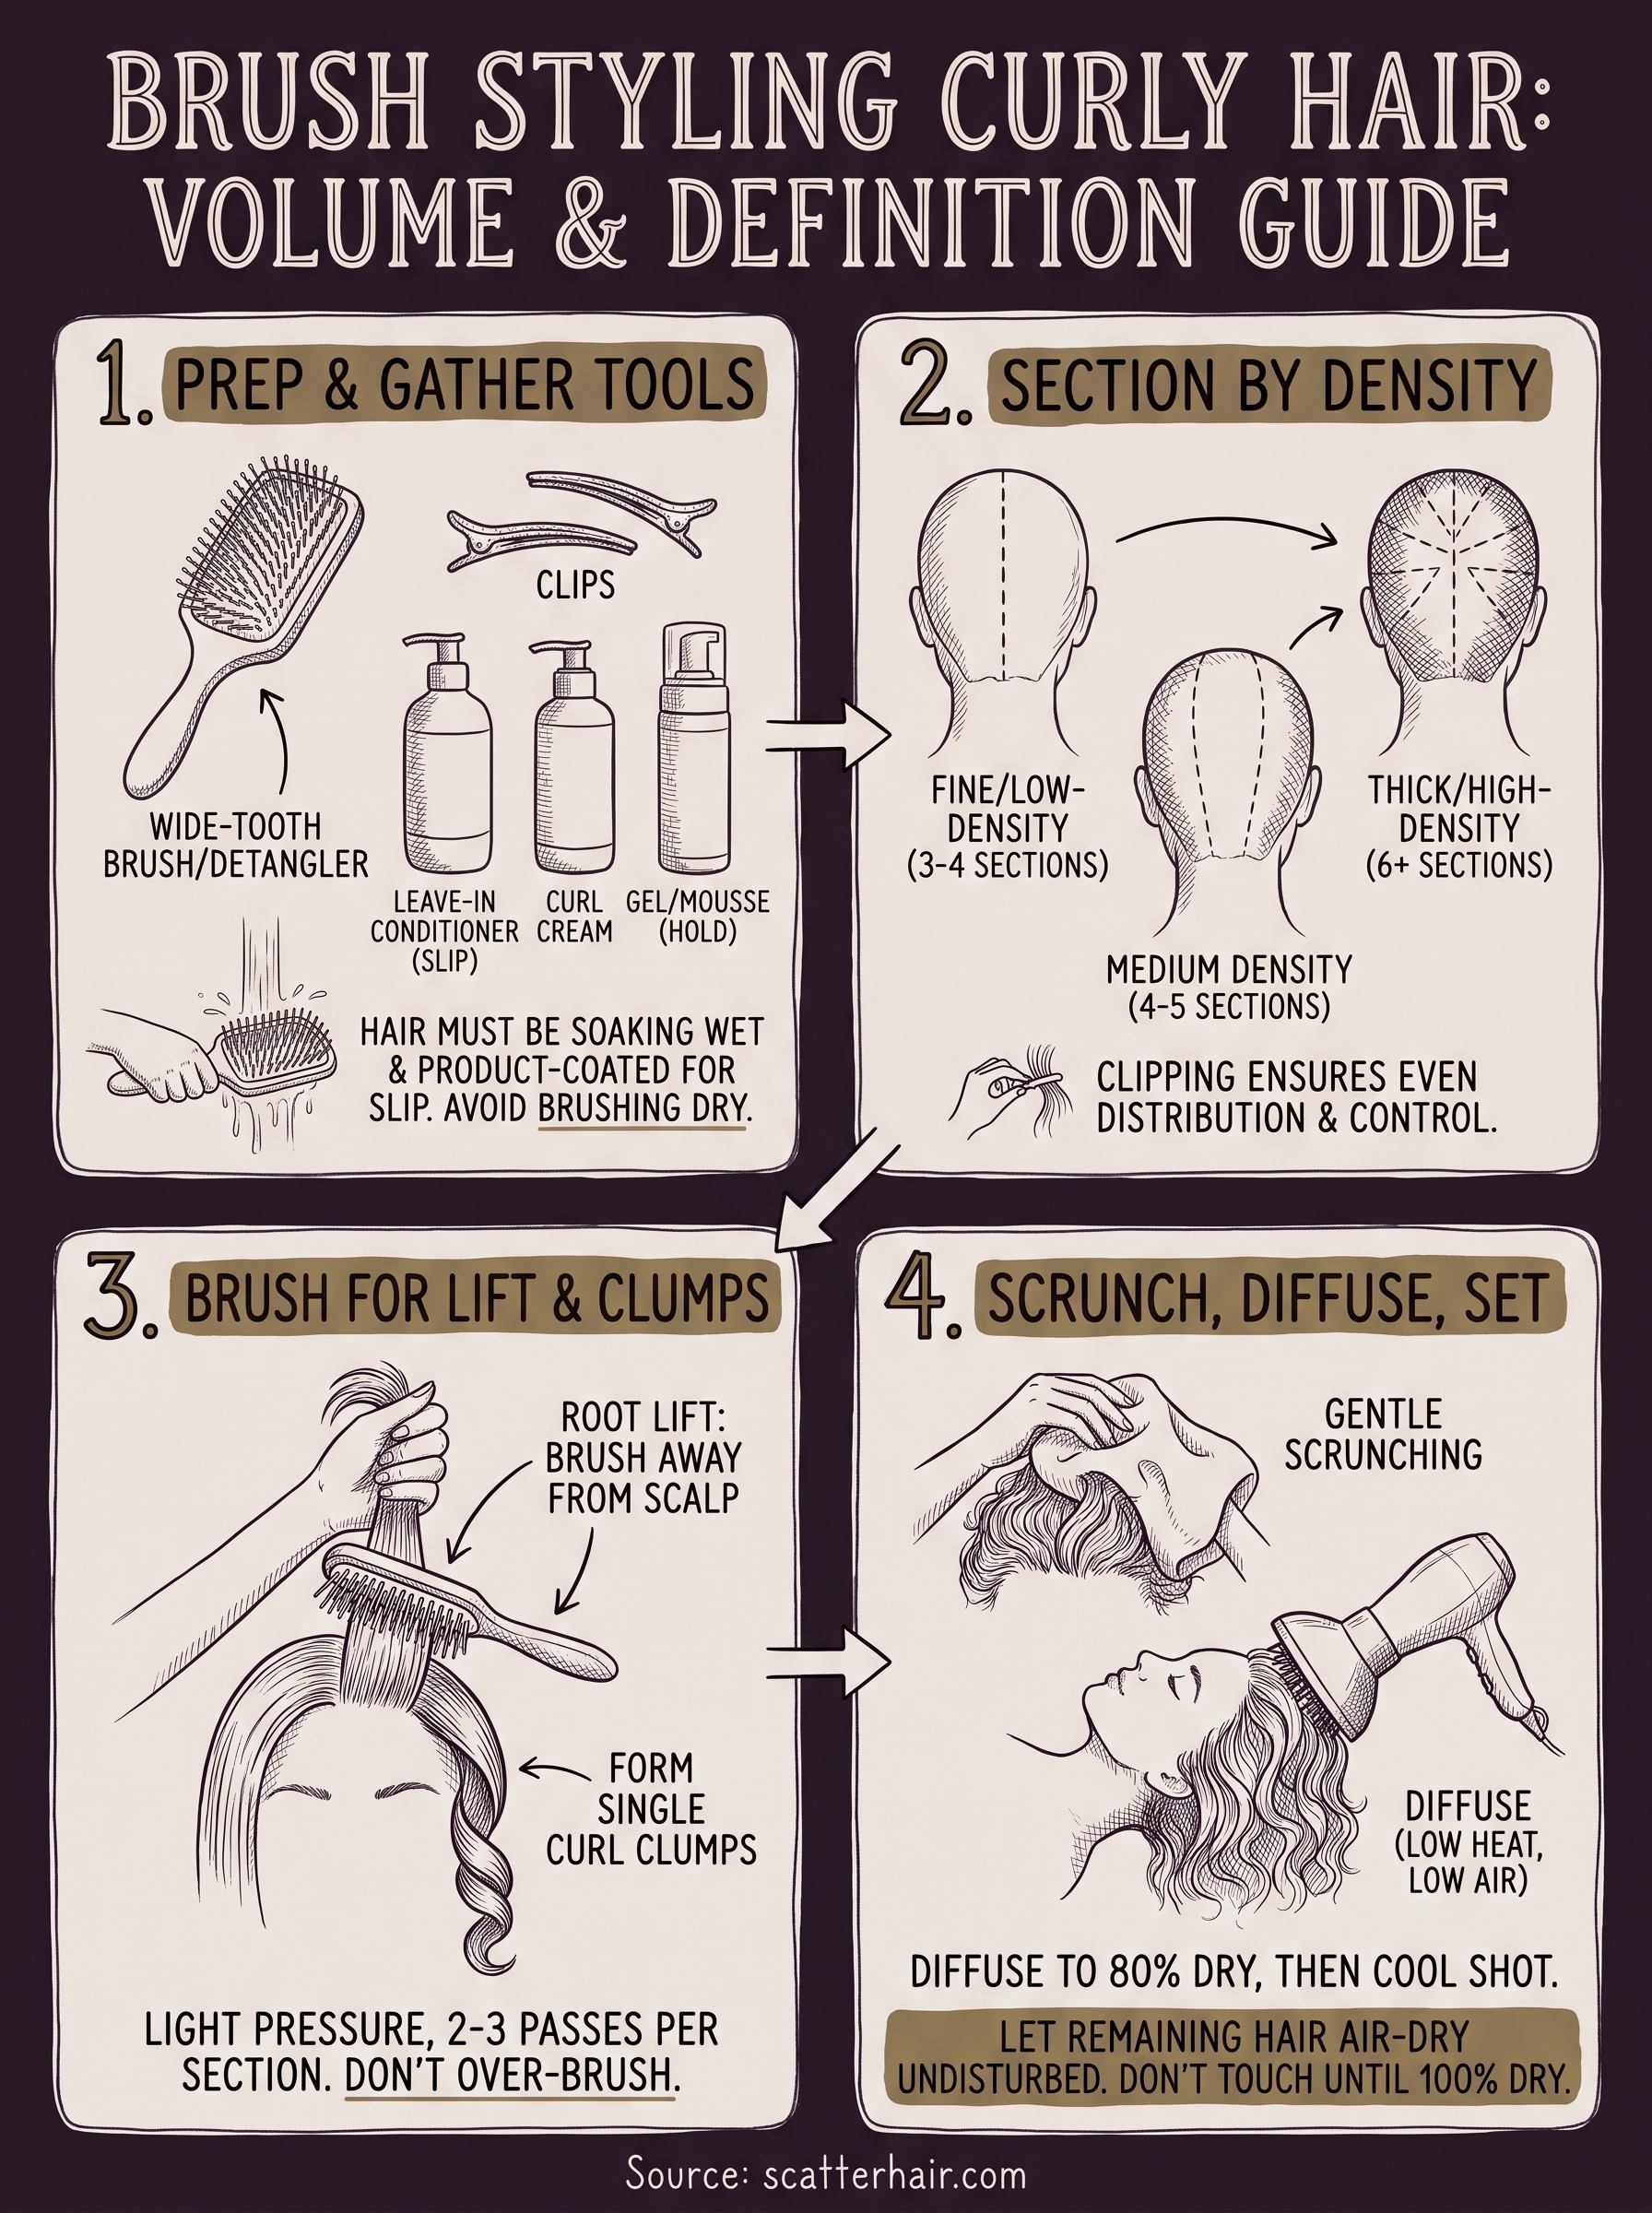
Grab your clips now, because sectioning by density is what keeps every part of your head getting the same amount of brush attention. Thick, dense curls need more sections than fine or low-density hair, otherwise you'll be dragging a brush through a huge chunk of soaking wet hair and losing product coverage before you even start. Split hair into four to six sections depending on how much you have: two in the front, two in the crown, and one or two in the back.
Use this as a starting point and adjust based on your own head:
- Fine, low-density hair: 3 to 4 sections
- Medium density: 4 to 5 sections
- Thick, high-density curls: 6 or more sections
Clip each section up and out of the way as you finish applying product, working from the back of your head to the front. This order matters because the back dries slower under your hair's own weight, so it can wait while you handle the pieces most exposed to air.
More sections mean more control, and control is what keeps volume even instead of lopsided.
Keep sections roughly the same size across your head. Uneven sections mean uneven brushing pressure, and that shows up later as flat spots or over-brushed frizzy patches. If you're working with thick curly hair, don't be tempted to rush this step by grouping big chunks together. Smaller sections take longer to clip but pay off with more consistent root lift once you actually pick up the brush.
Step 3. Brush each section for volume and definition
Unclip one section at a time, starting at the back, and keep the rest pinned up so you're not tempted to rush through wet hair. Take your Denman-style brush and stroke from root to tip in one smooth motion, following the natural direction your curls fall. This is where brush styling curly hair actually happens: the bristles lift the root while gathering loose strands into a single, defined clump instead of scattering them into frizz.
The motion that builds root lift
Hold the section straight up and away from your scalp, then brush downward with light tension. Don't drag the brush flat against your head. Angling the section up creates the root volume you're after, while brushing straight down flattens it before you've even started drying.
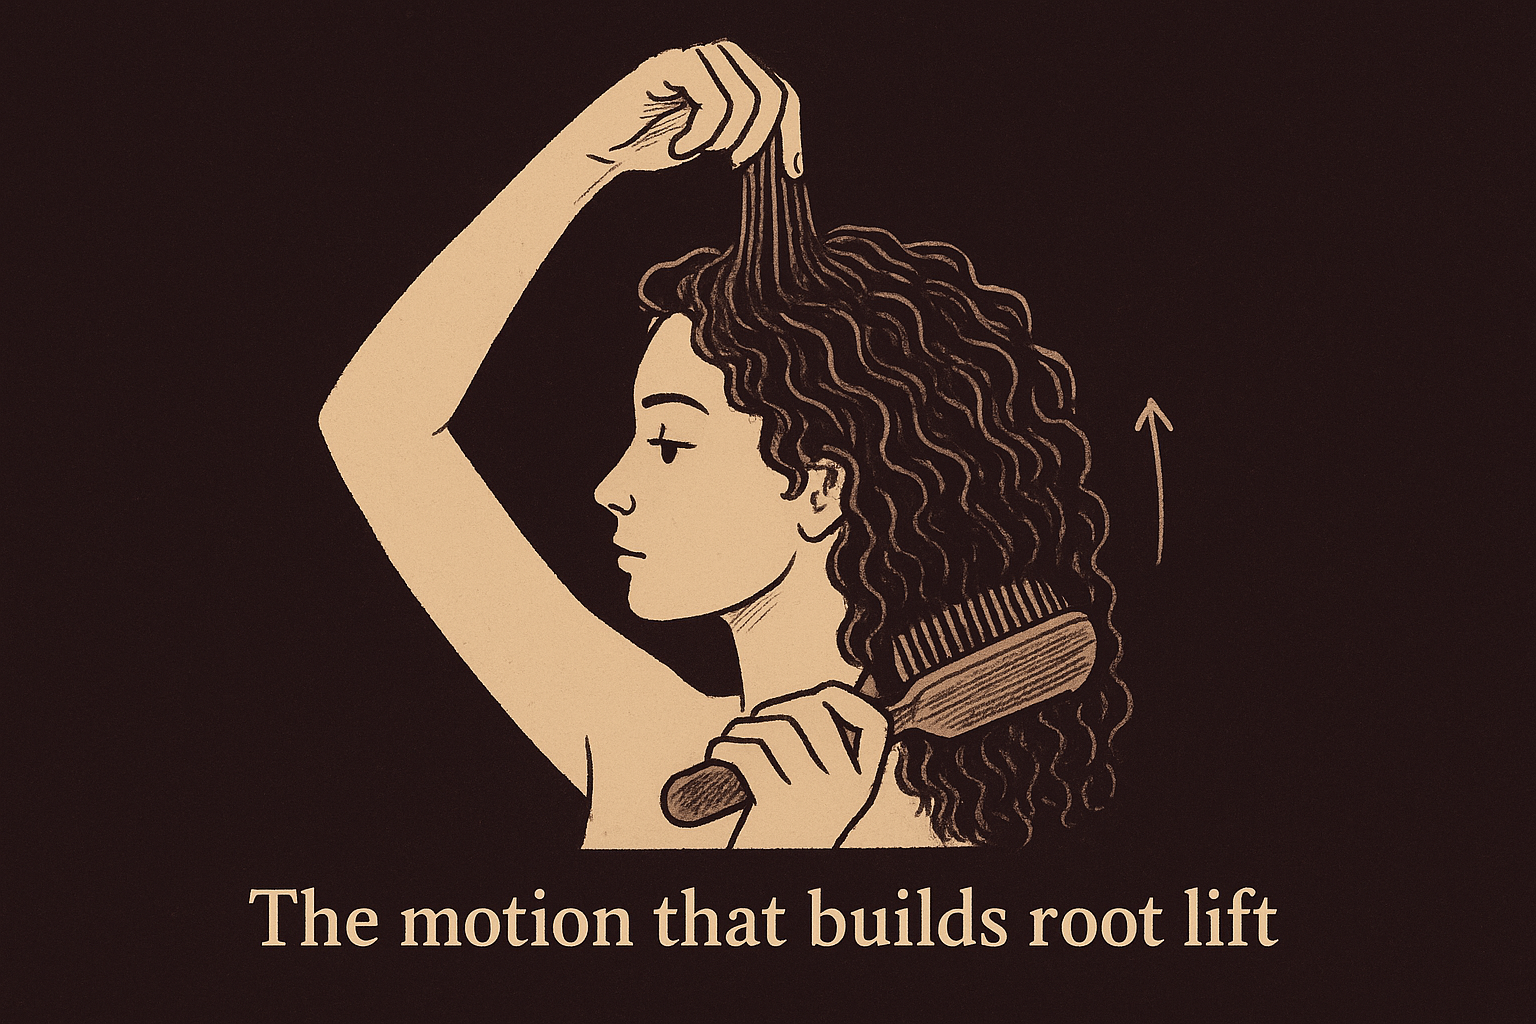
Root lift comes from the angle you brush at, not the pressure you use.
How much pressure actually helps
Use light, even pressure, two or three passes per section is enough. Over-brushing the same clump breaks it into smaller pieces, and smaller pieces mean more surface area for frizz once your hair dries. Watch for a single, cohesive rope of curl forming under the bristles as you brush; that's your curl clump taking shape.
Move through each section in the same order you clipped it, back to front, so nothing sits exposed to air longer than the rest. Once every section is brushed, you should have five or six thick, rope-like clumps instead of one giant tangled mass. That's the shape you'll carry into the drying step next.
Step 4. Scrunch, diffuse, and set your curls
Once every section is brushed into a rope-like clump, resist the urge to touch your hair again until it's dry. This is where a lot of people undo the work from Step 3 by scrunching too aggressively or running fingers back through the clumps. Scrunching curly hair should be gentle, an upward press with a microfiber towel or cotton t-shirt to remove excess water without breaking apart the shape you just brushed in.
Diffusing without disturbing your clumps
Attach the diffuser and flip your head upside down, cupping sections into the bowl of the diffuser rather than moving the dryer around your head. Use low heat and low airflow for the first pass, since high heat too early causes the outer layer to dry before the root does, which locks in puffiness instead of lift.
- Diffuse on low heat until hair is 70 to 80 percent dry
- Switch to cool shot for the final stretch to seal the cuticle
- Lift sections at the root with your palm, don't rake through with fingers
Frizz shows up when hair dries unevenly, not because you used a diffuser.
Letting curls finish drying undisturbed
Hair that's still slightly damp needs to air dry the rest of the way without any handling. Touching curly hair while it's between 80 and 100 percent dry is the single most common cause of frizz after an otherwise perfect brush-styling session. Give it 20 to 30 minutes untouched, then check your clumps. If they've held their rope-like shape, you've locked in the volume and definition from the brushing step.
Making brush styling part of your routine
Getting this right the first time won't happen. Your curl pattern, density, and porosity all shift how much product and pressure you need, so expect to tweak the process for a wash or two before it clicks. Once it does, brush styling curly hair stops being a special-occasion technique and turns into a five-minute habit built into your normal wash day.
Track what works as you go: how wet your hair was when you brushed, how many sections you used, how long the diffuser ran. Small notes like these turn guesswork into a repeatable routine that gives you the same volume and definition every single time, not just when the stars align.
The right products make this process faster and more forgiving, which is exactly what we're building at Scatter. If you want early access to styling products made for textured hair, join the Scatter waitlist before launch.