

How to Plop Curly Hair: T-Shirt vs Towel, Steps, and Timing
You wash your curls, add your favorite products, and then... towel dry. Frizz city. Or you air dry and wait forever while your hair stays damp and loses definition. Regular towels rough up your curl pattern and terry cloth creates friction that leads to frizz and breakage.
Enter plopping. This technique uses a cotton tee or microfiber towel to wrap your wet curls in a way that encourages curl formation while absorbing excess water. No rubbing, no friction, just gentle drying that keeps your curls intact.
This guide walks you through exactly how to plop your hair, from choosing between a cotton tee and towel to getting the timing right. You'll learn the full process, overnight options, and how to make plopping work for your specific curl type.
What hair plopping is and why it works
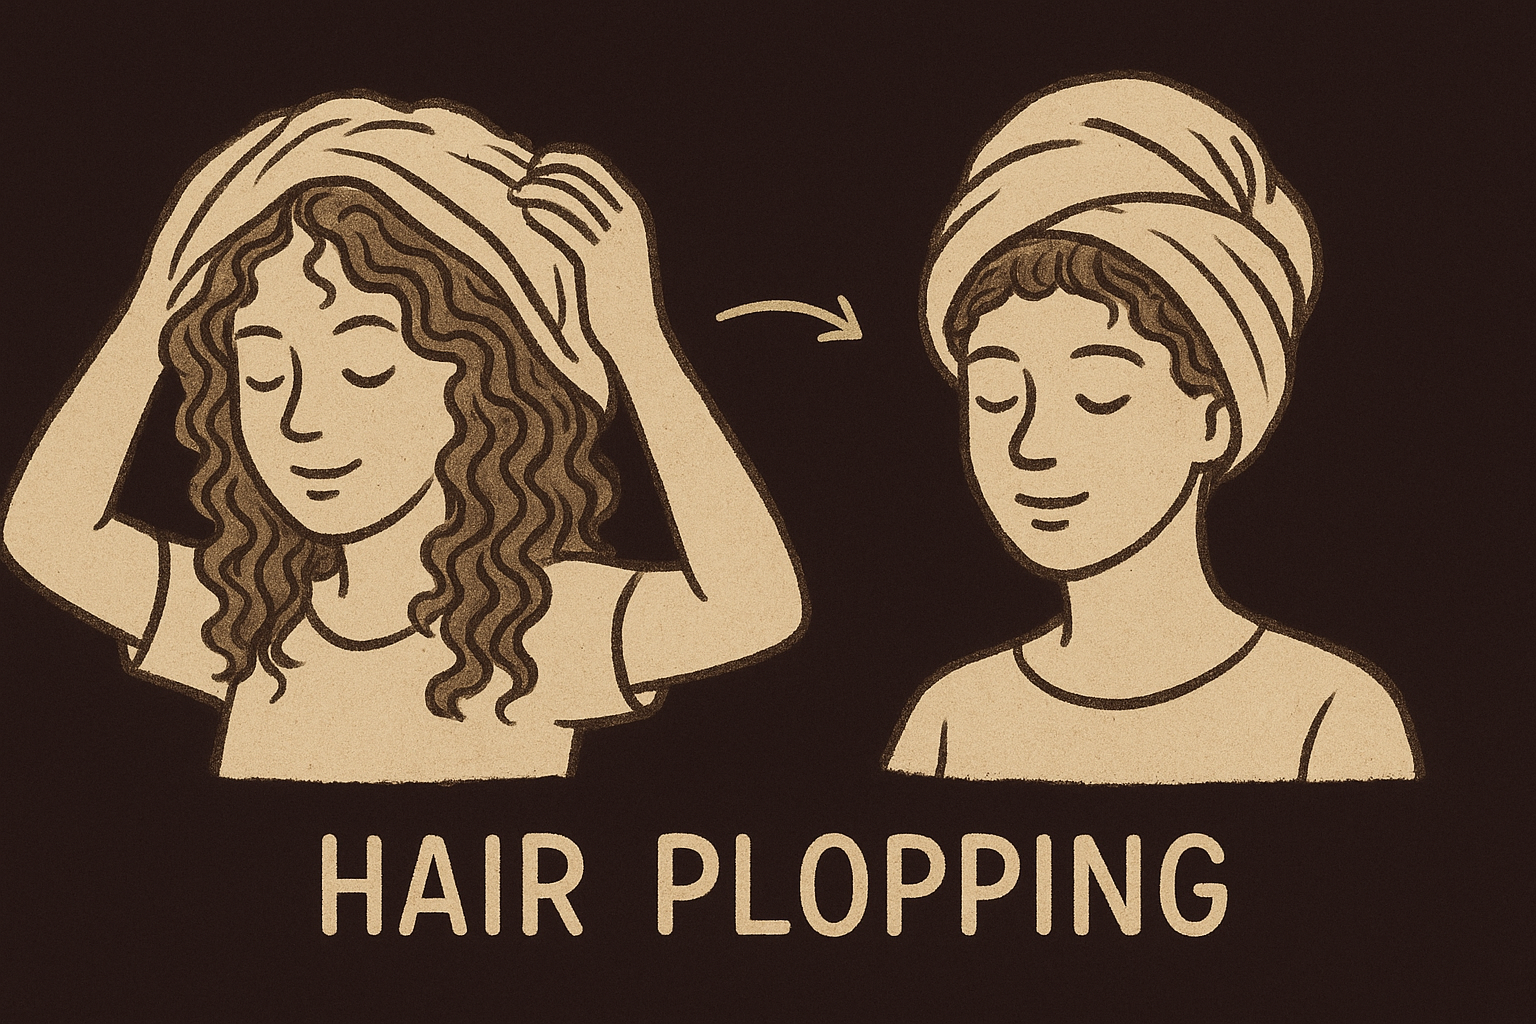
Hair plopping is a drying method where you wrap your wet curls in a cotton T-shirt or microfiber towel to encourage curl formation while removing excess moisture. Instead of rubbing your hair with a towel (which creates frizz), you gently lay your curls into the fabric and wrap it around your head. The fabric absorbs water without disrupting your curl pattern.
Why plopping prevents frizz and adds definition
Your hair cuticle looks like overlapping shingles under a microscope. When you rub a regular towel across wet curls, those rough terry cloth loops catch on the cuticle scales and lift them up. This creates frizz and tangles. Plopping uses smooth cotton or microfiber that glides over the cuticle without catching. The technique also keeps your curls bunched up against your scalp in their natural formation, which sets the curl pattern as it dries. You get defined spirals instead of stretched-out waves because gravity isn't pulling your curls down while they're wet and vulnerable.
When you plop, your curls dry in the shape they naturally want to form, not the shape gravity forces them into.
Step 1. Wash and prep your curls
Your plopping results start in the shower. Begin by wetting your hair completely with warm water, then apply a sulfate-free shampoo or co-wash (conditioner-only washing) to your scalp. Work the cleanser through your roots using your fingertips, not your nails, to avoid irritation. Let the runoff water clean your mid-lengths and ends as you rinse. This prevents over-stripping the more fragile parts of your hair where you need the most moisture.
Choose the right cleanser for your curl type
Tighter curls (3C to 4C) benefit from co-washing or cleansing conditioners that add moisture while removing buildup. These curl types naturally produce less oil, so harsh shampoos strip away what little natural moisture reaches the ends. Looser waves and curls (2A to 3B) can handle a gentle sulfate-free shampoo every wash without drying out. If your scalp gets oily quickly or you use heavy styling products, you'll need actual shampoo to remove buildup that prevents curl definition.
Condition and rinse properly
Apply conditioner from mid-lengths to ends, avoiding your roots. Use a wide-tooth comb or your fingers to detangle while the conditioner sits for 2-3 minutes. This is when you want to remove knots, not after your shower. Rinse with cool water to seal the cuticle and lock in moisture. Your hair should feel slippery but not coated when you finish rinsing. Squeeze out excess water gently with your hands before moving to styling products.
Step 2. Style, detangle, and choose your fabric
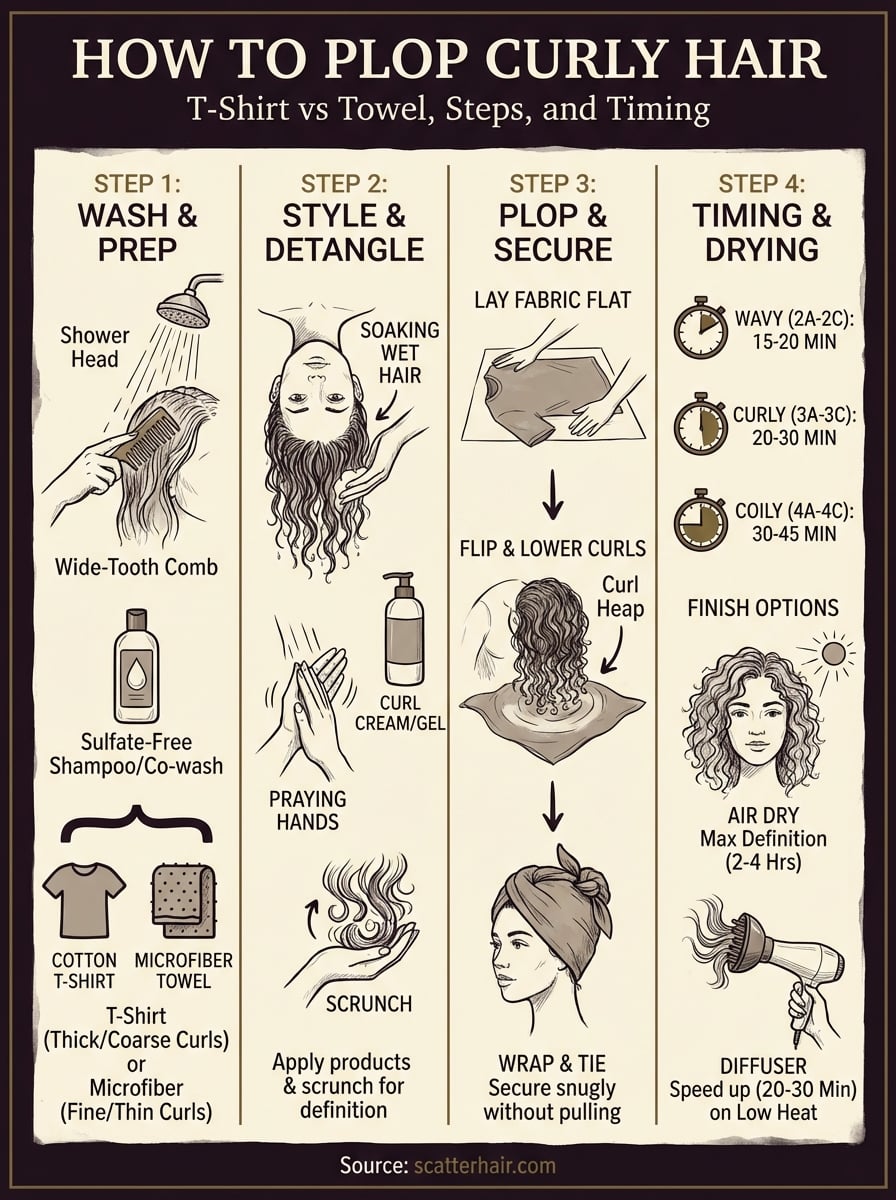
Your styling products work best on soaking wet hair, not damp. After squeezing out excess water in the shower, flip your head upside down and apply your curl cream or gel in sections. Use praying hands (smoothing product between your palms down each section) or scrunching motions to distribute product evenly. The water helps products glide through your curls and form clumps, which translate to defined curl patterns when you plop.
Apply your styling products while hair is wet
Rake a quarter-sized amount of product through each section of hair from roots to ends using your fingers. Start at the nape of your neck and work forward toward your hairline. After each section has product, scrunch your curls upward toward your scalp to encourage curl formation. Your hair should feel coated but not sticky. If you're learning how to plop curly hair for the first time, don't overdo the product amount or your curls will take forever to dry and may feel crunchy.
Cotton T-shirt vs microfiber towel
Cotton T-shirts absorb water slowly, making them ideal for thick or coarse curls that need extended plopping time. The smooth cotton fabric prevents frizz without pulling moisture out too quickly. Microfiber towels work faster and suit fine or thin curls that get weighed down easily. They absorb water rapidly, so you'll plop for less time. Both options beat regular towels because their smooth surfaces don't disrupt your curl pattern.
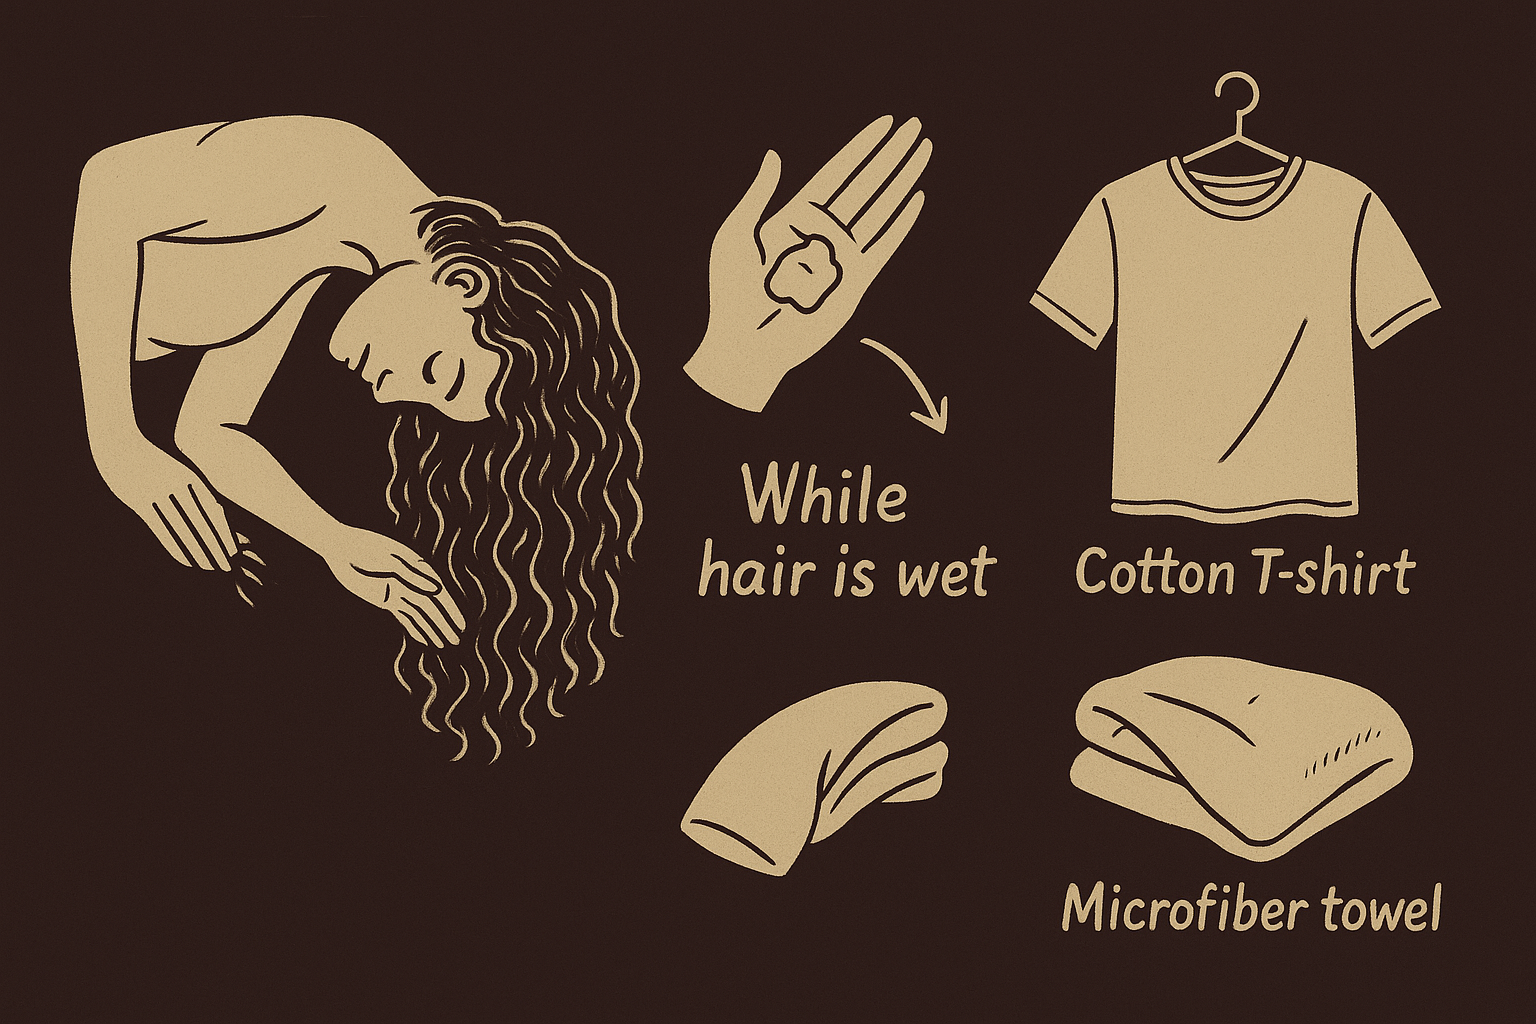
The fabric you choose changes how long you should plop, not whether plopping works.
Step 3. Plop and secure your curls
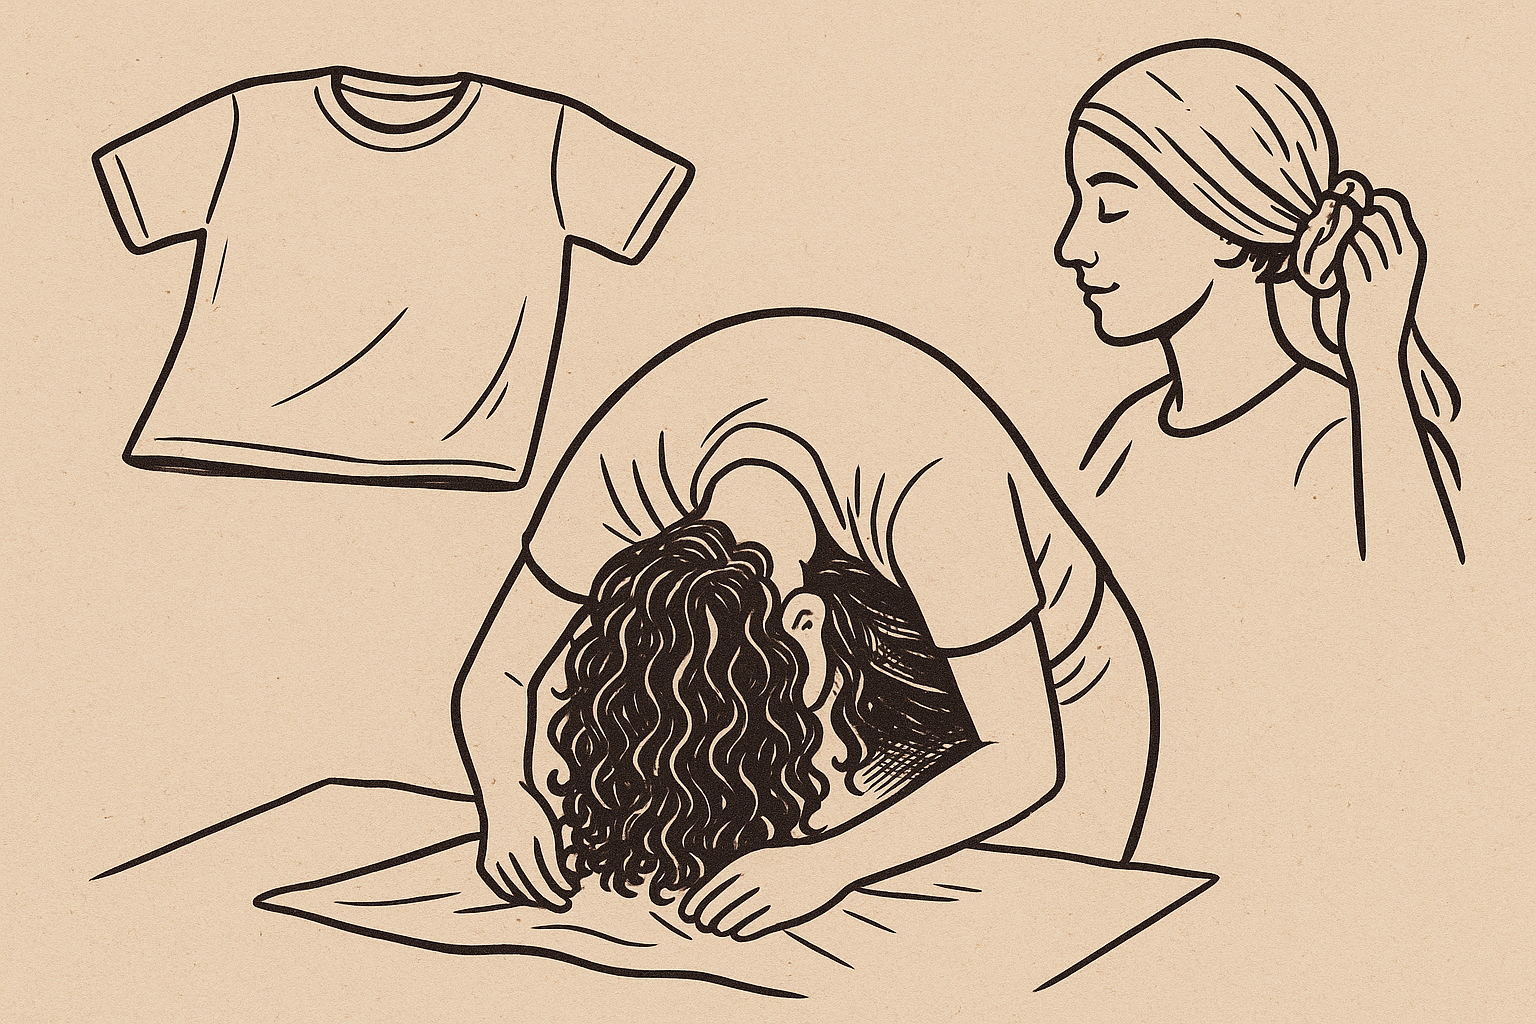
Lay your cotton T-shirt or microfiber towel flat on a bed, counter, or table with the widest part facing you. The sleeves of a T-shirt should point away from you. Position yourself so you can flip your head forward directly over the center of the fabric. This setup lets gravity work in your favor when you lower your curls down.
Position your fabric on a flat surface
Place the fabric completely flat without wrinkles or bunched areas that could create creases in your curls. If you're using a T-shirt, the collar should be furthest from you and the hem closest. For a microfiber towel, orient it so the longer edge runs parallel to the table edge. Check that you have enough space to flip forward comfortably without hitting furniture or walls.
Flip and lower your curls into place
Bend at your waist and flip your head upside down until your curls hang freely. Lower your head straight down toward the fabric center, letting your curls pile onto the material naturally. Don't shake your head or move side to side. Your curls should land in a gathered heap on the fabric, maintaining the clumps you created during styling. This motion preserves your curl pattern instead of stretching it out.
Wrap and tie the fabric securely
Bring the fabric edge closest to you up and over your head toward the back. Grab both sides and pull them tight around your hairline. Twist or tie the ends at the nape of your neck or secure them on top of your head. The wrap should feel snug but not painful. Tuck any loose ends so the fabric stays in place while you wait.
Your curls stay protected in their natural shape as long as the fabric holds them snugly against your scalp.
Step 4. Timing, drying, and overnight options
The length of time you plop depends on your hair density and curl type. Fine or thin curls need 10-20 minutes to avoid over-drying and losing volume. Medium density curls work best with 20-30 minutes of plopping. Thick or coarse curls can handle 30-45 minutes since they hold more water and take longer to set. Your curls should feel damp but not soaking when you unwrap the fabric.
Standard plopping times by curl type
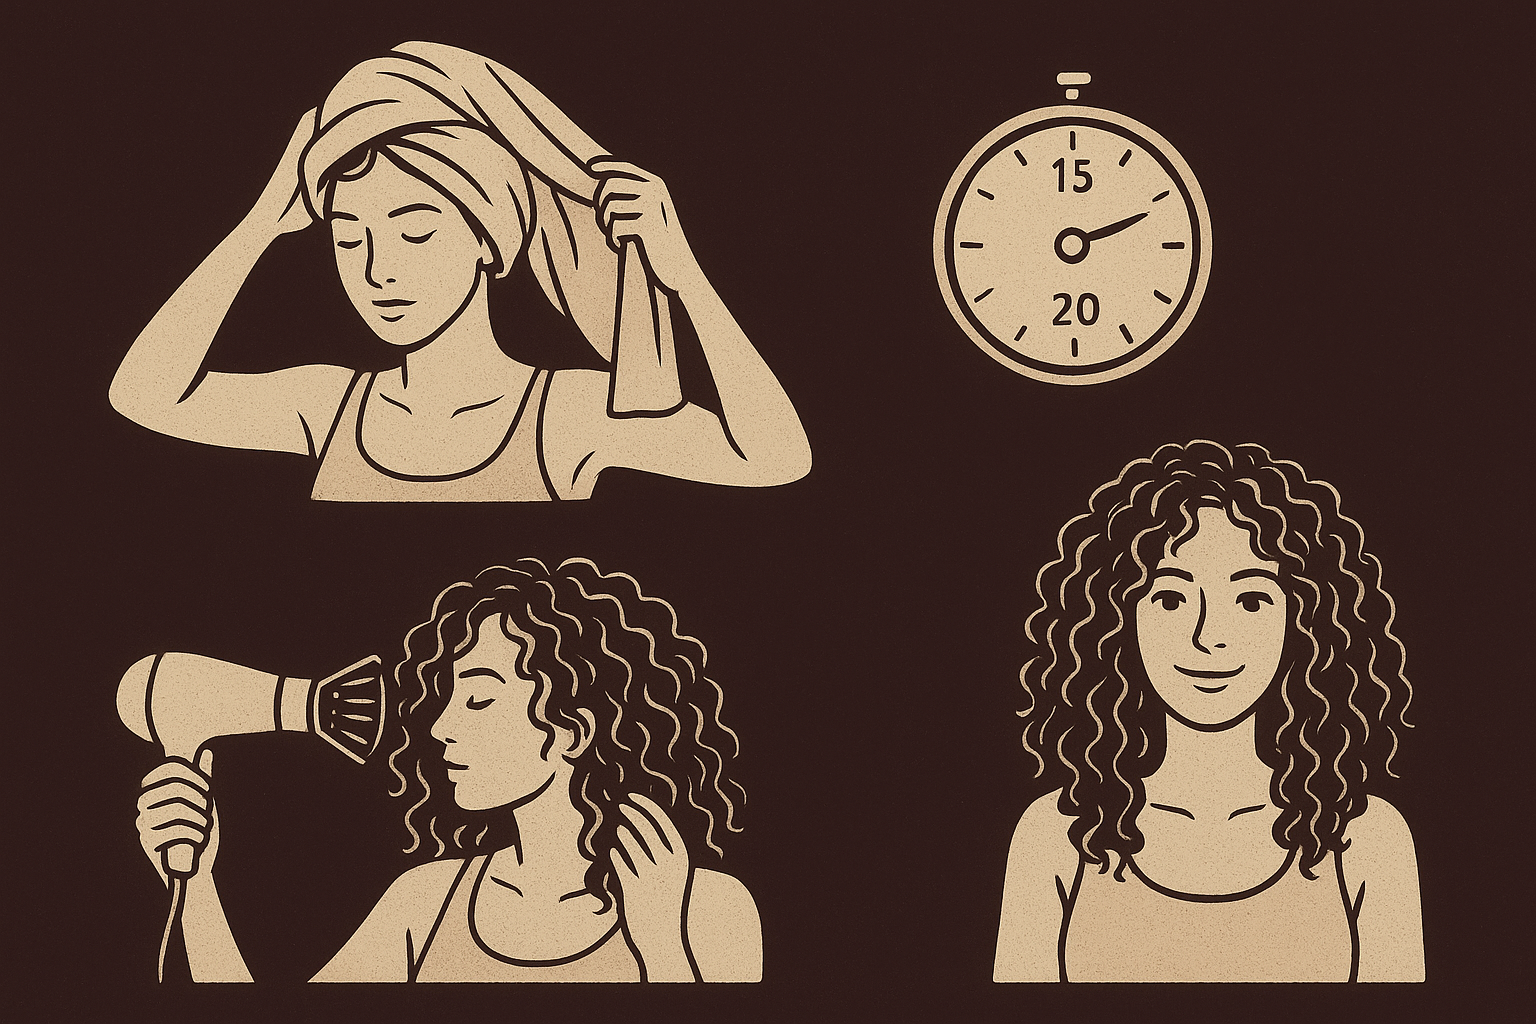
Wavy hair (2A-2C) benefits from 15-20 minutes of plopping to prevent limp waves from too much moisture absorption. Curly hair (3A-3C) needs 20-30 minutes to form defined spirals without frizz. Coily hair (4A-4C) requires 30-45 minutes because tighter curl patterns hold more water between the coils. Set a timer when you first learn how to plop curly hair so you don't leave the fabric on too long and create flat roots.
Remove the fabric and finish drying
Unwrap your hair carefully by untying the knot first, then letting the fabric fall away naturally. Don't pull or tug at your curls. You can air dry the rest of the way for maximum definition, which takes 2-4 hours depending on thickness. Using a diffuser attachment on low heat speeds up drying to 20-30 minutes while maintaining curl shape. Cup each section of curls in the diffuser bowl and hold for 10-15 seconds before moving to the next section.
Overnight plopping works for thick hair that takes hours to dry, but most curl types get better results with standard timing.
Make plopping part of your routine
Learning how to plop curly hair transforms your styling process from a frizz battle into a simple technique that works with your natural texture. Start with your fabric choice based on your curl thickness and how fast you want to dry. Apply products on soaking wet hair, flip and plop, then time it correctly for your curl type. The method takes practice to dial in your perfect timing and product amount.
Your curls will thank you for ditching the rough towel and embracing this gentle drying approach. Try plopping after your next wash day and adjust the timing based on your results. Scatter's first product is Slip, a 2% hyaluronic acid hair serum. Work it through wet-to-damp hair, then air dry for texture or blow dry for body. It's on pre-order now.