

What Is A Wash And Go? How To Style It And Make It Last
You've probably seen curls that look effortlessly defined, bouncy, and hydrated, all without a flat iron or blow dryer in sight. That's the magic of a wash and go, one of the most popular styling methods for natural and curly hair. But here's the thing: while the name suggests simplicity, there's actually a bit of technique involved to get it right.
If you've been wondering how some people walk out the door with perfectly clumped curls while yours fall flat by noon, you're not alone. The wash and go can be tricky to master, especially when you're still figuring out what products and methods work for your specific texture. That's exactly why we built scatterhair, to take the guesswork out of styling textured hair.
This guide breaks down everything you need to know: what a wash and go actually is, how to achieve it step by step, and the tips that'll help your curls last for days instead of hours. Whether you're a complete beginner or looking to refine your routine, you'll leave with a clear game plan for styling your texture with confidence.
What a wash and go is and who it works for
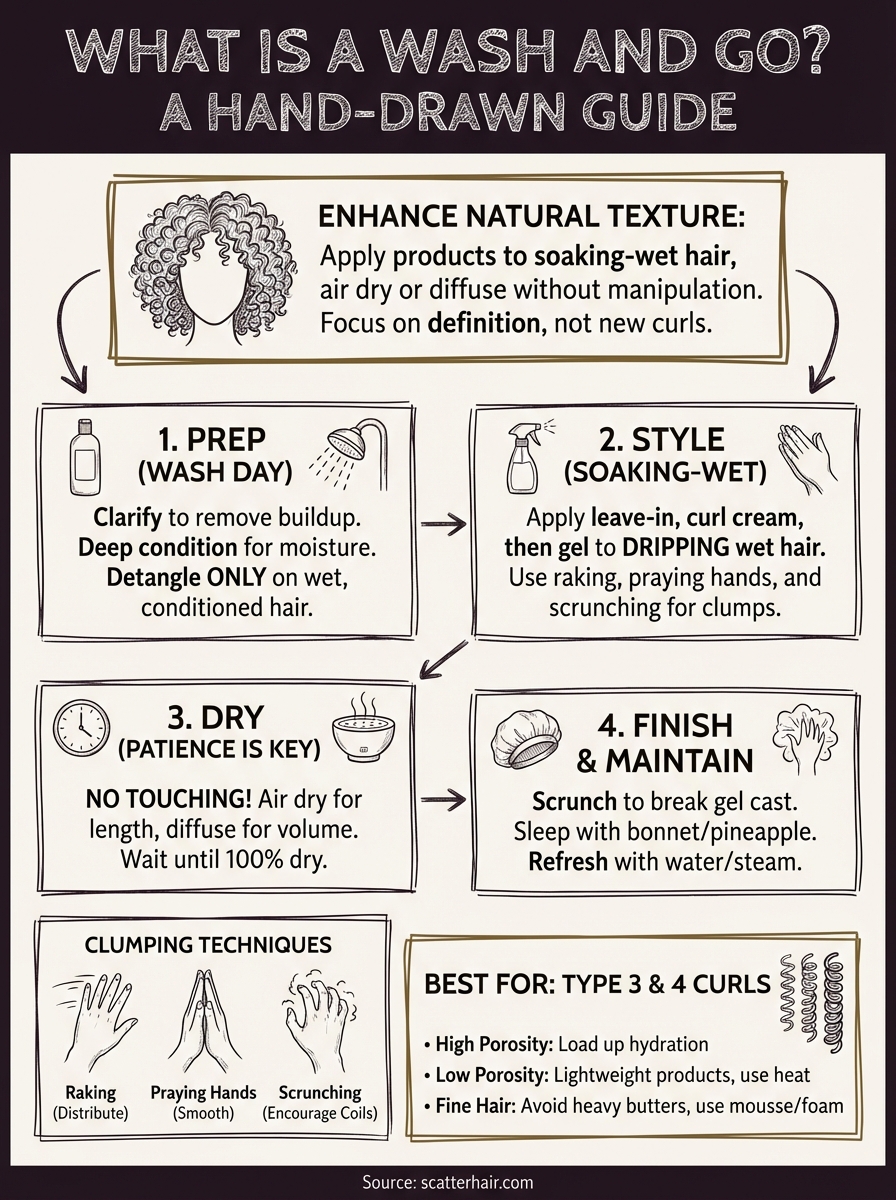
A wash and go is a styling method where you apply product to freshly washed, soaking-wet hair, then let it air dry or diffuse without manipulating the curls afterward. The goal is to enhance your natural curl pattern while minimizing frizz and maximizing definition. You're essentially working with your texture as it is, rather than forcing it into a different shape with heat or tools.
The technique gets its name from the idea that you can wash your hair and go about your day without spending hours styling. But what is a wash and go really about? It's about strategic product application and proper drying techniques that let your curls form their natural clumps and coils. You're not creating curls from scratch; you're revealing the ones already there by giving them the right environment to thrive.
The wash and go isn't about being lazy with your hair. It's about understanding how your curls naturally behave and giving them exactly what they need to look their best.
The basic definition and technique
You start with clean, dripping-wet hair right after washing and conditioning. Instead of towel-drying first, you apply your styling products while water is still running through your strands. This helps distribute the product evenly and encourages your hair to form defined curl clumps from root to tip.
Most people layer products in a specific order: a leave-in conditioner for hydration, followed by a curl cream or gel for hold. You apply these with techniques like raking, praying hands, or scrunching to encourage clumping. Then you let your hair dry completely before touching it again, which is the hardest part for many people to master.
The beauty of this method is that it works with your existing texture instead of fighting against it. You're not trying to make your 4C coils look like 3A waves. You're simply enhancing whatever pattern you already have, which is why the results look so natural and effortless when done correctly.
Which hair types get the best results
Wash and go styling works best for Type 3 and Type 4 hair, which includes everything from loose curls to tight coils. Your specific curl pattern within these categories will determine how much product you need and which techniques work best, but the core method stays the same.
Highly porous hair tends to respond well because it absorbs product quickly and holds moisture longer. If your hair dries fast and feels rough when dry, you probably have high porosity, which means you'll want to load up on hydrating products during your wash and go routine.
Low porosity hair can also achieve great wash and go results, but you'll need to focus on lightweight products that won't sit on top of your strands. Your hair naturally resists moisture, so you might need to apply products in thinner layers or use heat under a hooded dryer to help everything absorb properly.
People with fine or thin hair can still do wash and gos, but you'll want to avoid heavy creams and butters that weigh your curls down. Stick with mousses, lightweight gels, and foams that provide hold without bulk. Those with thick, dense hair have more flexibility with product choices and can usually handle richer formulas without losing volume.
Prep on wash day for definition and slip
Your wash day routine sets up everything that comes after, so you need to start with clean, properly conditioned hair that's ready to absorb product. What is a wash and go without the right foundation? Just frizz waiting to happen. The prep phase is where you build the moisture base and create the slip that allows your curls to clump together naturally instead of tangling into a mess.
Most people skip this step or rush through it, then wonder why their wash and go looks dry by day two. You need to treat your hair like a sponge that's been sitting out for weeks. It won't absorb anything until you saturate it thoroughly and remove all the buildup that's blocking moisture from getting in.
Your curls can't clump properly if they're coated in product residue or mineral deposits from hard water. Clean hair is the non-negotiable starting point.
Start with a clarifying wash
You should use a clarifying shampoo at least once a month to strip away buildup from styling products, hard water minerals, and natural oils that regular shampoo leaves behind. This creates a clean slate for your wash and go products to actually work instead of sitting on top of a layer of gunk.
Apply the clarifying shampoo to your scalp first, then work it through your hair in sections. Focus on your roots and scalp where most buildup accumulates, but make sure you run it through your ends as well. You'll know it's working when your hair feels squeaky clean, almost stripped, after rinsing.
Deep condition for maximum hydration
After clarifying, your hair needs intense moisture to bounce back. Apply a thick deep conditioner from roots to ends, making sure every strand gets coated. Use your fingers to work it through in sections, then cover your hair with a plastic cap for at least 20 minutes.
Adding heat accelerates the process. Sit under a hooded dryer or use a heat cap to help the conditioner penetrate your hair shaft. Your hair should feel soft and slippery when you rinse, which tells you it's properly hydrated and ready for styling products to lock in that moisture.
Detangle while conditioner is in
Never try to detangle dry hair before washing. Instead, work through knots while your regular conditioner or deep conditioner is still coating your strands. Start at your ends and work your way up to your roots using a wide-tooth comb or your fingers.
The conditioner provides slip that lets tangles glide apart instead of breaking off. Take your time with this step because proper detangling now means better curl definition later when you're applying styling products.
Style on soaking-wet hair for clumps
The styling phase happens while your hair is still dripping wet from the shower, not damp or towel-dried. Water acts as a carrier that helps products spread evenly and encourages your curls to form defined clumps instead of separating into frizzy individual strands. This is the core of what is a wash and go: working with water as your primary styling tool.
You need to keep a spray bottle filled with water nearby during this process. If sections start to dry before you finish styling, mist them generously to bring back that soaking-wet state. Your hair should be wet enough that water runs down your arms when you scrunch, which feels excessive but delivers the best results.
The wetter your hair when you apply products, the better your curl clumps will form and hold together throughout the drying process.
Apply products in the right order
Start with a leave-in conditioner on soaking-wet hair, using more than you think you need. Rake it through each section from roots to ends with your fingers spread wide, making sure every strand gets coated. This base layer provides the moisture foundation that everything else builds on.
Next comes your curl cream or styling cream, which adds definition and some hold. Apply this in smaller sections, using the praying hands method: smooth the product between your palms, then glide your flattened hands down each section of hair. Finally, layer on a gel with strong hold using the same technique, focusing on your ends where curls tend to separate most.
Use techniques that encourage clumping
Raking works best for distributing product through thick or dense hair. Spread your fingers wide and run them through each section like a comb, which helps product reach every strand. Follow up with scrunching motions to encourage your curls to coil up and form clumps.
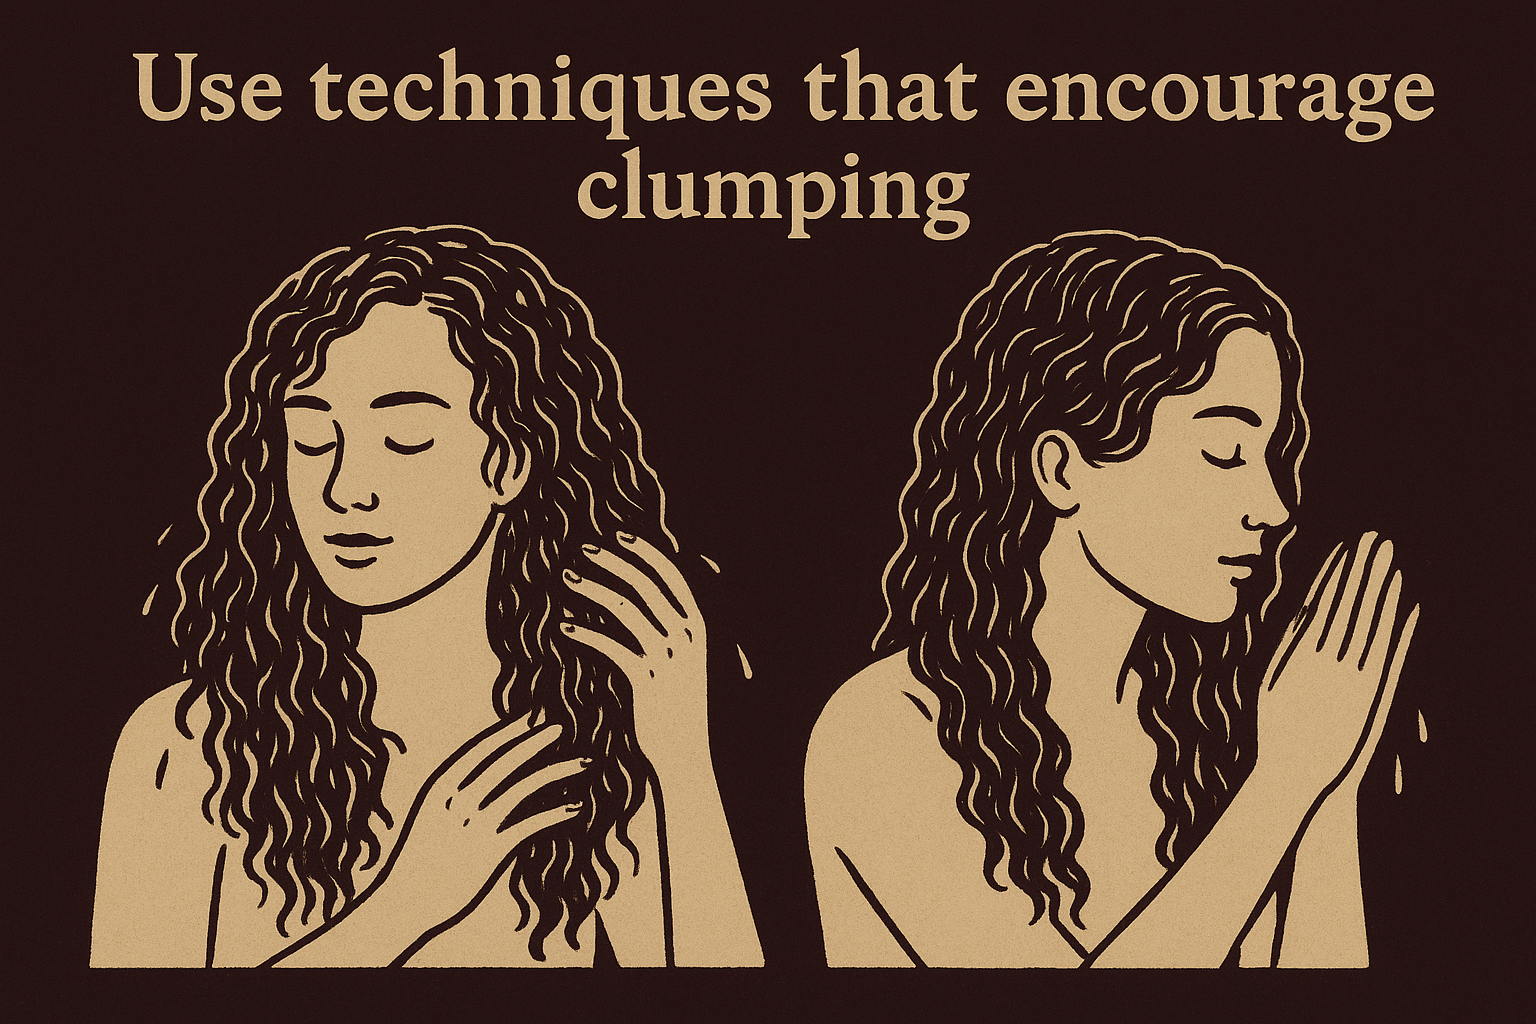
The praying hands method creates smooth, defined clumps by pressing hair between your palms as you slide down. Use this technique when you want sleek, elongated curls instead of maximum volume. Alternate between these methods based on what each section needs.
Section your hair for even coverage
Divide your hair into four to eight sections depending on thickness and density. Clip up the sections you're not working on to keep them out of the way. This systematic approach ensures you don't miss any spots and prevents some areas from getting too much product while others get none.
Work through one section at a time, applying all your products before moving to the next. Your arms will get tired and you'll feel like you're using too much product, but thorough application now means better definition that lasts for days instead of falling flat by tomorrow.
Dry without frizz and keep volume
The drying phase makes or breaks your wash and go because this is when your curl pattern sets and frizz either appears or stays under control. You've done all the work of cleansing, conditioning, and styling, but touching your hair before it's completely dry will undo everything and leave you with a frizzy mess. Understanding what is a wash and go means accepting that patience during the drying process delivers better results than any product ever could.
Most people make the mistake of touching their hair while it's still damp to "check on it" or fluff for volume. Every time you touch wet or damp curls, you break apart the clumps you worked so hard to create and invite frizz to take over. Your hands need to stay off your head until your hair feels dry to the touch, which can take anywhere from two to eight hours depending on your hair's density and porosity.
The longer you can leave your styled hair completely untouched during drying, the more defined and frizz-free your curls will be when you finally break the cast.
Air dry vs diffuse for different results
Air drying gives you the most elongated, defined curls with maximum hang time because gravity pulls your hair down as it dries. Simply style your hair and walk away, letting it dry naturally without any manipulation. This method works best when you have time to spare and don't need your hair dry quickly.
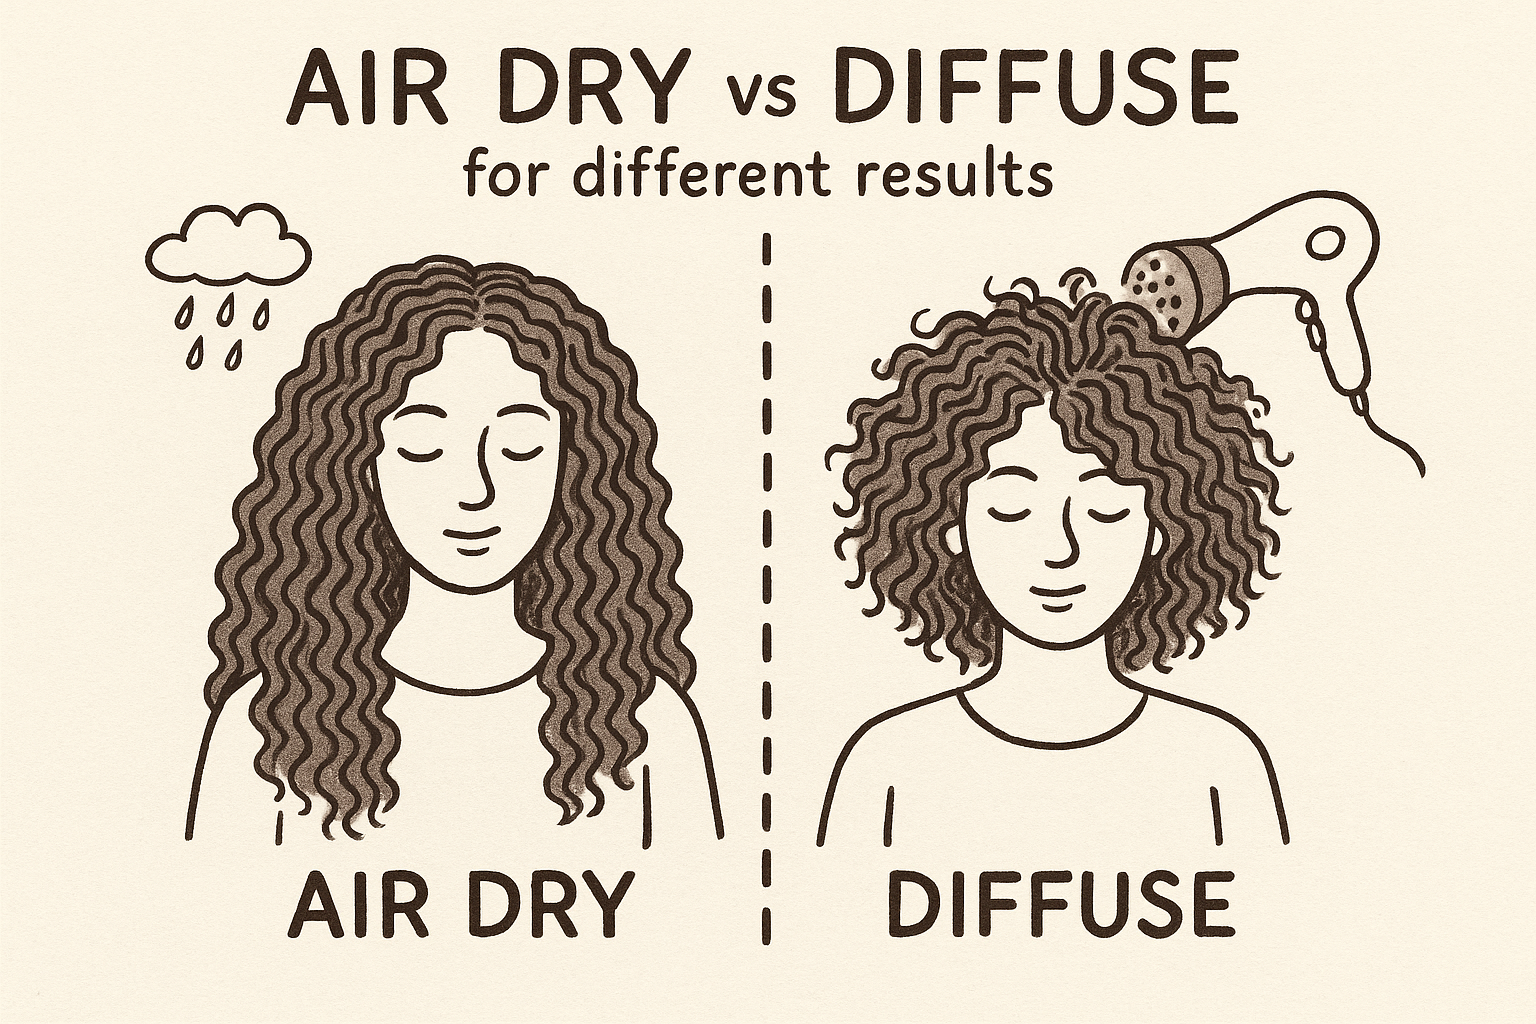
Diffusing speeds up the process and adds lift at the roots, which is perfect when you want more volume or need to leave the house soon. Attach a diffuser to your blow dryer, set it to low heat and low speed, then hover it near sections of your hair without actually touching them. Cup sections into the diffuser bowl and hold for 30 seconds before moving to the next area.
Protect your curls while they dry
Use a silk or satin bonnet if you're air drying overnight or need to move around during the day. Cotton pillowcases and regular fabrics create friction that roughens your hair cuticle and causes frizz, while silk and satin let your hair glide smoothly without disruption.
Avoid leaning your head against anything or lying down until your hair is fully dry. The pressure will flatten your roots and create dents in your curl pattern that won't bounce back later.
Break the gel cast for soft definition
Once your hair is completely dry, it will feel crunchy and stiff from the gel, which is exactly what you want. Scrunch your hair gently with your palms to break the cast and release soft, bouncy curls. Use a small amount of oil on your hands if you want extra shine while scrunching.
Make it last, refresh, and troubleshoot
A successful wash and go can last three to seven days with the right maintenance routine, which saves you hours of styling time each week. The key to extending your results lies in protecting your curls while you sleep and knowing how to refresh without starting from scratch. What is a wash and go worth if it only looks good for one day? Understanding maintenance techniques turns this into a practical everyday style instead of a special occasion look.
Protect your wash and go overnight
Wrap your hair in a satin or silk bonnet before bed to prevent friction that causes frizz and flattens your curl pattern. Make sure the bonnet fits securely without being too tight, which can leave crease marks in your hair. You can also use a satin pillowcase as backup protection if your bonnet slips off during the night.
The pineapple method works well for preserving volume at your roots. Flip your head forward and gather all your hair at the very top of your head in a loose, high ponytail using a satin scrunchie. This keeps your curls suspended and prevents them from getting crushed while you sleep.
Protecting your hair at night is just as important as the styling process itself because one night of friction can undo days of definition.
Refresh without rewashing
Spritz your hair with a water and leave-in conditioner mixture in a spray bottle when your curls start looking dry or frizzy. Focus on the sections that need help, then scrunch gently to reactivate the products already in your hair. Add a small amount of gel or curl cream to your palms and smooth over any particularly frizzy areas.
Steam refreshing works when your curls have lost definition but aren't completely flat. Stand in your bathroom with the shower running hot for five to ten minutes, letting the steam penetrate your hair. Scrunch sections as they soften and your curl pattern will bounce back without needing a full rewash.
Fix common problems
Your roots falling flat means you need more root clipping during the drying phase next time. Attach small clips at your roots while your hair dries to create lift that lasts. Frizz appearing by day two usually signals that you didn't use enough gel or touched your hair before it was completely dry.
Curls separating into stringy pieces means you need to use more product and focus on clumping techniques during styling. Apply products in smaller sections and make sure you're scrunching thoroughly to encourage your hair to form cohesive clumps instead of individual strands.
Wrap-up and what to try next
Now you understand what is a wash and go and how to execute each step from wash day prep through styling and maintenance. The technique takes practice to master, but the foundation stays consistent: work with soaking-wet hair, use enough product, and keep your hands off until everything's completely dry. These core principles apply regardless of your specific curl pattern or hair density.
Your next step is experimenting with different product combinations and application techniques to find what works for your specific texture. Try varying the amounts you use, switch up the order of products, or test different drying methods until you nail down a routine that gives you consistent results every single time.
Scatter is building custom-formulated styling products designed specifically for textured hair that actually performs, so you can stop guessing and start getting the definition you want. Join our email list for early access when we launch in 2026.