

Deep Conditioning for Low Porosity Hair: A Step-by-Step Guide
You bought another deep conditioner. You left it on for 30 minutes. Your hair still feels dry and looks dull. If that sounds familiar, your low porosity hair is probably rejecting everything you throw at it. Those tightly packed cuticles act like a shield, keeping moisture out instead of letting it in. Most deep conditioning advice ignores this reality and leaves you wondering why nothing works.
The fix is not more product or longer wait times. You need a different approach that actually opens those cuticles and pushes moisture where it belongs. Heat, the right ingredients, and proper prep make the difference between wasted product and hair that finally feels hydrated.
This guide walks you through exactly how to deep condition low porosity hair. You'll learn how to confirm your porosity, prep your strands correctly, choose formulas that penetrate instead of coat, and use heat strategically. We'll also cover timing, common mistakes, and simple DIY recipes that work better than most store-bought options. By the end, you'll have a repeatable routine that actually delivers results.
What low porosity hair actually needs
Low porosity hair has a structural problem that standard deep conditioning methods cannot fix. Your cuticles sit flat and overlap tightly, creating a barrier that blocks moisture from entering the hair shaft. When you apply regular deep conditioner without addressing this barrier, the product sits on the surface and does nothing. You end up with buildup instead of hydration, and your hair feels coated rather than conditioned.
The cuticle barrier problem
Your hair cuticles need to open before any conditioning treatment can work. Think of it like trying to water a plant with a sealed lid on top. The water cannot reach the soil no matter how much you pour. Low porosity cuticles stay sealed shut at room temperature, which means cold or lukewarm applications waste your time and product. Heat changes everything because it temporarily lifts those cuticles and creates openings for moisture to enter.
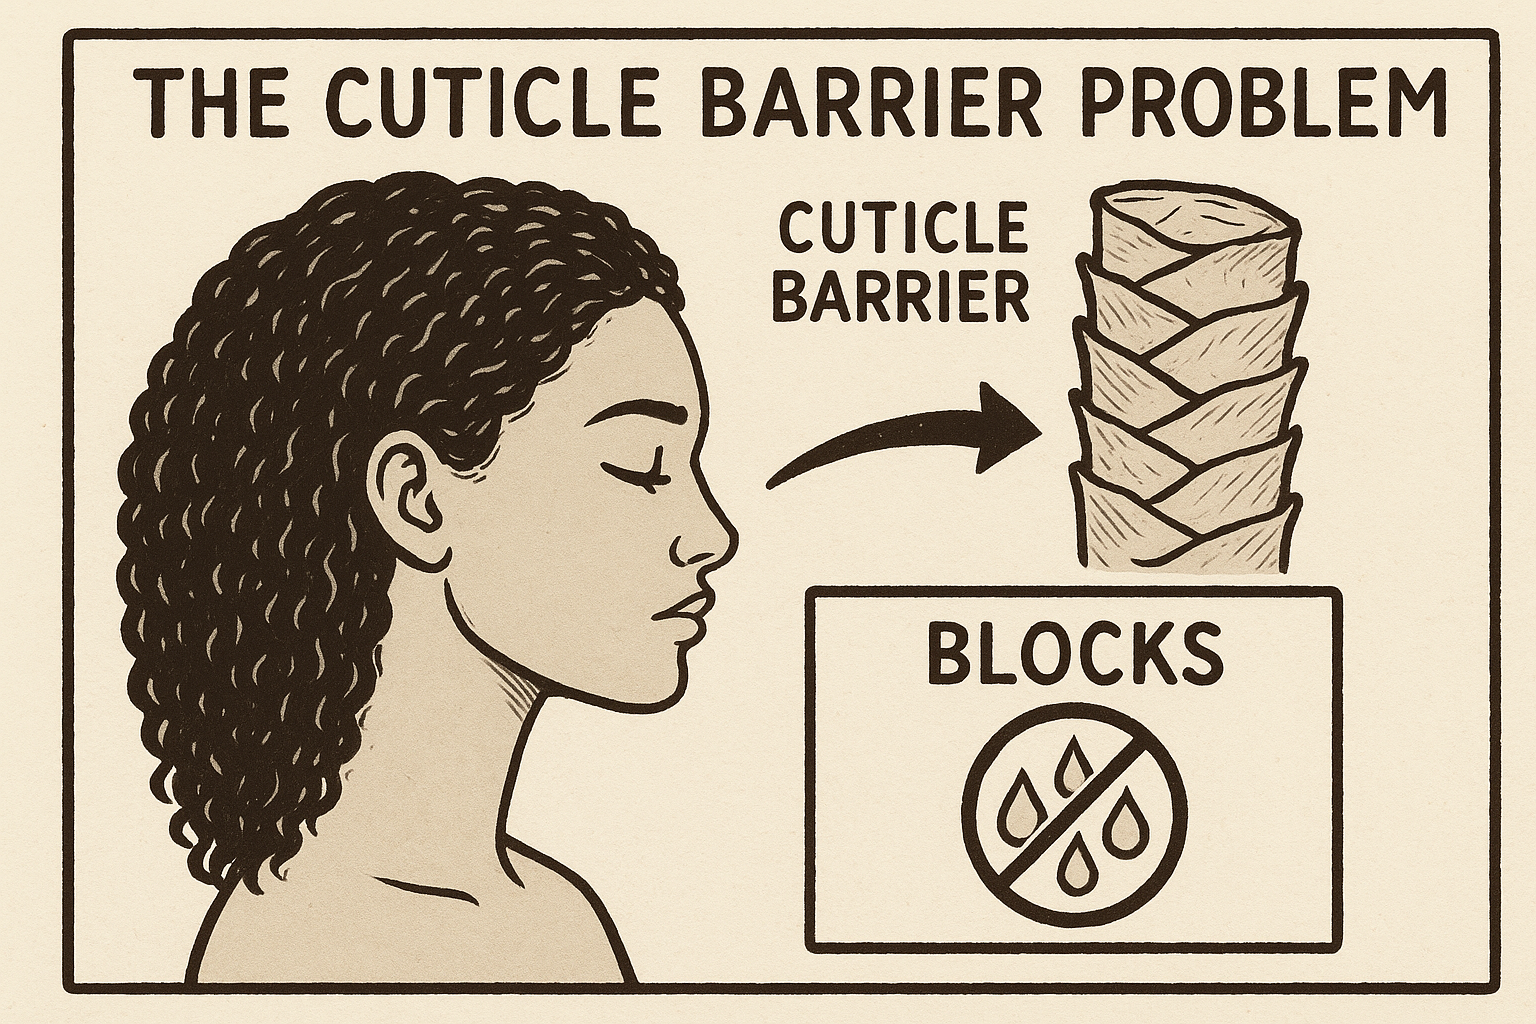
Most deep conditioning for low porosity hair fails because people skip the heat step entirely. They rely on time alone, leaving conditioner on for hours without ever opening the cuticle layer. This approach never works because the cuticles remain closed throughout the entire process.
Heat is not optional for low porosity hair. It is the only reliable method to open tightly packed cuticles.
The three non-negotiables
You need three specific things to make deep conditioning work on low porosity hair. First, you need clean hair free from buildup. Product residue sits on your cuticles and blocks absorption even when you use heat. Second, you need water-based conditioners with penetrating ingredients like coconut oil, honey, or glycerin. Heavy butters and thick oils cannot enter the hair shaft and will only coat the outside. Third, you need consistent heat application for at least 20 to 30 minutes. A plastic cap or steamer keeps heat trapped around your hair and maintains open cuticles throughout the treatment.
Your technique matters as much as your products. Apply conditioner to soaking wet hair in small sections to ensure even distribution. Use clips to separate your hair into four to six sections, then work the product through each section from roots to ends. This method guarantees every strand receives coverage instead of just the outer layer.
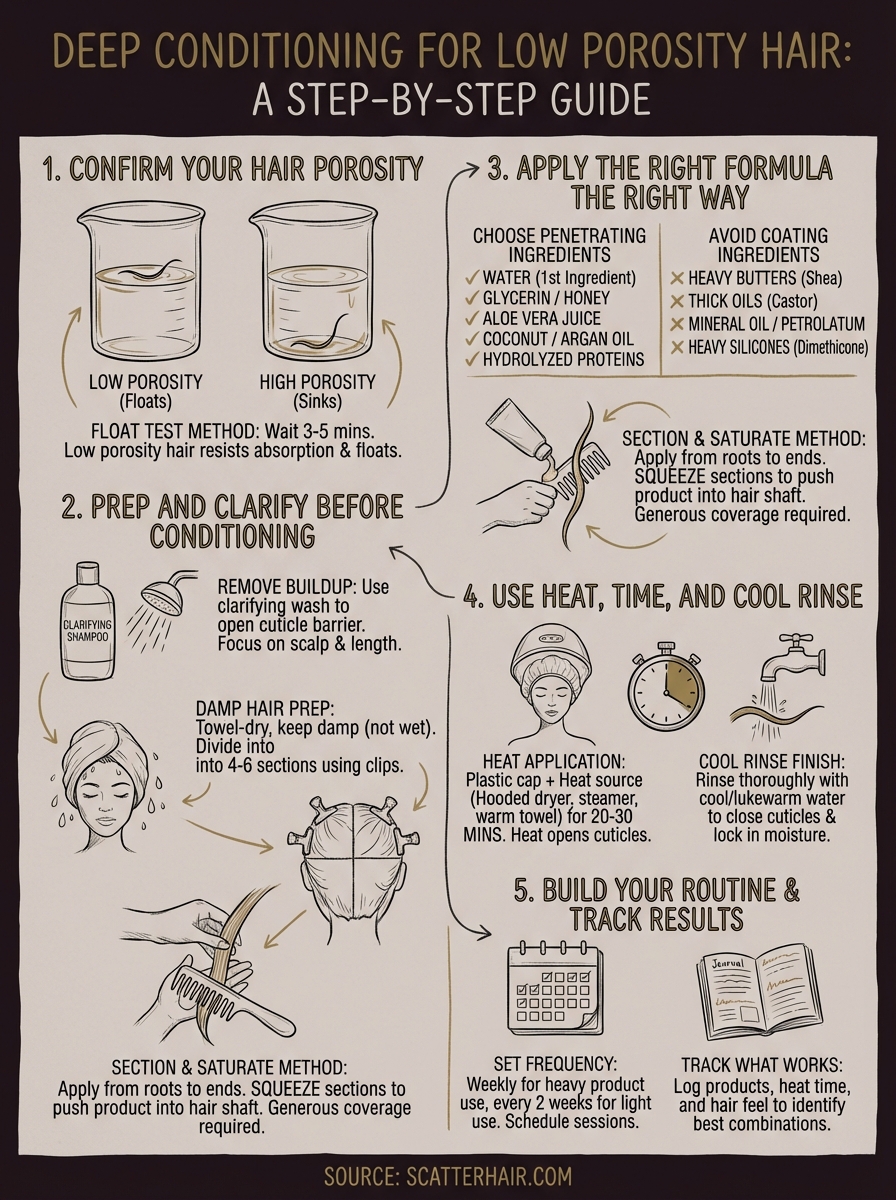
Step 1. Confirm your hair porosity
You cannot fix a problem you have not properly identified. Many people assume they have low porosity hair based on symptoms like dryness or product buildup, but these issues can appear across all porosity types. Testing your actual porosity removes guesswork and ensures you apply the right deep conditioning approach. Wrong assumptions lead to wrong products, wasted money, and hair that stays dry despite your efforts.
Your porosity level determines how you should approach every aspect of deep conditioning for low porosity hair. High porosity hair absorbs too much moisture and needs sealing, while low porosity hair struggles to absorb anything and needs opening. Using high porosity techniques on low porosity hair creates buildup and limp strands. Testing takes five minutes and saves you months of trial and error.
The float test method
Take a clean strand of hair from your brush or comb. Fill a clear glass with room temperature water and drop the strand into the water. Wait three to five minutes without touching the glass or disturbing the water. Low porosity hair floats on the surface because the tightly packed cuticles resist water absorption. Medium porosity hair floats briefly then slowly sinks to the middle of the glass. High porosity hair sinks immediately to the bottom.
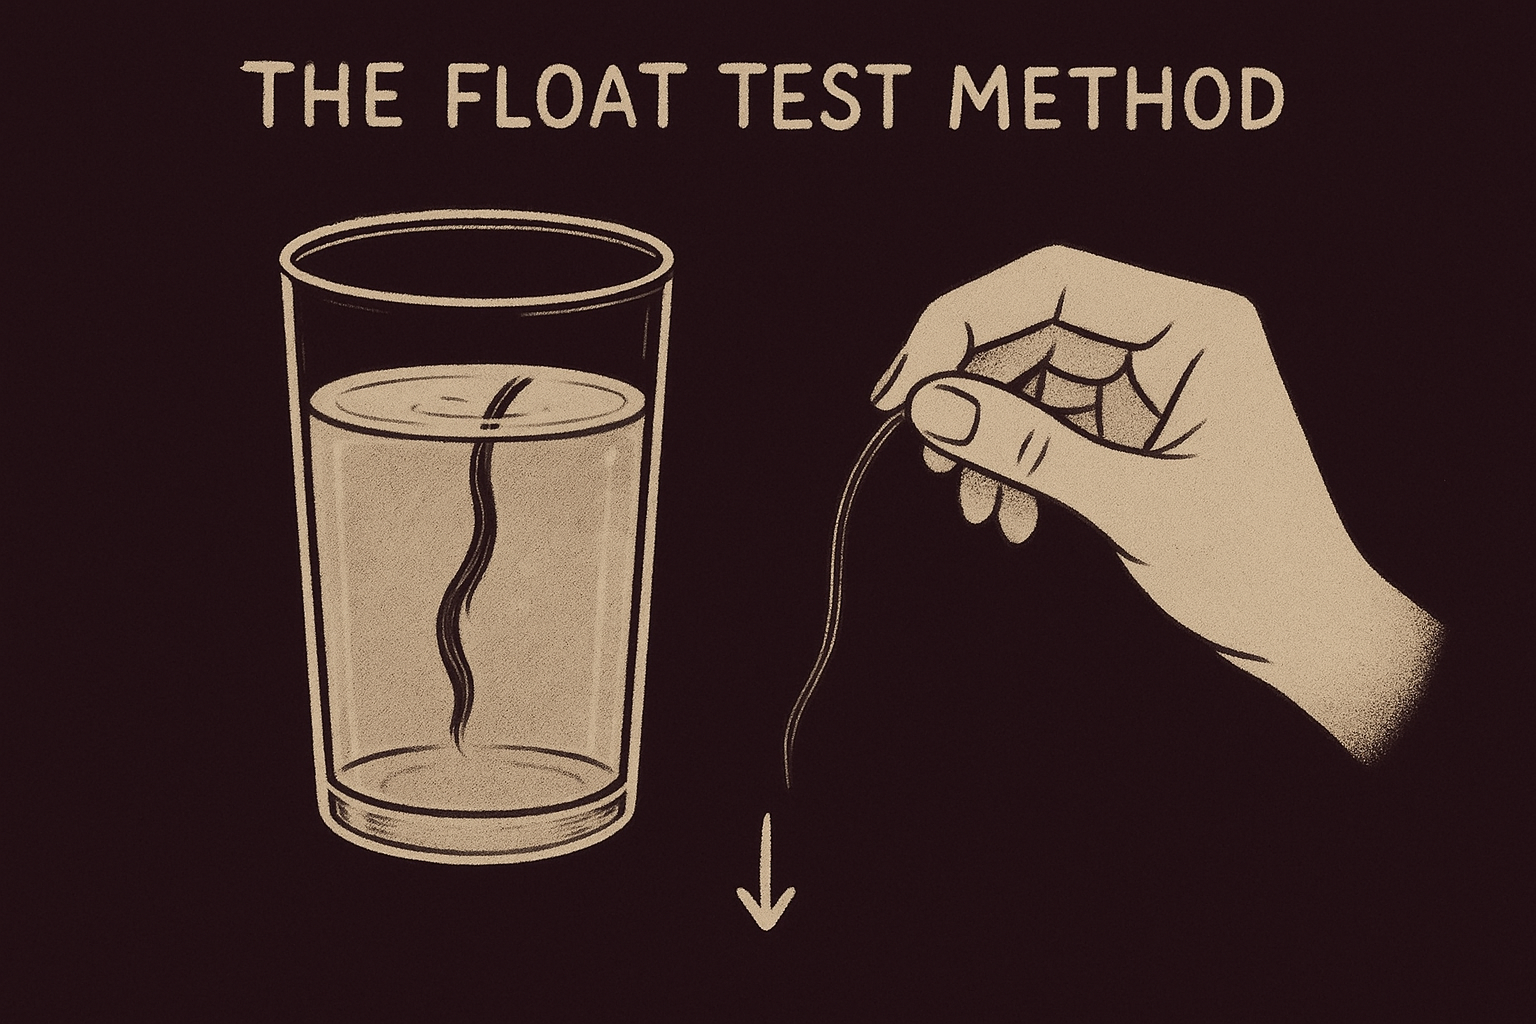
Low porosity hair floats because closed cuticles prevent water from weighing down the strand.
Use hair that is free from products for accurate results. Product residue can affect how your hair interacts with water and give you false readings. If you wash your hair today, collect a shed strand tomorrow morning before applying any styling products.
Additional confirmation methods
Spray a section of clean, dry hair with water from a spray bottle. Watch how your hair responds to the moisture. Low porosity hair sees water beads sitting on the surface for several seconds before absorbing. High porosity hair soaks up water immediately with no beading.
Run your fingers along a single strand from end to root. Low porosity strands feel smooth because the cuticles lay flat against the shaft. High porosity strands feel rough or bumpy because lifted cuticles create texture. This tactile test works best on the oldest parts of your hair near the ends, where your natural porosity shows most clearly.
Step 2. Prep and clarify before deep conditioning
Your hair needs to be completely clean before you attempt any deep conditioning treatment. Product buildup creates an invisible barrier on your cuticles that blocks moisture absorption even when you use heat and the right products. Low porosity hair accumulates buildup faster than other hair types because those closed cuticles trap residue on the surface instead of allowing it to rinse away. Every styling product, conditioner, and oil you have used in the past week sits on your hair and must be removed first.
Clarifying removes all residue and prepares your cuticles to accept moisture during deep conditioning for low porosity hair. Think of it as cleaning a window before trying to see through it. You cannot skip this step and expect results. Most failed deep conditioning attempts happen because people condition dirty hair and wonder why nothing absorbs.
The clarifying wash process
Start with completely wet hair under warm running water. Warm water helps loosen product residue before you apply any cleanser. Apply a clarifying shampoo or apple cider vinegar rinse directly to your scalp and massage for at least two minutes. Your goal is to break down oils, silicones, and product buildup, not just wet your hair and rinse. Work the cleanser through your entire hair length, focusing on areas where you typically apply the most product.
Rinse thoroughly with warm water until the water runs completely clear. Residue left behind will block your deep conditioner, so spend extra time on this rinse step. Your hair should feel slightly stripped or squeaky when you run your fingers through it. That stripped feeling confirms you removed all barriers between your cuticles and the conditioning treatment.
Post-clarify prep steps
Pat your hair with a towel to remove excess water but keep your hair damp. Do not dry your hair completely because the deep conditioner needs water to help it penetrate. Your hair should be wet enough that water would drip if you bent forward, but not so saturated that it pools in your hands.
Damp hair absorbs conditioner better than dry or soaking wet hair because water opens the pathway without diluting the product.
Divide your hair into four to six sections using clips or hair ties. This sectioning allows you to apply conditioner evenly and ensures every strand receives treatment. Smaller sections work better for thick or dense hair because you can saturate each piece completely. Your prep work directly determines whether your deep conditioning treatment succeeds or fails.
Clarify your hair every two weeks if you use styling products regularly. Monthly clarifying works for minimal product users. Skip this schedule and your deep conditioning treatments will stop working as buildup accumulates on your cuticles.
Step 3. Apply the right formula the right way
Your deep conditioner formula determines whether moisture enters your hair shaft or sits uselessly on top. Lightweight, water-based formulas penetrate low porosity cuticles while heavy creams and butters create coating and buildup. You need ingredients small enough to slip through temporarily opened cuticles, not thick molecules that can only sit on the surface. Application technique matters just as much as product choice because uneven distribution leaves dry patches no matter how good your conditioner is.
Choose penetrating ingredients
Look for deep conditioners with water listed as the first ingredient followed by humectants like glycerin, honey, or aloe vera. These ingredients attract and hold moisture inside your hair shaft after the cuticles close. Avoid products with heavy oils (castor, olive) or thick butters (shea, mango) in the first five ingredients because these molecules cannot penetrate low porosity cuticles even with heat.
Coconut oil and argan oil are exceptions because their molecular structure allows them to enter the hair shaft. Products containing hydrolyzed proteins (wheat, silk, keratin) also work well for deep conditioning for low porosity hair because the hydrolyzation process breaks proteins into small pieces that can penetrate.
Check your current deep conditioner against this comparison:
| Penetrating Ingredients | Coating Ingredients |
|---|---|
| Water, glycerin, honey | Shea butter, castor oil |
| Coconut oil, argan oil | Mineral oil, petrolatum |
| Aloe vera juice | Heavy silicones (dimethicone in first 3 ingredients) |
| Hydrolyzed proteins | Thick creams without water base |
Ingredients matter more than price or brand reputation when treating low porosity hair.
Section and saturate method
Divide your damp, clarified hair into four to six manageable sections using clips. Smaller sections guarantee complete saturation and prevent you from missing areas. Take down one section at a time and apply conditioner generously from roots to ends. Your goal is full coverage, not conservative product use. Low porosity hair needs enough product to coat every strand completely.
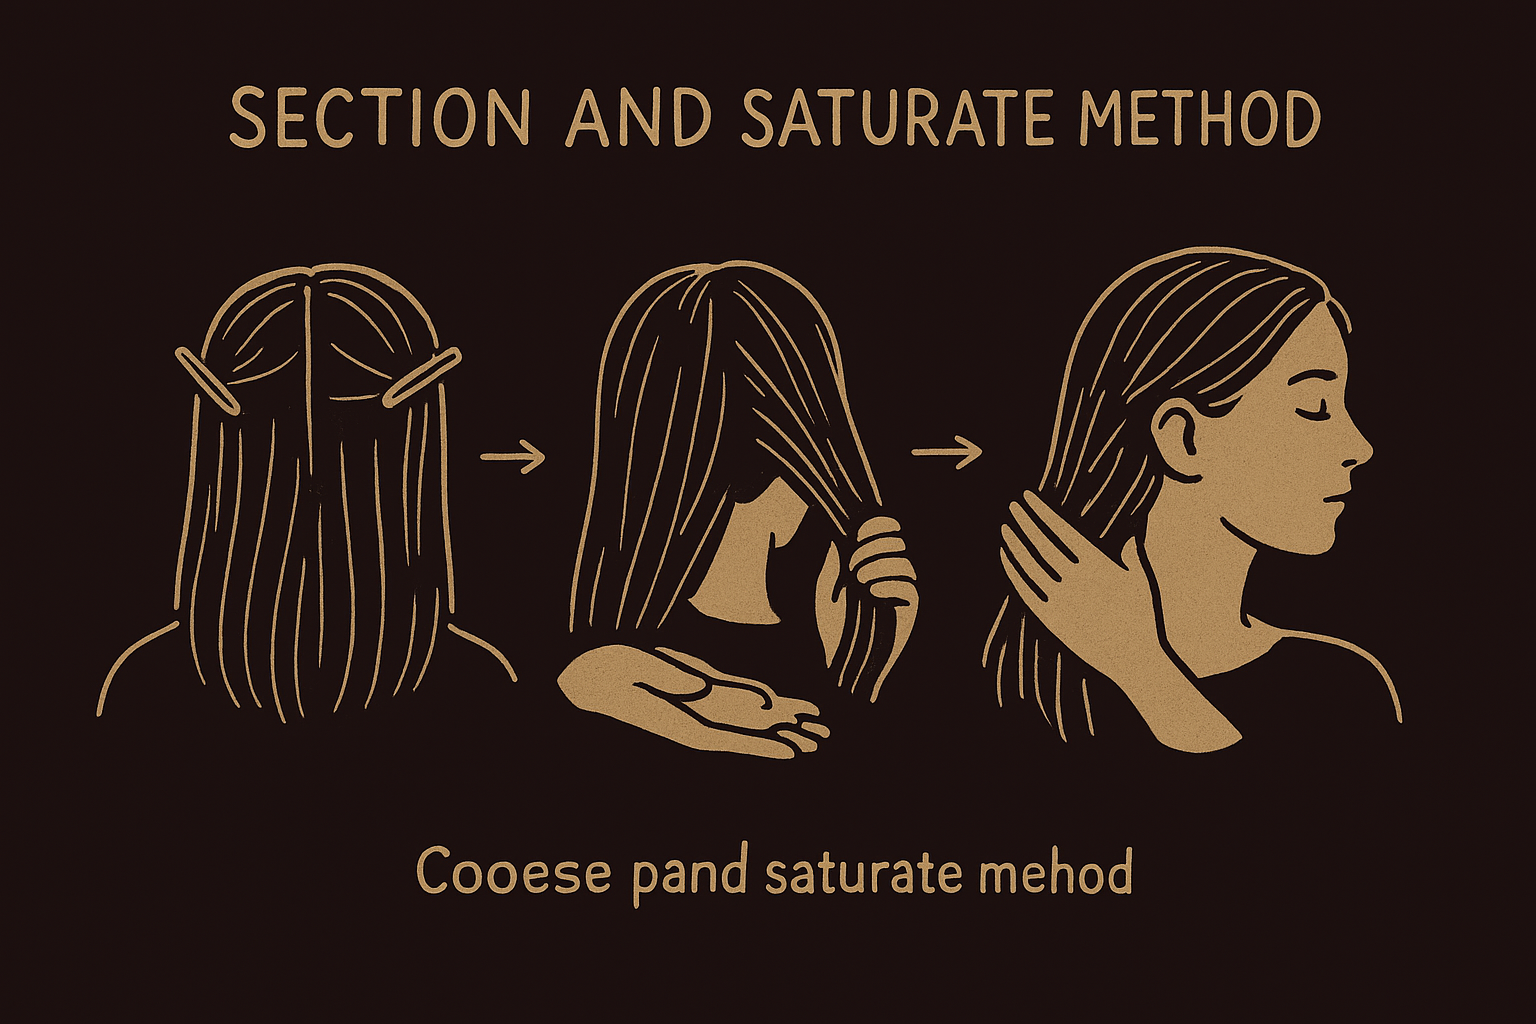
Work the conditioner through each section using your fingers or a wide-tooth comb. Squeeze the section gently to push product into your strands rather than just smoothing it over the surface. This squeezing motion helps force moisture through the cuticle layer. Clip the section back up and move to the next one.
Apply conditioner using this process:
- Take down one section of damp hair
- Pour or scoop a generous amount of conditioner into your palm
- Distribute the product evenly through the section with your fingers
- Use a wide-tooth comb to ensure every strand is coated
- Squeeze the section 3-4 times to push product into the hair shaft
- Twist or clip the section to keep it separate
- Repeat for all remaining sections
Reapply conditioner to any sections that look dry or feel under-saturated. Your hair should look visibly coated with product, almost dripping. Under-application is the most common mistake people make when deep conditioning low porosity hair because they treat it like normal porosity hair that absorbs easily.
Step 4. Use heat, time, and rinsing to lock it in
Heat transforms your deep conditioning treatment from surface coating to actual penetration. Without consistent heat application, your carefully chosen products and perfect sectioning mean nothing because those cuticles remain closed. You need heat to open the pathway, time to let moisture move inside, and a proper rinse to seal everything in place. This step separates successful deep conditioning for low porosity hair from wasted product and continued dryness.
Heat application methods
Cover your product-saturated hair with a plastic cap or processing cap immediately after application. This trapping method keeps moisture from evaporating and maintains contact between product and hair. Sit under a hooded dryer set to medium heat for 20 to 30 minutes, or use a handheld dryer to warm the plastic cap for 5 minutes, then wrap your head in a warm towel for the remaining time.
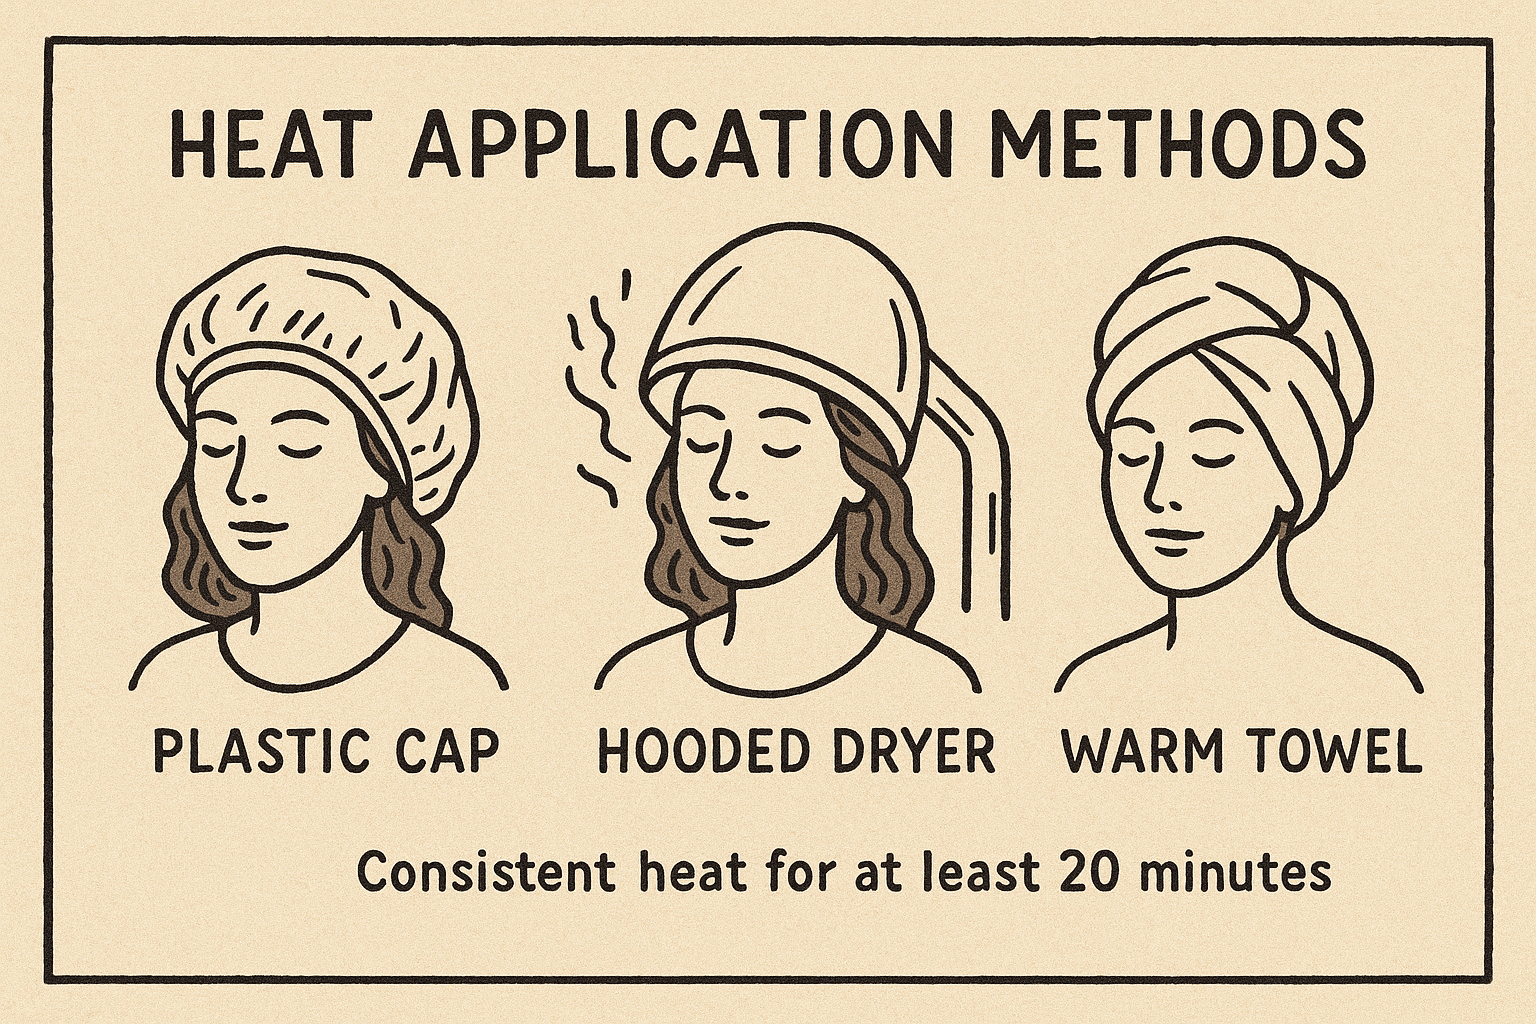
Steam treatments work even better than dry heat because moisture and heat combine to open cuticles more effectively. If you own a hair steamer, use it for 15 to 20 minutes after covering your hair. No steamer? Create steam by running a hot shower, letting your bathroom fill with steam, and sitting in the steamy room for 20 minutes with your capped hair. Heat speeds up the chemical process that allows conditioner molecules to enter your hair shaft.
Consistent heat for at least 20 minutes is required to open low porosity cuticles enough for moisture absorption.
Timing your treatment
Leave your deep conditioner on for 20 to 30 minutes under heat, not longer. Extra time after your cuticles open does not increase absorption and can actually cause protein overload if your conditioner contains hydrolyzed proteins. Set a timer instead of guessing because under-processing wastes the treatment while over-processing creates new problems.
Check your hair after 20 minutes by unwrapping one section. Your hair should feel softer and slightly slippery. If it still feels coated or sticky, the product is sitting on the surface rather than penetrating. This outcome usually means your cuticles need more heat or your product formula is too heavy.
The cool rinse finish
Rinse your hair thoroughly with cool to lukewarm water, never hot water. Cool water closes your cuticles and locks in the moisture you just deposited. Hot water keeps cuticles open and allows the conditioning treatment to rinse right back out. Rinse each section separately to ensure you remove excess product without stripping the moisture that penetrated your strands.
Continue rinsing until the water runs clear and your hair no longer feels slippery. Squeeze sections gently while rinsing to help remove surface product while keeping internal moisture intact. Your hair should feel smooth but not coated when you finish. Any remaining slipperiness means product buildup that will interfere with your next styling session.
Step 5. Build your deep conditioning routine
A single successful deep conditioning session means nothing if you cannot repeat it consistently. Random treatments whenever your hair feels dry create confusion about what works and waste time on guesswork. You need a structured routine that accounts for your hair's unique moisture needs, your product usage, and your styling habits. Consistency reveals patterns and lets you adjust based on actual results instead of assumptions about deep conditioning for low porosity hair.
Set your frequency schedule
Deep condition every one to two weeks based on how much product you use and how often you style your hair. Heavy product users need weekly sessions because buildup accumulates faster and blocks moisture absorption. Light product users can stretch to two weeks between treatments. Never go longer than two weeks because low porosity hair loses moisture slowly but struggles to regain it once dry.
Follow this schedule framework:
| Your Hair Situation | Deep Conditioning Frequency |
|---|---|
| Daily styling with gels, creams, oils | Weekly (every 7 days) |
| Styling 2-3 times per week | Every 10 days |
| Minimal products, protective styles | Every 14 days |
| After chemical treatments or color | Weekly for 4 weeks, then assess |
| During dry winter months | Weekly regardless of product use |
Mark your calendar with specific dates instead of vague plans to condition "when needed." Your hair responds better to predictable moisture cycles than sporadic treatments. Schedule your sessions on days when you have 60 to 90 minutes available for the complete process from clarifying through final styling.
Track what works
Keep a simple log of each deep conditioning session and your results. Write down the products you used, how long you applied heat, and how your hair felt immediately after and three days later. This tracking reveals which combinations work best for your specific hair and eliminates products that waste your time.
Recording your routine removes guesswork and builds a proven system based on your actual results.
Adjust your routine every four sessions based on what your log shows. If your hair feels dry by day five after conditioning, increase your frequency or leave heat on for five extra minutes. Notice patterns in seasonal changes too because your hair needs more moisture during winter and may handle longer intervals between treatments in humid summer months. Your log becomes your personal guide instead of following generic advice that may not match your hair's behavior.
Extra tips, mistakes, and DIY recipes
Most people master the basic deep conditioning process but still miss smaller details that multiply their results. These overlooked elements separate acceptable treatments from transformative ones. You can follow every major step correctly and still leave moisture on the table by ignoring timing details, water temperature, or ingredient ratios. Common mistakes also sabotage treatments before they start, creating frustration that makes you abandon methods that would work if executed properly.
Common mistakes that block results
The biggest error is applying deep conditioner to hair that is too dry or too wet. Bone-dry hair cannot transport conditioner molecules into the shaft, while dripping wet hair dilutes your product so much that active ingredients lose effectiveness. Your hair should be damp enough to feel cool when touched but not wet enough to drip water.
Another mistake is using products with silicones as primary ingredients because these molecules are too large to penetrate low porosity cuticles. Check your ingredient list and avoid anything with dimethicone, cyclomethicone, or amodimethicone in the first five positions. These ingredients create temporary smoothness through coating rather than actual conditioning, and they build up quickly on low porosity hair.
Silicone-heavy products feel good initially but prevent real moisture absorption and create buildup that blocks future treatments.
DIY recipe templates
Make a basic penetrating mask by combining these measured ingredients:
Lightweight Moisture Recipe
- 2 tablespoons coconut milk (canned, full fat)
- 1 tablespoon raw honey
- 1 tablespoon melted coconut oil
- 5 drops glycerin
Mix ingredients in a bowl until smooth. Apply to damp, sectioned hair and process under heat for 25 minutes. This formula provides humectants that pull moisture in plus coconut oil small enough to penetrate your cuticle layer.
Protein Balance Recipe
- 1 whole egg
- 1 tablespoon plain yogurt
- 1 teaspoon argan oil
- 1 teaspoon aloe vera gel
Whisk the egg first, then blend remaining ingredients. Apply immediately to avoid separation. This mask delivers protein for strength without heavy ingredients that coat your strands. Use this recipe every four weeks if your hair feels weak or stretchy, but not more frequently because protein overload causes brittleness.
Store leftover DIY masks in the refrigerator for maximum three days and bring to room temperature before applying. Fresh batches work better than stored ones because ingredients like honey can separate or lose potency over time.
Bringing it all together
You now have a complete system for deep conditioning low porosity hair that actually delivers results. Start with clarifying to remove barriers, apply lightweight water-based products to damp sectioned hair, and use consistent heat for 20 to 30 minutes. Follow this process every one to two weeks based on your styling product usage. Your success depends on executing each step correctly rather than hoping random products will magically fix persistent dryness.
Track every session and adjust your routine based on what your hair shows you over time. The float test confirmed your porosity type, clarifying removed buildup barriers, and strategic heat application opened those stubborn cuticles. Properly conditioned hair transforms your entire styling routine because products actually work on hydrated strands instead of fighting constant dryness. When you're ready to style your newly moisturized texture, explore Scatter's performance-focused styling products designed specifically for textured hair that needs products to actually work.