

How to Style Long Bangs with Curly Hair: Step-by-Step
Long bangs and curly hair sound like a bad combination until you get the technique right. One humid morning and your bangs shrink into a frizzy triangle while the rest of your curls stay put, or they curl so tight they poke you in the eye by noon. If you've been searching how to style long bangs with curly hair and getting generic straight-hair advice, that's the problem. Curly bangs need their own rules for cutting, wetting, and shaping.
This guide gives you the actual steps: how to section your bangs before you wash, which products keep them defined without weighing them into your eyes, and how to diffuse curly bangs so they curl with your face instead of against it. We also cover the specific case of curtain bangs on curly hair, since the part and the layers matter more than most tutorials admit.
We've spent a lot of time here thinking about what actually works on textured hair, not just what looks good in a photo. So expect real techniques you can repeat every wash day, plus product pairings that hold curl pattern through the day without stiffness or flaking.
What you need before you start styling curly bangs
Grab the wrong products and your bangs will fight you before you even start. Curly fringe needs lighter hold than the rest of your head because it sits closer to your skin and gets touched, pushed, and repositioned all day. Heavy creams or butters that work fine on your crown will weigh bangs down fast and drag your curl pattern into a flat swoop by noon.
Tools that actually matter
Skip the brush. A wide-tooth comb or your fingers are the only detangling tools your bangs need when wet, since brushing curly hair breaks up the curl clumps you're trying to build. Here's what to have on hand before wash day:
- A microfiber towel or old t-shirt (regular towels rough up the cuticle and cause frizz)
- A wide-tooth comb for detangling in the shower
- A lightweight leave-in conditioner
- A curl cream or gel with light to medium hold
- A diffuser attachment for your blow dryer
- Bobby pins or a small clip for pinning bangs back while the rest dries
Bangs need lighter product and gentler tools than the rest of your curls, because they sit closest to your face and take the most daily wear.
Know your cut before you style
How your bangs were cut changes how you'll style them. Curtain bangs, cut with a center part and swept to either side, need a different product placement than a blunt fringe cut straight across. If you're working with curtain bangs on curly hair, the layers should already be cut curl by curl, dry, so you're not fighting shrinkage after the fact. Ask your stylist about this before your next trim. If your bangs were cut wet and straight, expect more shrinkage than you planned for, and budget extra length. Knowing your specific cut helps you predict exactly how much curl you'll get once everything sets, so you're not guessing every morning.
Step 1. Prep your bangs while still damp
Start while your bangs are still soaking wet, right after you rinse conditioner out. Curly hair sets its pattern from the first product you apply on wet strands, so this window matters more than any step that follows. Wringing water out with a microfiber towel first keeps the cuticle smooth instead of roughing it into frizz, which is the fastest way to ruin a good curl day before it starts.
Layer product from thinnest to thickest
Apply a lightweight leave-in first, working it through with your fingers, then follow with a small amount of curl cream just on the bangs. This order keeps you from overloading the front section, which is exactly how you end up with a heavy, flat fringe by afternoon. If you're figuring out how to style bangs curly hair without them looking greasy, product order is the fix, not less product overall.
Apply the lightest product first and save the heavier cream for last, or your bangs will weigh down before they even dry.
Separate bangs from the rest
Clip or twist your bangs away from the rest of your head once product is in. This stops them from tangling into the surrounding curls while everything dries, which saves you a rough detangling session later.
Step 2. Diffuse or air-dry to set the curl pattern
Once product is worked through, you have two paths: diffuse for volume and speed, or air-dry for the least frizz. Both work, but they call for different handling once your bangs are still clipped away from the rest of your head.
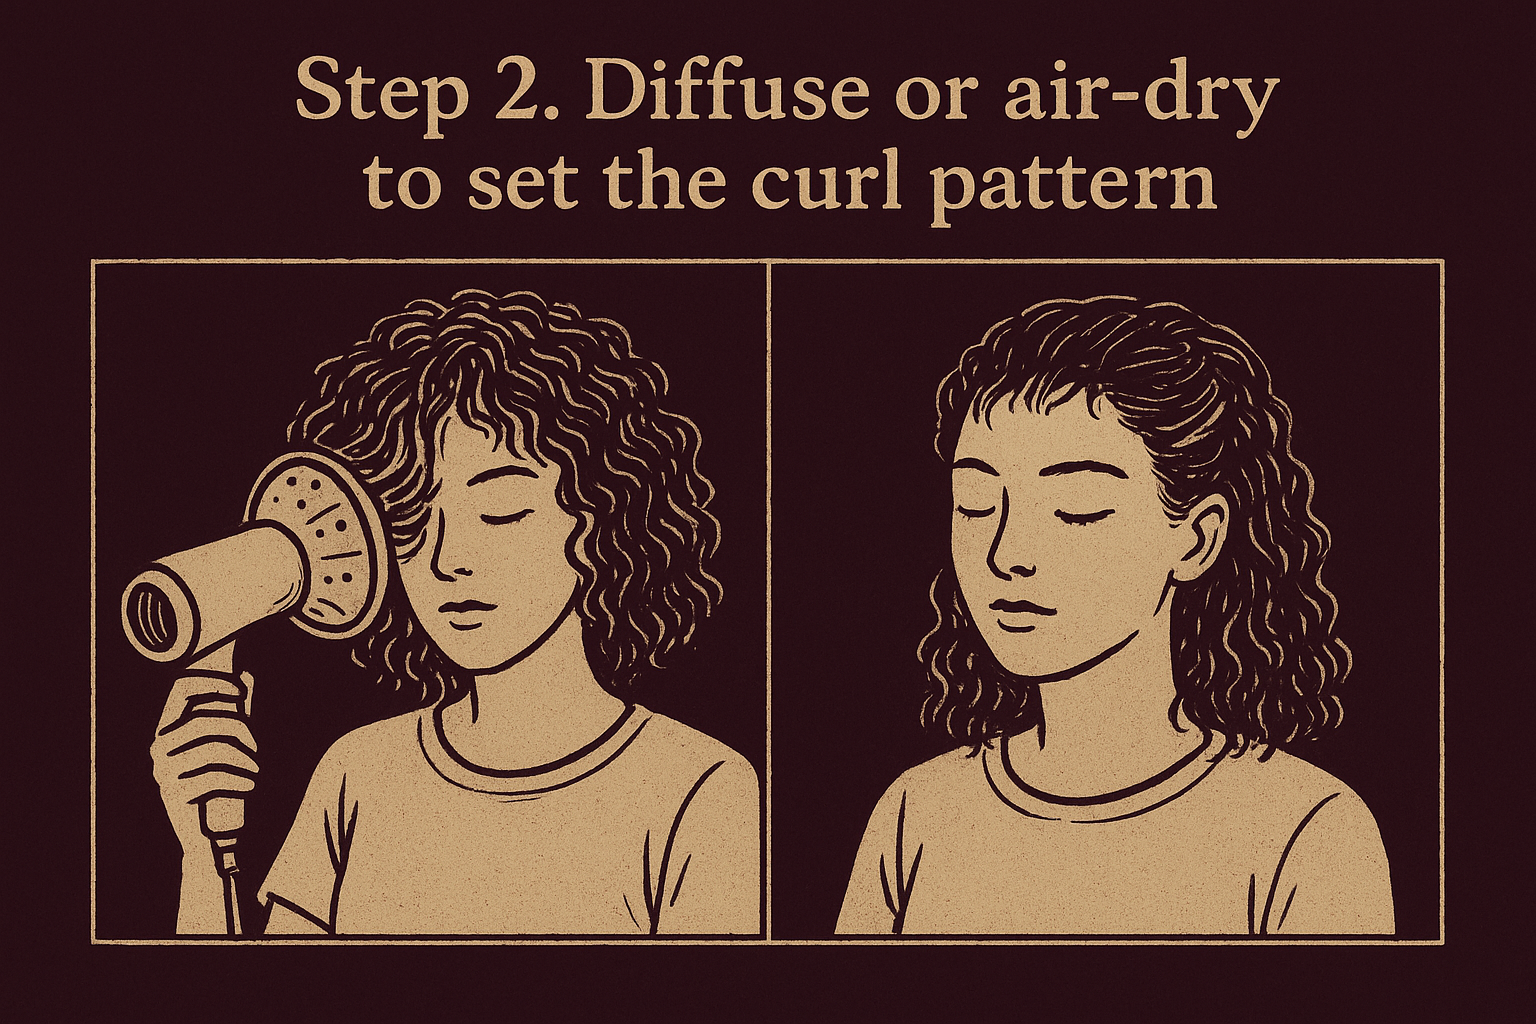
Diffusing without frying your fringe
Set your dryer to low heat and low speed, then cup the diffuser under your bangs and hold for a few seconds before moving on. Rushing this step is how you end up with frizzy curly bangs instead of defined ones, since fast, hot air scatters the cuticle before curls have a chance to clump. Keep the diffuser moving slowly and never point it straight down at your roots.
Low heat and patience set your curl pattern; high heat and rushing undo everything you just did.
Air-drying when you have the time
If you're not in a rush, skip the dryer entirely and let bangs air-dry while clipped back. This produces the softest, least frizzy result, but it takes longer and works best on lower humidity days. Either method sets your curl pattern for the day, so pick the one that fits your morning.
Step 3. Shape, separate, and add volume
Once your bangs are dry, resist the urge to touch them right away. Curly hair looks its worst mid-transition, but it settles once you scrunch out the crunch and break up any cast the gel left behind. This is where you finally get to see your actual curl pattern and decide how you want it to sit.
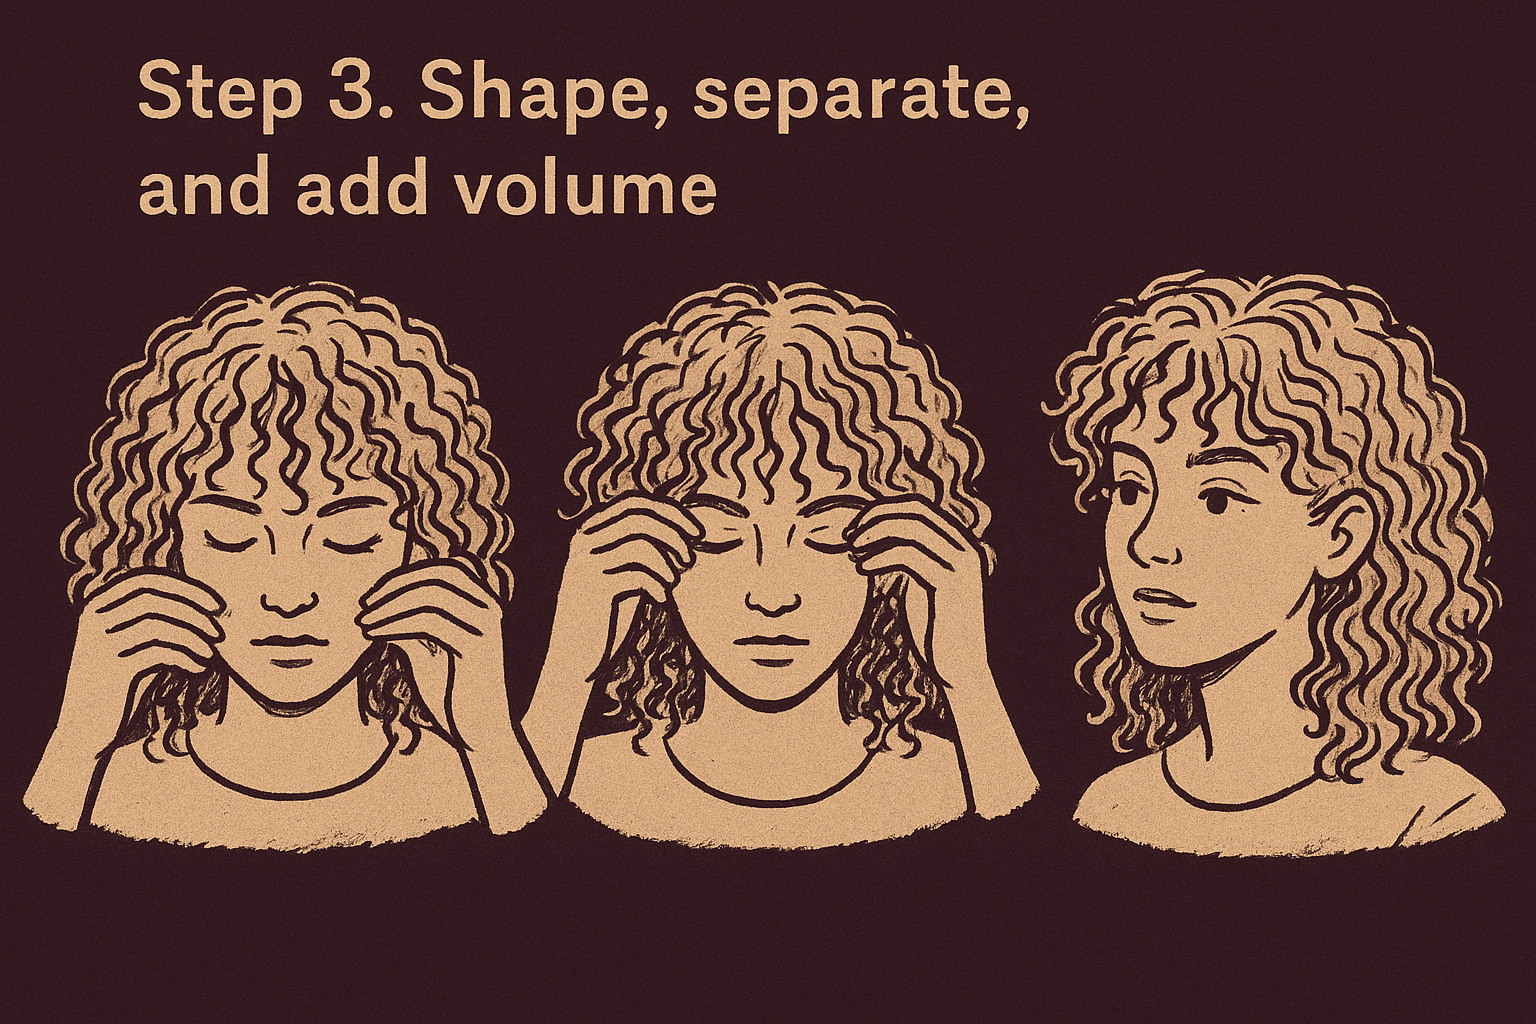
Scrunch out the cast, then separate
Cup your hands under your bangs and scrunch gently to crack the gel cast without pulling curls apart. Once that's done, use your fingers, not a comb, to separate clumps into individual pieces. This is the step that turns how to style bangs for curly hair from flat and helmet-like into something with actual movement and shape.
Scrunching cracks the cast; separating with fingers gives you shape without frizz.
Add volume where you need it
Flip your bangs back at the root with your fingers for a few seconds while a bit of warm air hits underneath, then release. This lifts the base without disturbing the curl clumps you just built. For curtain bangs on curly hair, this root lift matters most near the part, since that's where flatness shows first. A light shake at the crown finishes the volume without undoing your work.
Step 4. Refresh your bangs throughout the day
Bangs work harder than the rest of your curls. They touch your forehead, catch sweat, and get pushed around every time you check your phone or put on a hat. By mid-afternoon, even a perfect morning set can go flat or frizzy, and that's normal, not a sign you did something wrong earlier.
Water-based refresh, not a full re-wet
Skip running your whole head under water. Instead, mist your bangs lightly with a spray bottle, then rub a small amount of leave-in or curl cream between your palms and scrunch it in. This wakes the curl pattern back up without stripping the shape you built this morning.
- Spray bottle with water, not a soaked hand
- A pea-sized amount of leave-in conditioner
- Finger-scrunch upward toward your scalp
A light mist and a scrunch beats a full re-wash every time your bangs start to fall.
Handle humidity and sweat without starting over
On humid days, keep a small anti-frizz serum or oil in your bag and smooth a drop over dry bangs if they start swelling. If sweat flattens them at the gym, the same spray-and-scrunch method works once you've toweled off. This is the fastest way to keep frizzy curly bangs in check without redoing your whole routine.
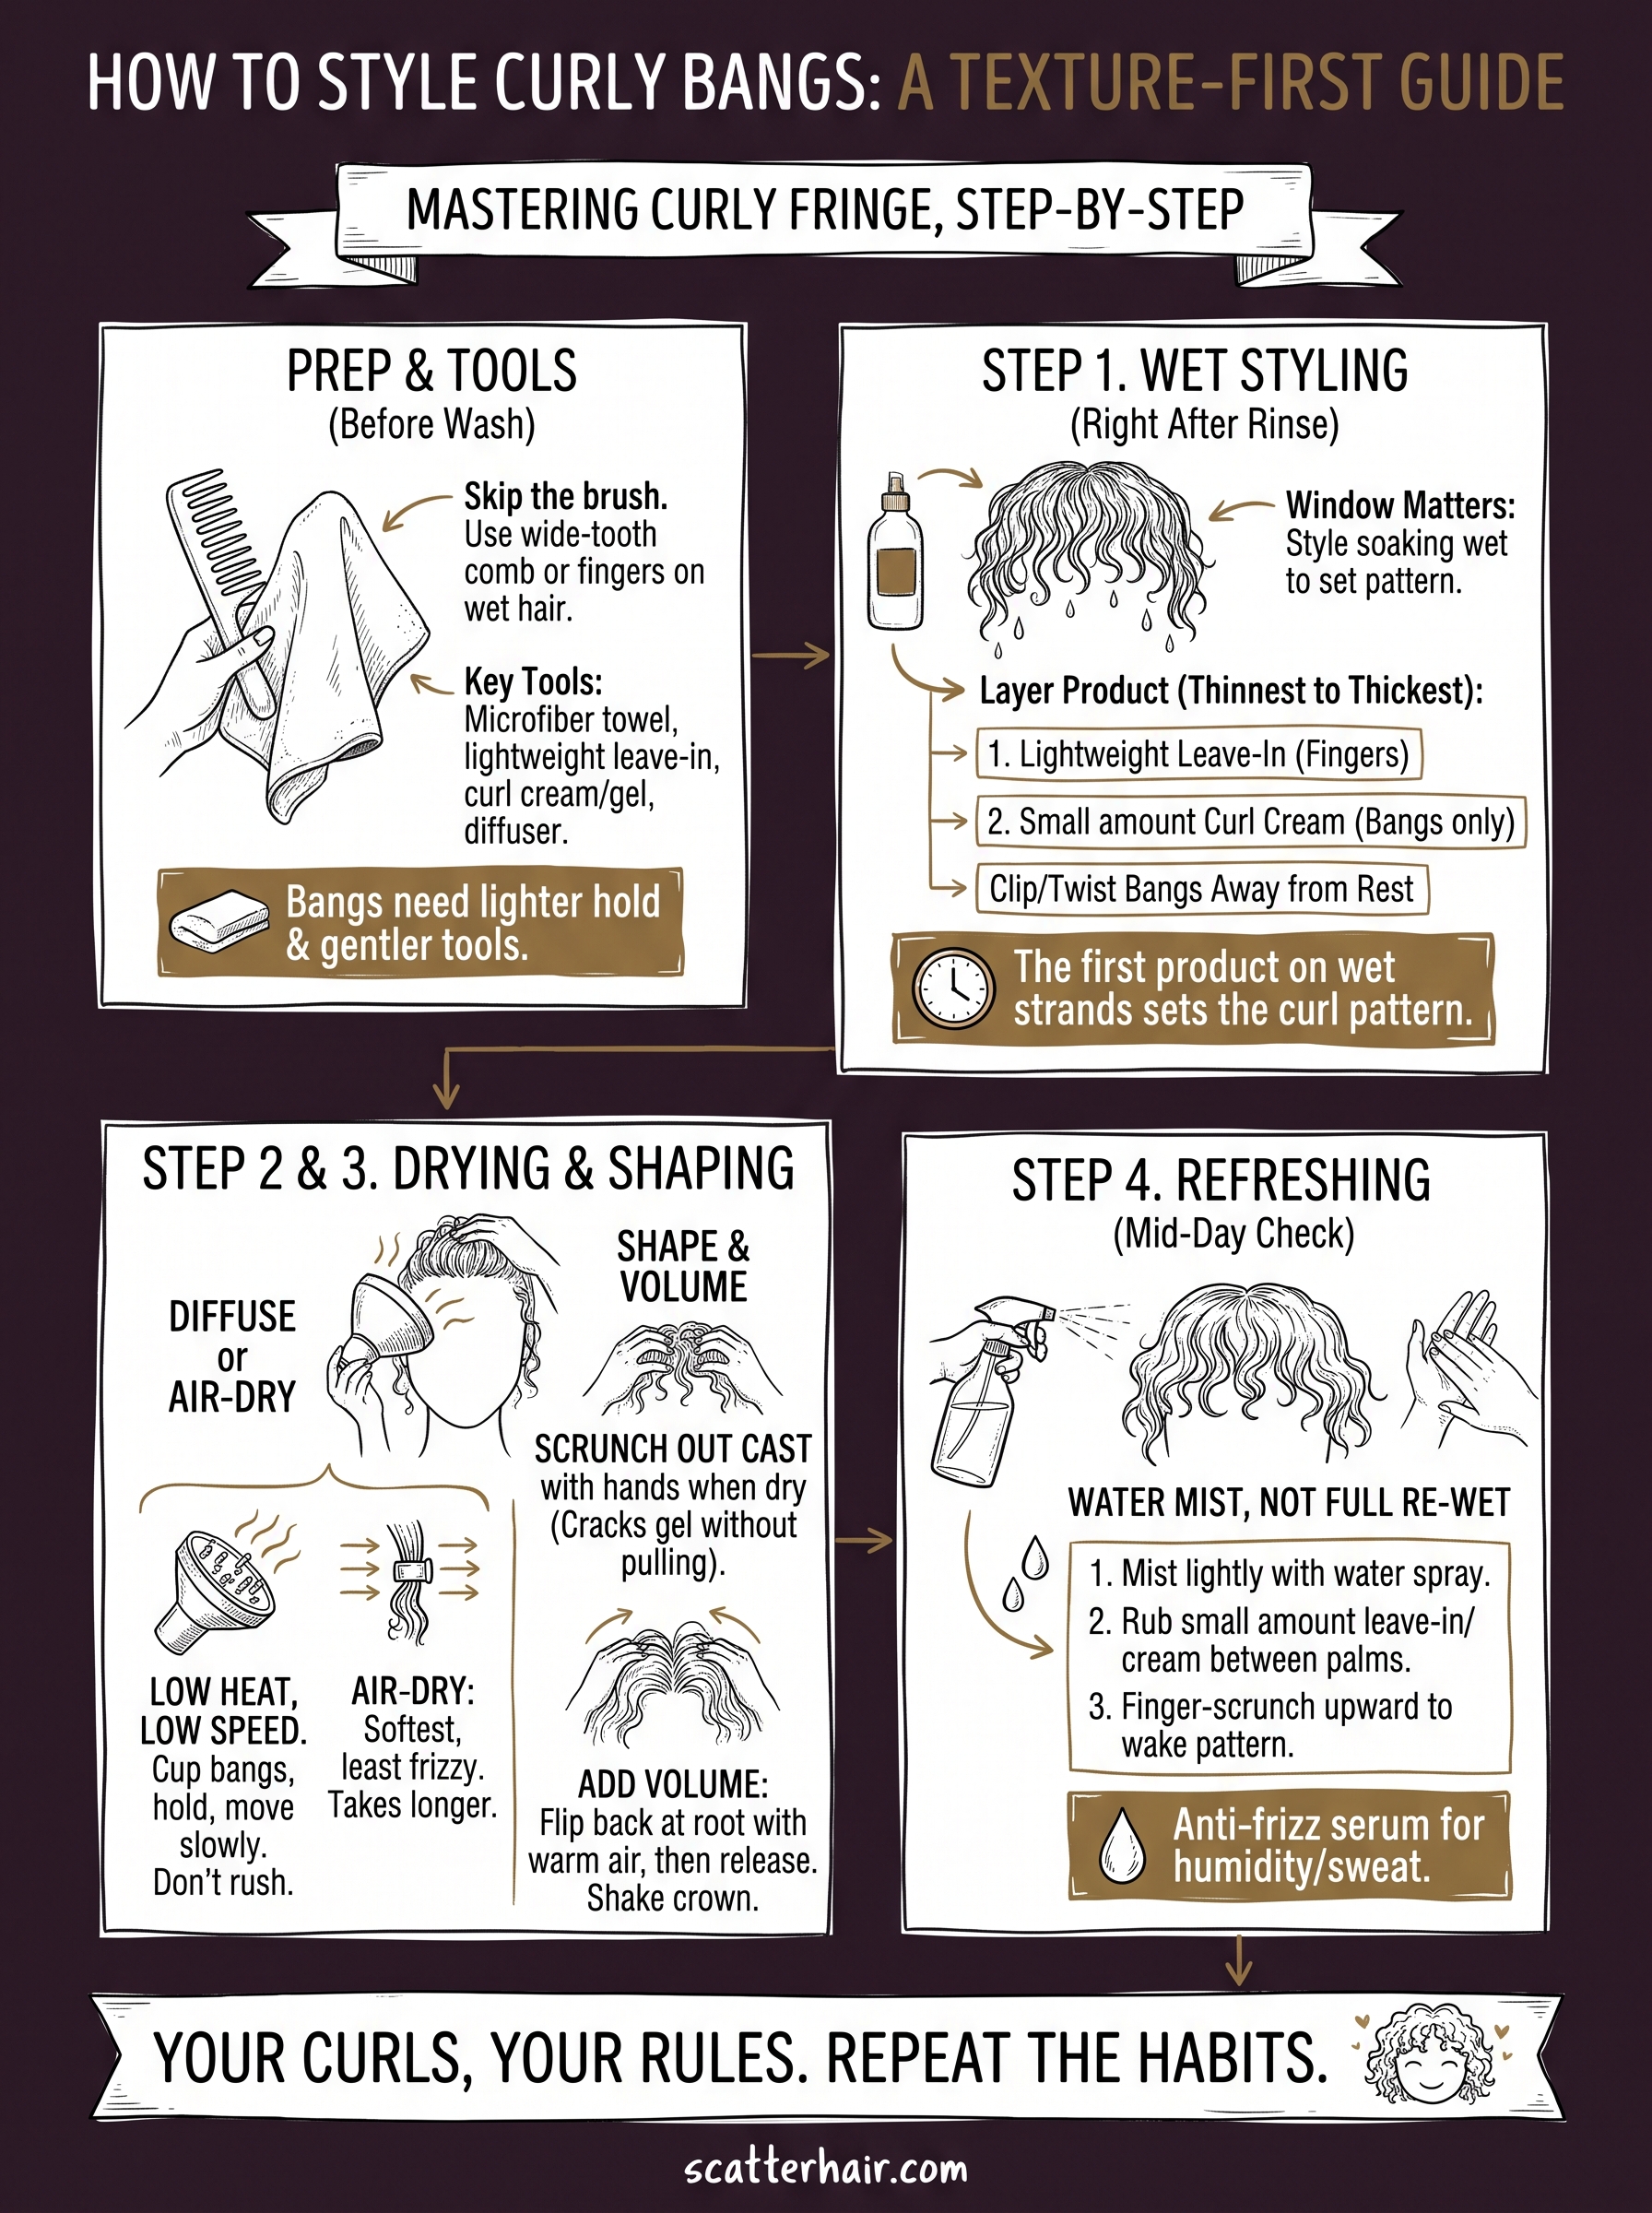
Your curls, your fringe, your rules
Getting curly bangs right comes down to a few habits repeated correctly, not a complicated routine. Prep them wet, choose diffusing or air-drying based on your morning, scrunch out the cast without pulling curls apart, then refresh with water and a little product when the day wears them down. Once you know how to style long bangs with curly hair this way, the guesswork disappears and your fringe starts working with your face shape instead of against it.
Stop borrowing tips built for straight hair and build a routine around what your curl pattern actually needs. That's the whole difference between bangs that fight you and bangs that finally cooperate. Curly-specific products matter more here than almost anywhere else on your head, since bangs get touched, sweated on, and rained on more than any other section.
If you want styling products actually built for textured hair, join the Scatter waitlist and get early access when we launch.