

Split Ends on Curly Hair: How to Trim and Prevent Them
If you have curly hair, you already know the struggle: dryness, frizz, and tangles that seem to appear out of nowhere. But one of the most persistent issues, split ends on curly hair, often goes unnoticed until the damage is already visible. Because curls twist and coil, splits can hide along the strand, quietly working their way up and robbing your hair of definition and bounce.
The good news? You don't have to keep trimming away length you worked hard to grow. With the right approach to prevention and care, you can keep split ends under control and maintain healthy curls that actually hold their shape. That's exactly the kind of effortless styling experience we're building toward here at Scatter, products and knowledge that work with your texture, not against it.
This guide breaks down what causes split ends in curly hair, how to spot them early, and what you can do to treat and prevent them, without sacrificing your curl pattern or length.
Split ends on curly hair basics
A split end forms when the protective cuticle layer breaks down and the inner strand begins to fray. The tip separates into two or more pieces, which is the classic split you have probably spotted before. There are also mid-shaft splits, which form along the length of the strand rather than at the tip, and these are often harder to catch early.
What causes split ends in curly hair
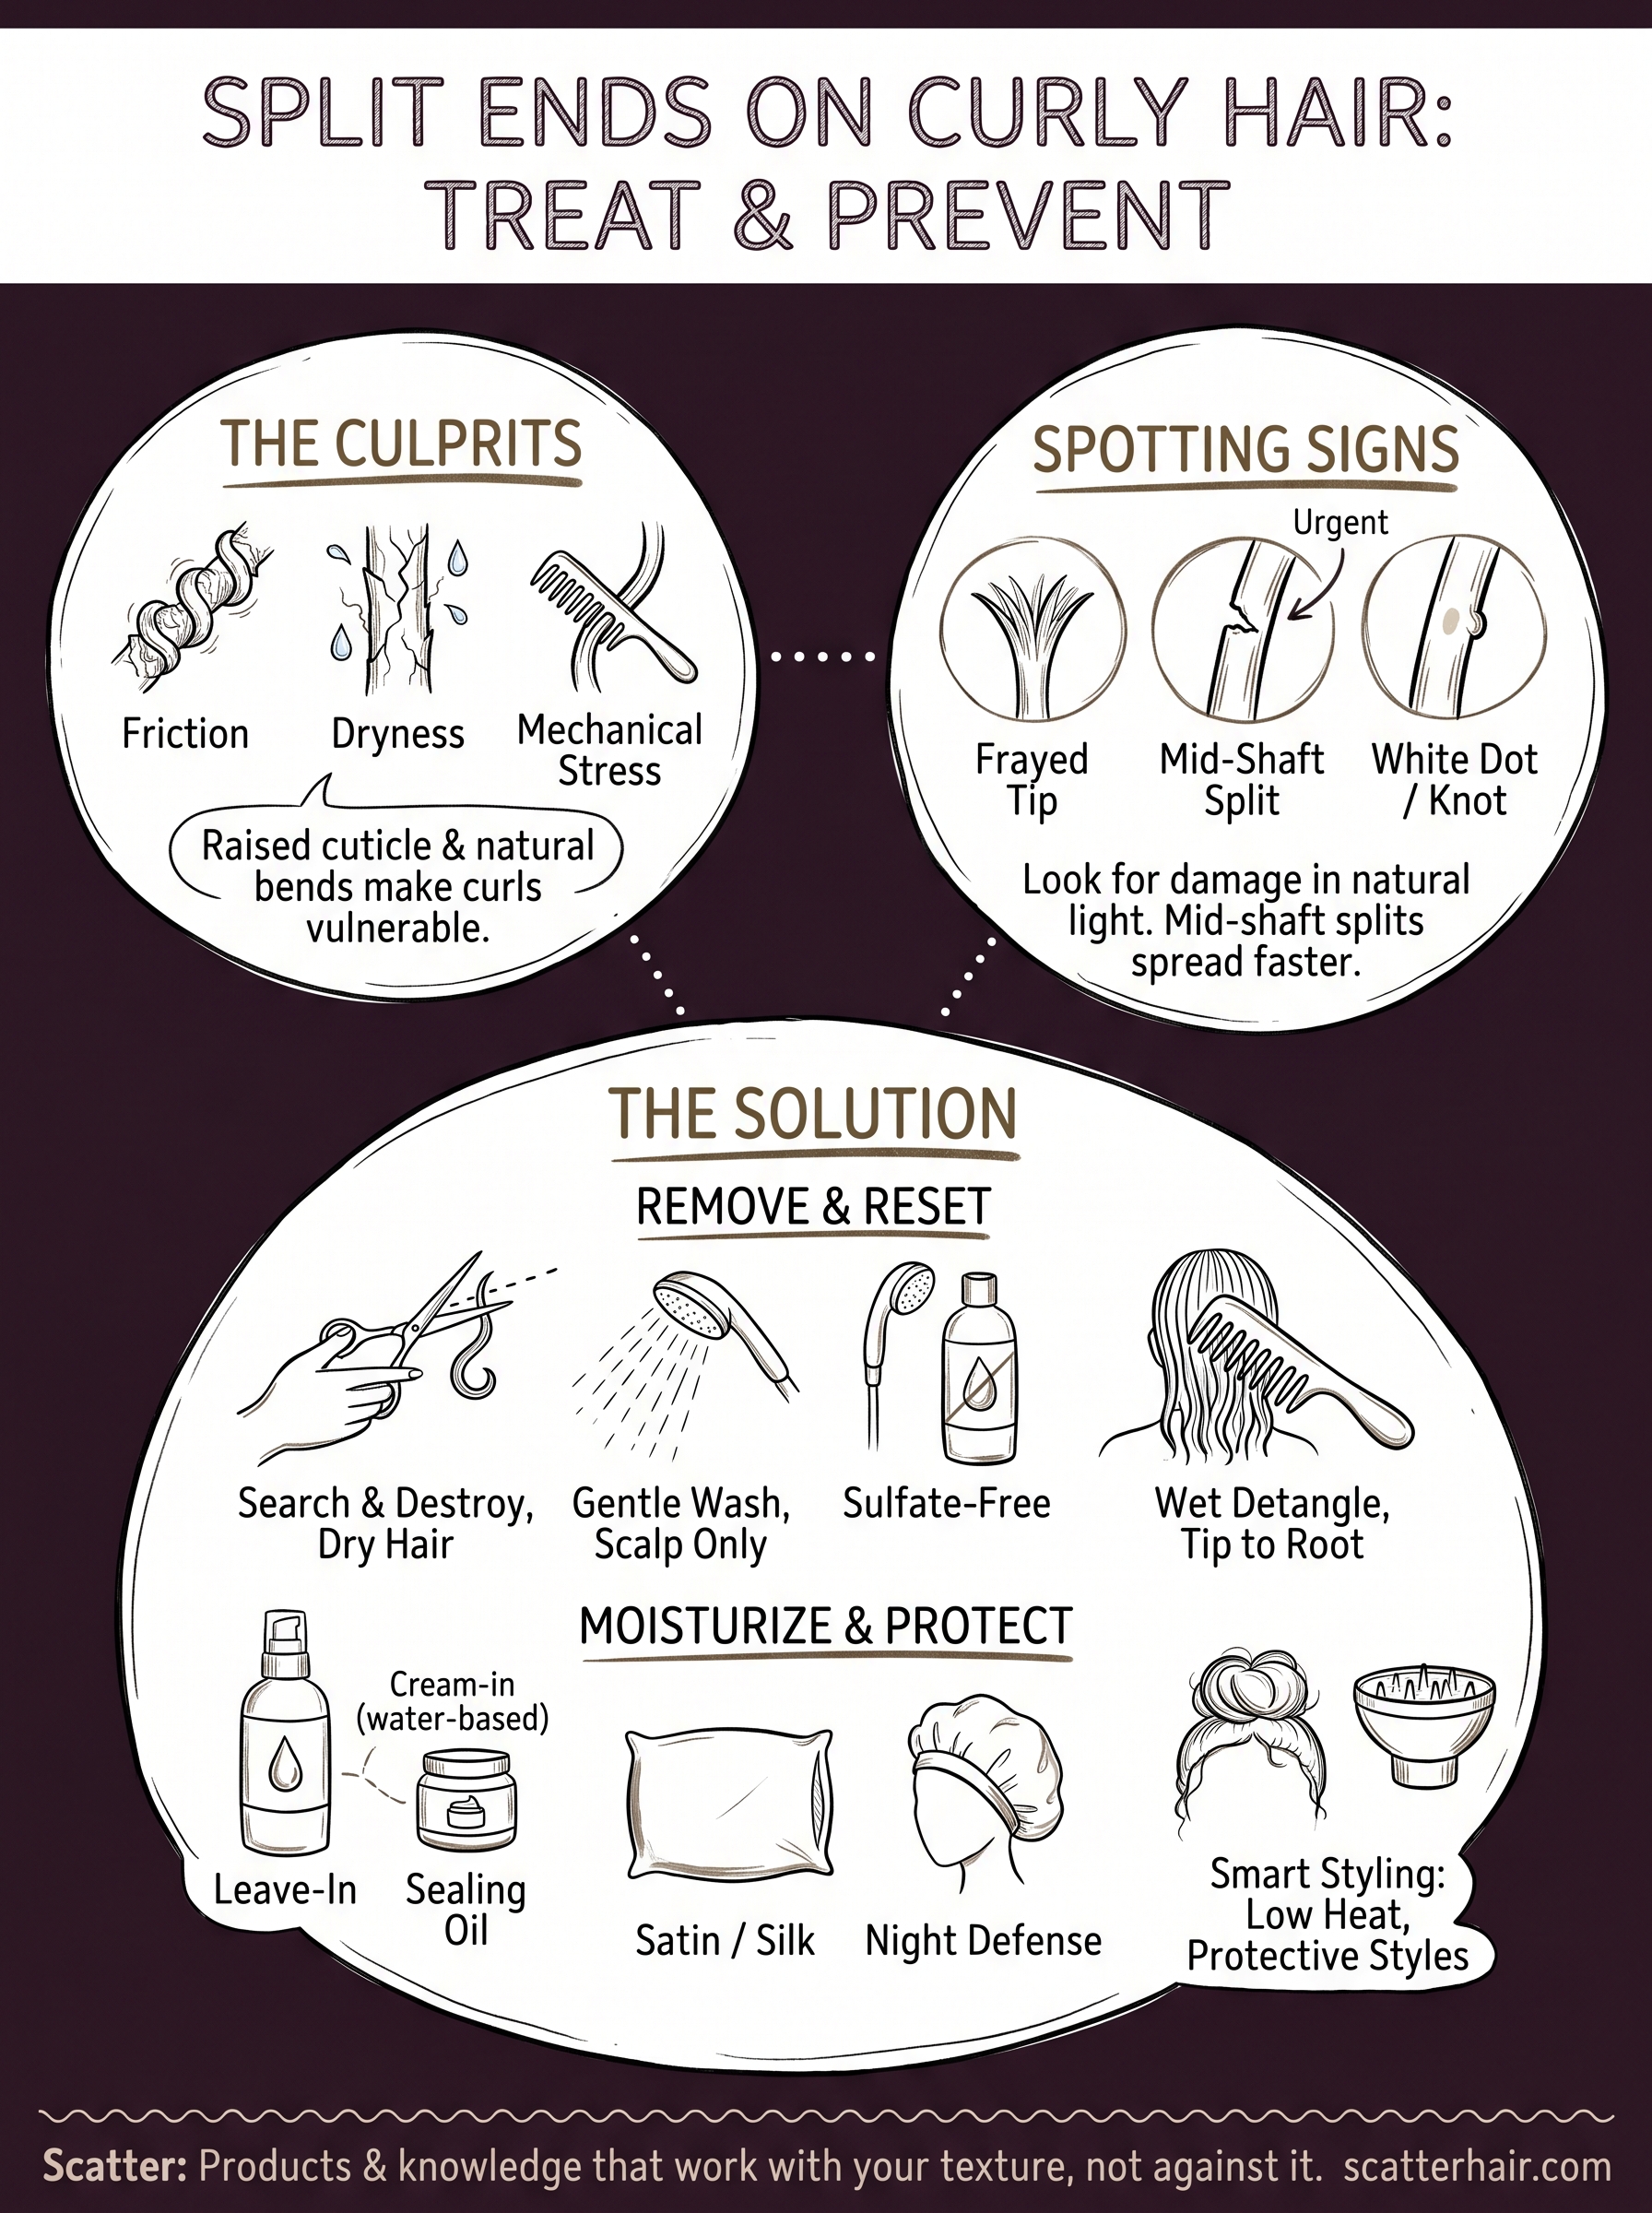
The main drivers are friction, dryness, and mechanical stress. Every time you detangle dry or style without enough slip, you put stress on the cuticle. Heat tools and chemical treatments add to the damage. For curly hair specifically, natural oils from the scalp struggle to travel all the way down a coiled strand, so your ends often run dry by default.
Dry ends are always the first to break. When your ends miss out on consistent moisture, splits form faster and spread further up the strand.
Why curly hair is more vulnerable
Curly hair has a naturally raised cuticle compared to straight hair. Those lifted edges snag on each other during every wash, detangle, and style session. The bends and coils in each strand also create natural stress points where the hair is more likely to fracture under tension.
Split ends on curly hair are also harder to spot early. Because strands spiral and clump together, a damaged tip can tuck into your curl pattern and hide until the split has already traveled up the shaft. Knowing what to look for, and where, gives you a real head start on keeping your curls healthy.
Step 1. Confirm you have split ends
Before you treat anything, you need to know what you're actually dealing with. Split ends on curly hair hide inside curl clumps easily, so a quick visual scan of your overall style won't cut it. Pull a single strand away from your curl cluster and hold it up to natural light for a clear look.
Signs to look for
You're checking for specific visual cues that tell you the strand is damaged. A classic split shows two or more separated tips at the very end of the strand. A mid-shaft split looks like a small gap or nick along the length, not at the tip, and these are the ones you need to catch fast.
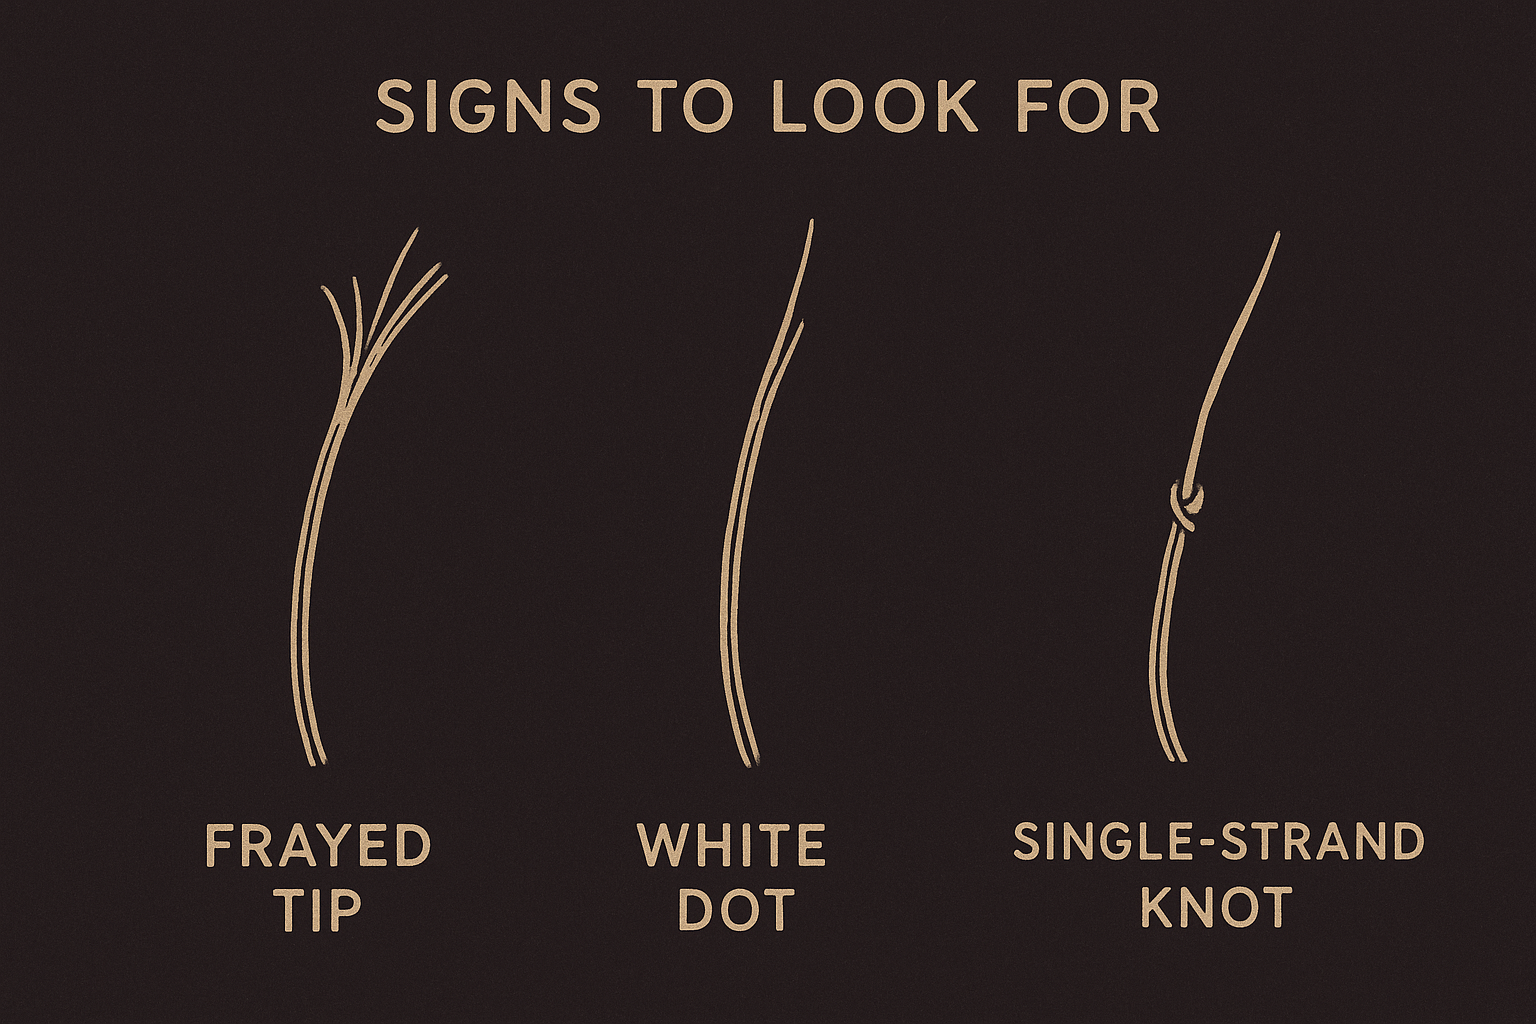
If you find mid-shaft splits, treat them as urgent. They spread up the shaft faster than tip splits and lead to breakage at a point where you actually notice the length loss.
- Frayed tip: the end fans out like a tiny brush
- White dot: a small pale speck on the shaft marks a weak point about to snap
- Single-strand knot: a tiny knot near the tip that creates a split as it tightens
Step 2. Remove split ends without losing curls
Once you have confirmed split ends on curly hair, the next move is removing them cleanly. Pulling or ripping a split off only creates a new rough edge that frays again fast. You need sharp hair shears for this, not regular scissors, which crush the strand instead of cutting it cleanly.
How to cut without disrupting your curl pattern
Work on dry, detangled hair so you can see where each curl naturally falls and avoid cutting into healthy length by accident. Twist a small section loosely, then snip only the visible splits. This method is called search and destroy, and it targets individual damaged tips without committing to a full trim.
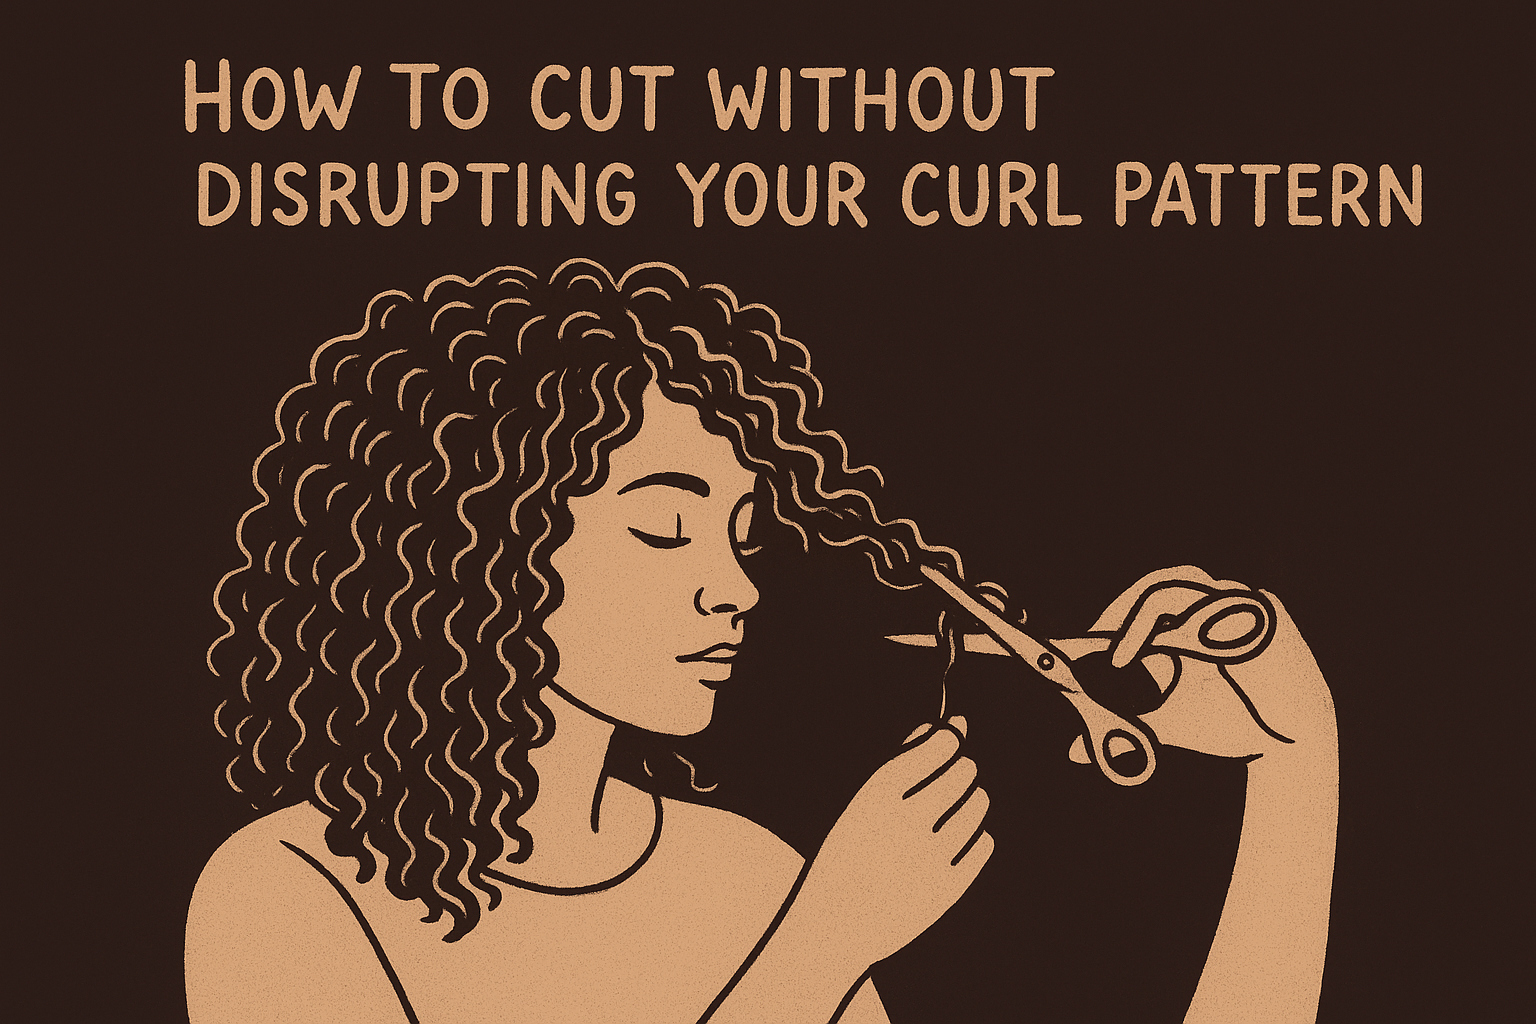
Cut about a quarter inch above the split, not right at it. Cutting exactly at the damage leaves the weakened shaft just above exposed to the same stress.
- Use hair shears only, never craft or kitchen scissors
- Work in small sections, one curl cluster at a time
- Trim on dry hair to preserve your natural curl shape
Step 3. Reset your wash and detangle routine
Your wash and detangle routine creates more friction than almost anything else you do to your hair. That friction is one of the biggest causes of split ends on curly hair, and resetting those habits can stop new damage from forming at the source.
Friction during wash and detangle sessions breaks the cuticle before styling even begins, so this is the step where prevention does the most work.
Wash with less friction
Apply cleanser only to your scalp and let rinse water carry it down without scrubbing the length. Choose a sulfate-free shampoo to protect your ends from unnecessary moisture loss.
- Avoid piling hair on top of your head while washing
- Let water flow downward to minimize tangling during the rinse
Detangle the right way
Always detangle on wet, conditioned hair using a wide-tooth comb or your fingers. Start at the tips and work upward toward the root so you release knots without dragging them through the full length.
- Use enough slip to let the comb glide without pulling
- Work in small sections to keep tension low throughout
Step 4. Lock in moisture and protect the ends
Once you remove visible damage, keeping moisture locked into the strand is what stops split ends on curly hair from coming back fast. Dry ends fray again quickly if you skip this step because your ends don't retain water on their own without some help.
Moisture retention works best when you layer products: a water-based leave-in first, then a cream or oil to seal it in before it evaporates.
Apply a leave-in and seal
Start with a water-based leave-in conditioner on soaking wet hair, focusing product on your ends. Follow immediately with a sealing butter, cream, or oil to trap that moisture before it evaporates off the strand.
- Apply your sealing product last, always after the leave-in
- Use lighter oils like argan or jojoba on fine curls to avoid buildup
Protect your ends at night
Cotton pillowcases strip moisture from your ends while you sleep, undoing the work you just put in. Switch to a satin or silk pillowcase, or sleep in a satin bonnet to protect your ends and cut down on overnight friction.
Step 5. Prevent split ends with smart styling
Your styling habits either protect your ends or wear them down. Split ends on curly hair form faster when you expose your strands to repeated heat, rough handling, or styles that pull at the same weak points day after day.
The less manipulation your ends experience daily, the longer they stay intact between trims.
Limit heat and handle with care
Heat tools are one of the fastest ways to degrade the cuticle. If you use a diffuser, keep it on low heat and low speed to dry your curls without forcing extra friction. Skip flat irons and curling wands as much as possible, and always apply a heat protectant when you do use them.
Choose protective styles strategically
Tucking your ends away into buns, twists, or braids reduces daily exposure to friction and environmental stress. Avoid styles that pull tightly at the hairline or nape, since those areas already take on extra stress and split faster under tension.
- Keep elastic bands away from your ends
- Rotate your protective styles to avoid stressing the same sections repeatedly
A simple plan to keep ends healthy
Managing split ends on curly hair comes down to three consistent habits: trim the damage early, keep your ends moisturized, and reduce the friction that causes new splits to form. You don't need to overhaul everything at once. Start with one change this week, whether that's switching to a satin pillowcase or detangling on wet, conditioned hair, and build from there.
Regular search-and-destroy trims every six to eight weeks keep splits from traveling up the shaft before you catch them. Pair that with a moisture-sealing routine after every wash, and you'll notice your curls holding their shape longer between cuts. Small, consistent choices protect your length better than any single product ever will.
Your curls deserve products formulated to work with your texture, not against it. Explore what Scatter is building for textured hair and sign up for early access before the launch.