

How To Do A Braid Out On Natural Hair For Big Definition
A braid out on natural hair remains one of the most reliable ways to achieve stretched, defined curls without heat damage. It's low-effort, versatile, and works across multiple hair textures, from loose waves to tight coils. But here's the catch: the difference between frizzy, undefined results and bouncy, lasting definition often comes down to technique and product choice.
At scatterhair, we're obsessed with making textured hair styling actually effortless. That means understanding what works, what doesn't, and why your braid outs might be falling flat. This guide breaks down the entire process step by step, from prep to takedown, with specific tips for Type 4 and 4c hair that often gets overlooked in generic tutorials.
Whether you want big, fluffy curls or tighter, more uniform waves, you'll walk away knowing exactly how to customize your braid out for maximum definition and longevity. Let's get into it.
What you need for a clean braid-out
You don't need a complicated product lineup to get a great braid out on natural hair. The key is quality over quantity, focusing on products that provide slip, hold, and moisture without creating buildup. Most failed braid outs stem from using the wrong combination or skipping essential steps, not from lacking expensive tools.
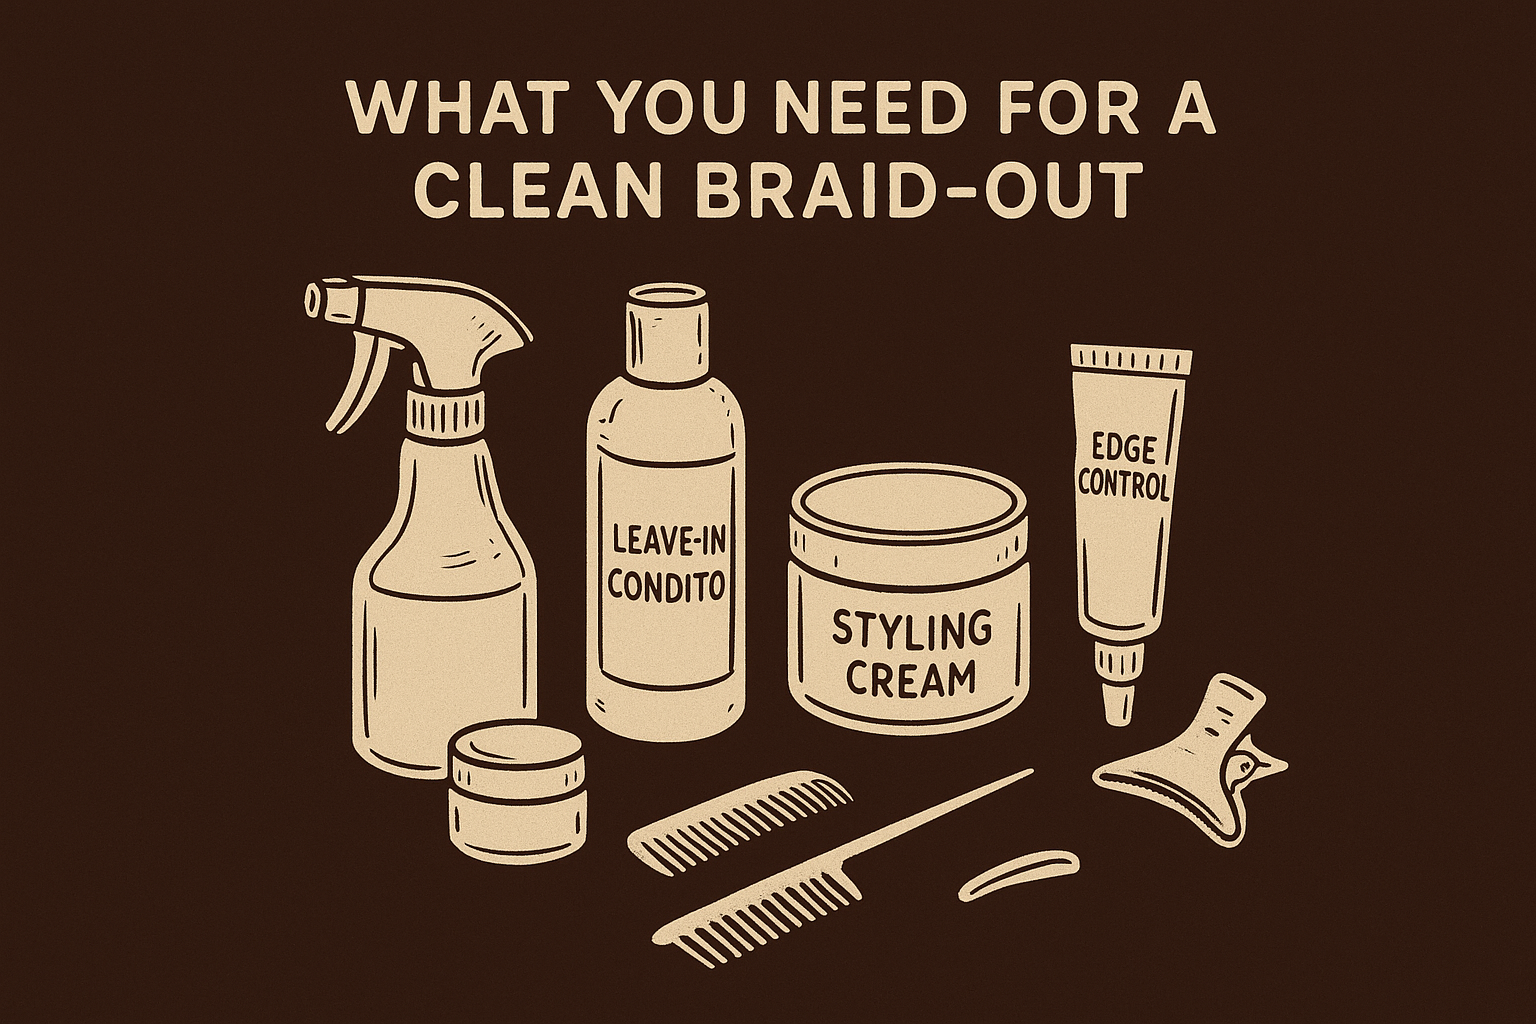
Your product and tool selection directly impacts how defined your curls look and how long they last before frizzing out. Having the right setup before you start braiding saves time and frustration later.
The difference between a braid out that lasts three days and one that falls flat by morning usually comes down to prep and product layering.
Essential products
Start with a leave-in conditioner that provides moisture without weighing hair down. Type 4 hair especially needs this hydration layer to prevent dryness and breakage during the styling process. Follow up with a styling cream or gel that offers hold without crunch. You want something that dries soft but keeps the braid pattern intact.
- Leave-in conditioner (water-based, lightweight)
- Styling cream or custard for definition
- Light oil or butter to seal ends
- Edge control (optional, for sleeker parts)
Tools that make it easier
A spray bottle filled with water helps you maintain consistent moisture as you work through sections. Hair clips or bands keep braided sections separated and prevent tangling. A hooded dryer speeds up drying time significantly, though air drying works if you have patience.
- Spray bottle for sectioning
- Rattail comb for clean parts
- Hair clips to separate sections
- Hooded dryer or bonnet attachment
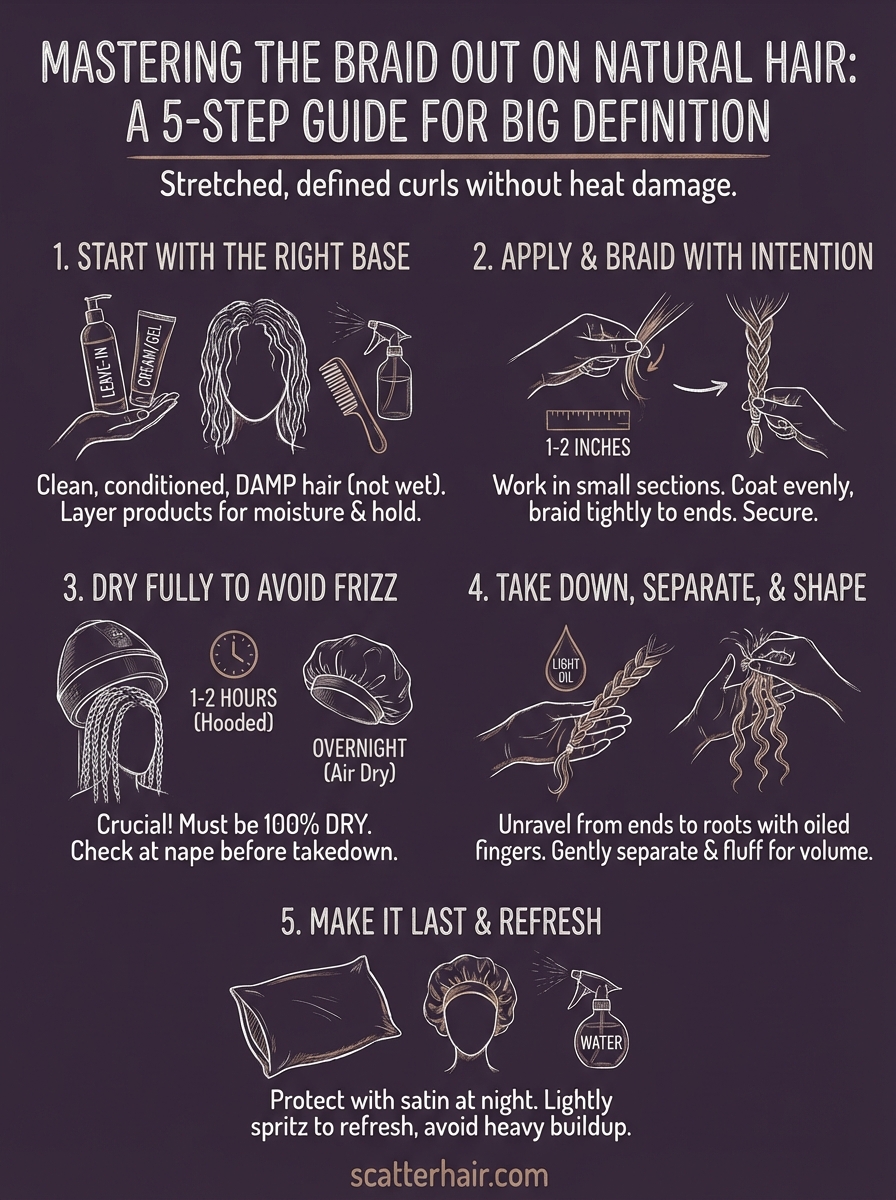
Step 1. Start with the right base
Your foundation determines everything about your braid out on natural hair results. Starting on freshly washed, conditioned hair gives you the cleanest slate for definition. Attempting a braid out on dirty or product-heavy hair creates buildup that prevents your products from penetrating properly and leads to dull, undefined curls.
Wash day timing
Plan your styling session for wash day or the day after while your hair still holds moisture naturally. Type 4 and 4c textures especially benefit from this timing because the hair cuticles are already softened and receptive to styling products.
Starting on clean, properly moisturized hair cuts your styling time in half and extends how long your braid out lasts.
Moisture level matters
Your hair should be damp, not soaking wet or completely dry. Too much water dilutes your products and extends drying time unnecessarily. Blot excess water with a microfiber towel until hair feels moist to the touch but doesn't drip. This sweet spot allows products to absorb while giving you enough slip to braid smoothly.
Step 2. Apply product and braid with intention
Product layering and braid technique directly control the definition you get from your braid out on natural hair. Work in small sections (1-2 inches wide) to ensure every strand gets coated evenly. Rushing through this step with large chunks creates inconsistent results where some areas look defined while others fall flat.
Layer products strategically
Apply your leave-in conditioner first, raking it through from root to tip with your fingers. Follow immediately with your styling cream or gel while hair stays damp. Use the praying hands method to smooth product along each section, then rake through once more to distribute evenly. This layering prevents products from sitting on top of your hair instead of penetrating.
The tighter you braid, the more stretched your hair becomes, while looser braids give you bigger, fluffier definition.
Choose your braid pattern
Three-strand braids work for most textures and create uniform waves. Split each section into three equal parts, crossing side strands over the middle strand alternately. Braid all the way to the ends and secure with a small band or bobby pin. Leaving ends unbraided creates frizzy tips that ruin your finished look.
Step 3. Dry fully so you avoid frizz
Incomplete drying ruins more braid outs than any other single mistake. Taking down damp braids creates instant frizz because the hair pattern hasn't fully set, leaving you with undefined, puffy results instead of clean definition. Your braid out on natural hair needs to dry completely before you touch it.
Choose your drying method
Air drying takes 6-12 hours depending on your hair density and braid size. Sleep in your braids overnight with a satin bonnet to protect them while they dry naturally. Hooded dryers cut drying time to 1-2 hours and create more consistent results because heat sets the pattern faster.
Your braids must feel completely dry to the touch, not just mostly dry, before you take them down.
Check for true dryness
Test a braid near your nape where hair stays dampest longest. Unravel one inch of the braid and feel the hair shaft. Slightly cool or damp texture means wait longer before taking everything down. Fully dry hair feels room temperature and moves freely when you separate the strands.
Step 4. Take down, separate, and shape
Your fully dry braids hold all that definition you worked for. Takedown technique determines whether you preserve that pattern or destroy it in seconds. Work slowly and deliberately, starting from the ends and moving toward your roots to avoid creating tension that causes breakage or frizz.
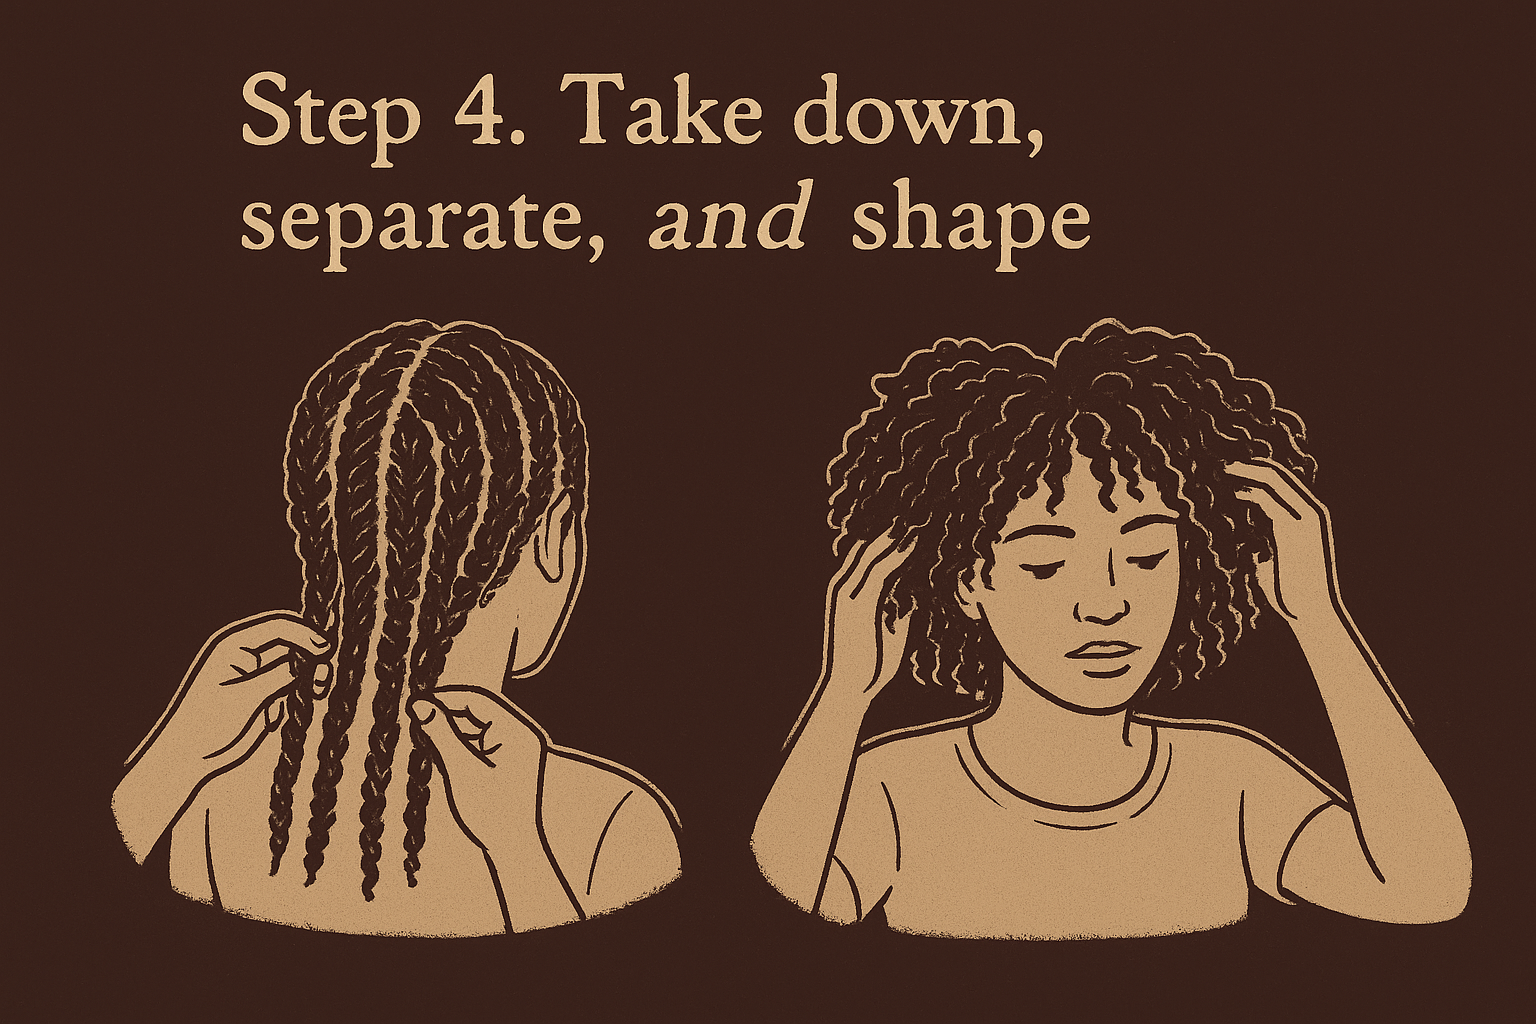
Unravel gently
Untwist or unbraid each section completely before separating individual curls. Hold the base of each braid with one hand while you carefully unravel with the other. Apply a light oil or serum to your fingertips as you work through sections to add shine and reduce friction that leads to frizz.
Taking down braids from ends to roots prevents matting and preserves your curl pattern better than starting at the scalp.
Separate and fluff
Divide each unraveled braid into 2-4 smaller sections depending on how much volume you want. Gently pull apart the waves with your fingers, working from bottom to top. Fluff at your roots by lifting sections away from your scalp to create height and movement in your braid out on natural hair. Shape problem areas by gently twisting or smoothing individual curls back into place.
Step 5. Make it last and refresh without buildup
Your braid out on natural hair can last 4-7 days with proper maintenance. Protecting your style while you sleep stops friction from destroying definition overnight. Daily refreshing without reapplying heavy products keeps your curls looking fresh instead of weighed down and greasy.
Protect it at night
Sleep with a satin bonnet or pillowcase to minimize friction that creates frizz. Pineapple your hair by gathering it loosely at the crown before bed. Never sleep on cotton because it absorbs moisture and creates rough texture that ruins your curl pattern by morning.
Protecting your braid out overnight extends its life by 3-4 days compared to sleeping without coverage.
Refresh without buildup
Spritz sections lightly with water in the morning to reactivate your existing products. Scrunch gently to bring definition back to flattened areas. Add product only to spots that need it, not your entire head, to prevent buildup that makes hair look dull and feel heavy.
Your next braid-out
Your next braid-out starts with what you learned here. Clean, moisturized hair combined with proper product layering sets you up for definition that actually lasts. The techniques work across all textures when you adjust braid size and tension to match your specific curl pattern.
Type 4 and 4c hair thrives with this method because you control moisture retention and minimize manipulation. Your results improve each time you practice the steps, from sectioning to takedown. Small adjustments in technique create massive differences in how your finished style looks and holds up through the week.
Ready to make textured hair styling actually effortless? Scatter is building products specifically for textured hair that deliver performance without guesswork. Subscribe for early access to custom formulations designed to work with your natural texture, not against it. Your best braid out on natural hair starts with products that understand what textured hair really needs.