

How To Take Down A Braid Out Step-By-Step For Soft Volume
You spent time braiding, you let it set overnight, and now comes the moment that makes or breaks the whole style. Knowing how to take down a braid out the right way is the difference between soft, bouncy curls and a frizzy mess you didn't sign up for. The unraveling matters just as much as the setup.
Most people rush this step. They pull too fast, skip the oil, or separate too aggressively, and then wonder why their definition disappeared. A good takedown protects your curl pattern, minimizes breakage, and gives you that full, voluminous finish that lasts. It's a skill, and once you learn it, your braid outs will hit different every single time.
At scatterhair, we're building styling products specifically for textured hair, formulas that make moments like these easier and more predictable. Until our 2026 launch, we're here to share the techniques that actually work. Below, you'll find a complete step-by-step breakdown for taking down your braid out with soft volume and zero frizz panic.
What you need before you start
Having everything within reach before you start saves time and keeps your hands from searching mid-takedown, which is when most people accidentally rush and cause friction. Gathering your supplies first means you can work through each braid with steady, controlled movements from start to finish.
Rushing to find products mid-takedown is one of the fastest ways to introduce frizz to an otherwise clean braid-out.
Tools you'll need
The right tools do most of the work for you. You need a wide-tooth comb or a detangling brush to gently separate your hair after unbraiding, not during. Keep a rat-tail comb nearby if you plan to part your sections cleanly, and have a few hair clips or butterfly clamps to hold unraveled sections out of the way while you work through the rest.
- Wide-tooth comb or detangling brush
- Rat-tail comb (optional, for clean parts)
- Hair clips or butterfly clamps (4 to 6)
- A mirror with good lighting
Products that help
Your product lineup before a takedown is short but important. A lightweight oil, like jojoba or grapeseed, applied to each braid before you open it gives your hair slip and reduces the friction that causes frizz. You also want a light-hold cream or curl refresher on hand for after separation, in case any sections need more definition or moisture to spring back fully.
- Lightweight oil (jojoba, grapeseed, or argan)
- Leave-in conditioner or curl refresher spray
- Light-hold styling cream for post-separation shaping
Skip heavy butters at this stage. Heavy products weigh down your curl pattern before you even see it, and you want your hair to feel light and pliable before you start separating.
Step 1. Prep your braid-out for slip and softness
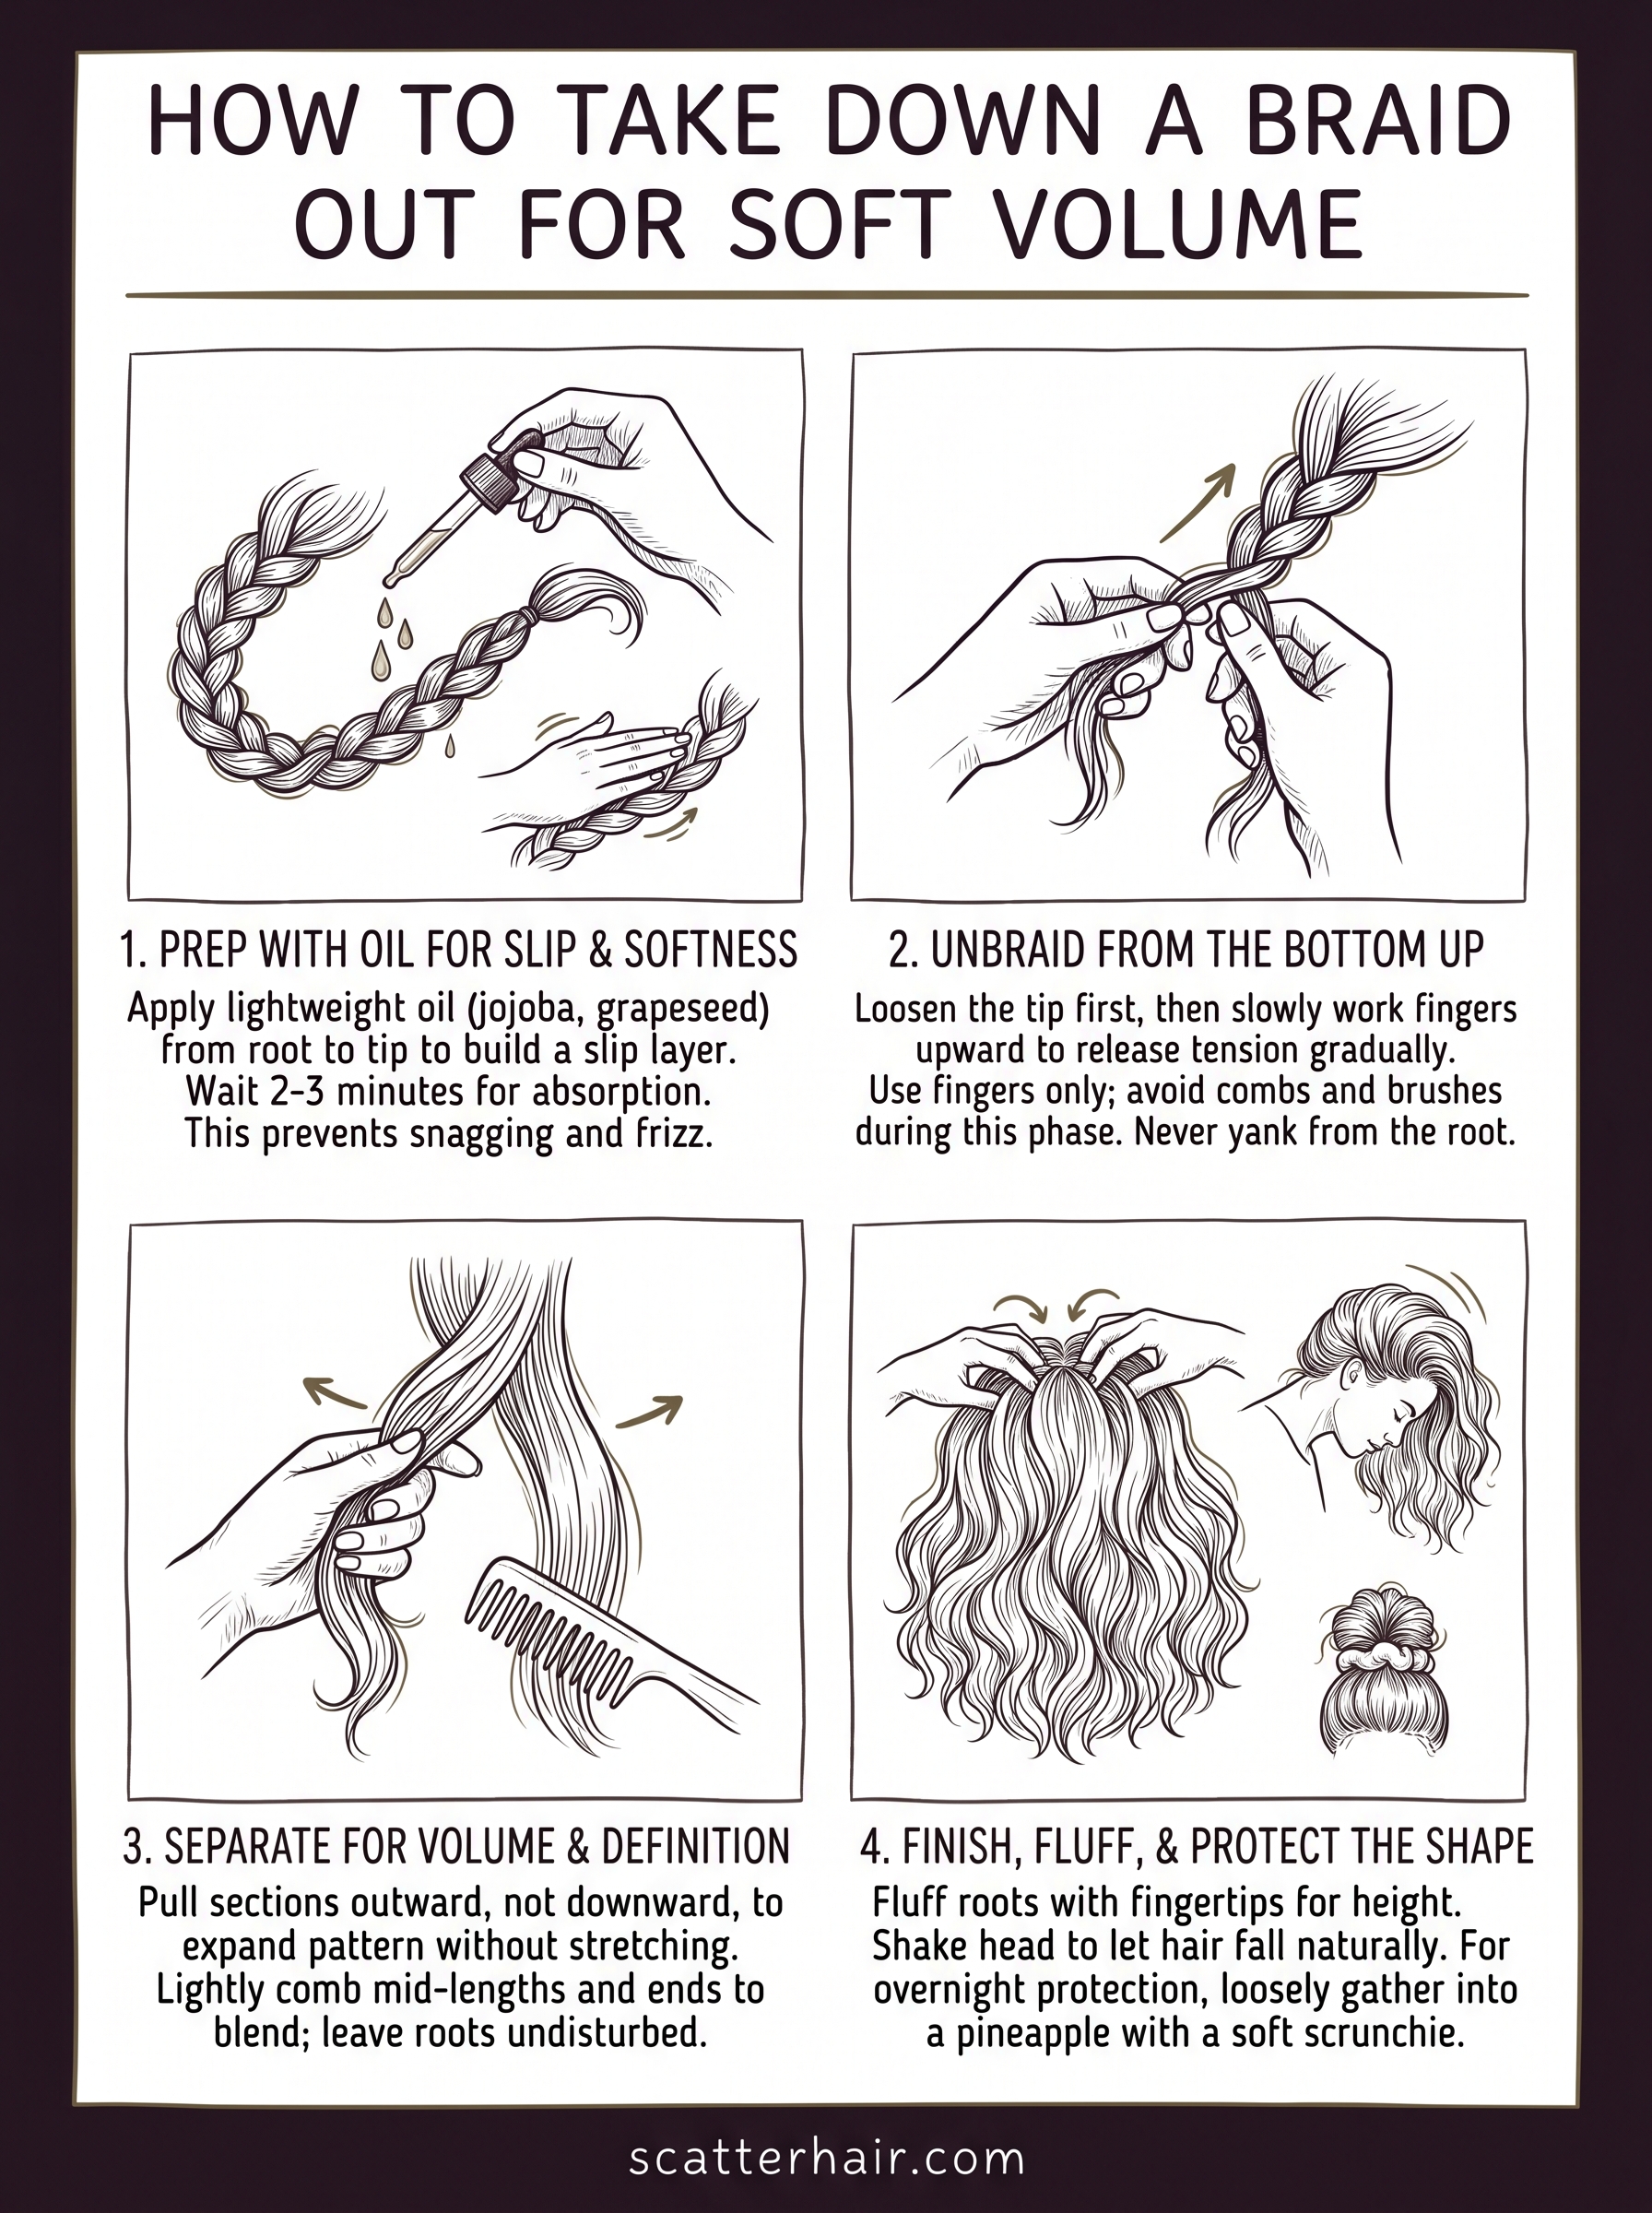
Before you open a single braid, take two minutes to prep the set with oil. This one step is what separates a smooth takedown from a frustrating one. Your hair needs slip and softness before you introduce any separation.
Apply oil before you open anything
Start at the bottom section and run a few drops of lightweight oil down each braid using your fingers. Coat the length of the braid from root to tip, not just the ends. This builds a slip layer between the strands so the hair releases cleanly without snagging or pulling apart.
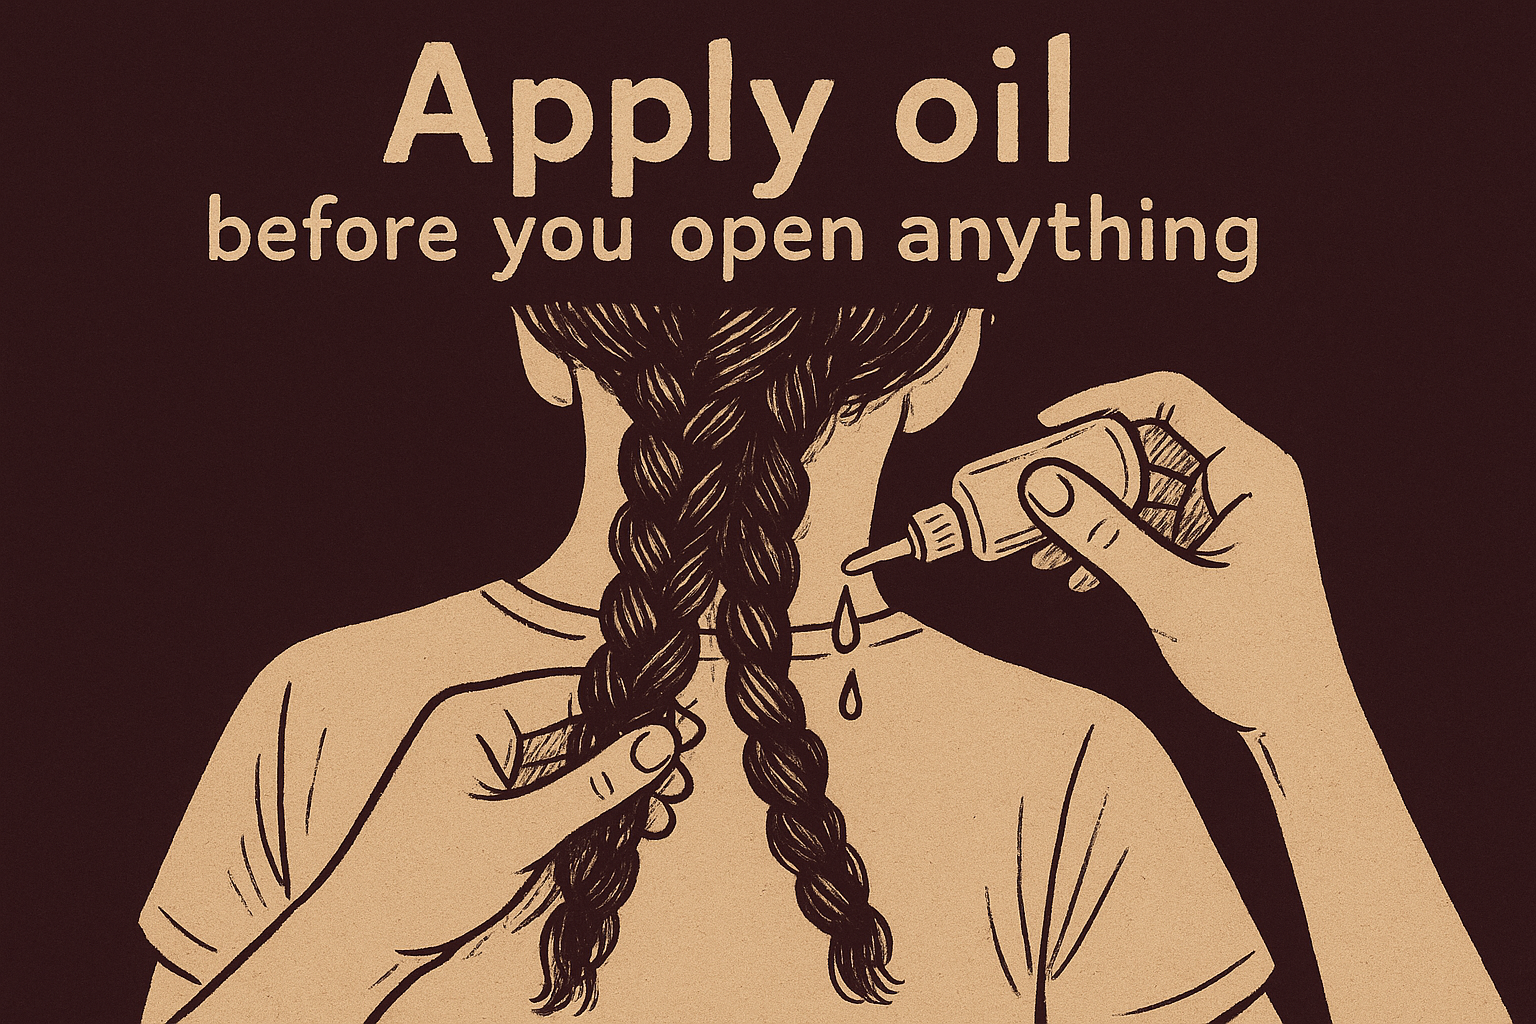
Skipping this step is the single biggest reason braid outs lose definition during takedown.
Once you oil a section, give it two to three minutes to absorb before you start unbraiding. That short pause lets the oil soften any tension built up overnight, and your fingers will feel the difference the moment you start to open it. Work through every braid in your set this way before moving to the next step.
Step 2. Unbraid the set without causing frizz
Now that your braids have slip, you can start opening them with control. The way you unbraid matters as much as the oil you applied. Moving too fast here disrupts your curl pattern before it even has a chance to form.
Work from the bottom up
Start at the very end of each braid and loosen the tip first. Then slowly work your fingers upward, unwinding one small section at a time. This bottom-up approach lets the hair release tension gradually instead of forcing the top of the braid open while the bottom is still locked. Once you open a full braid, lay it gently over your shoulder or clip it away from the others.
Never yank a braid open from the root down. That single move is what kills definition and invites frizz.
Use your fingers, not your tools
Your fingers are the right tool for this step. Keep your wide-tooth comb and detangling brush clipped to your shirt or resting nearby, but do not reach for them yet. When you learn how to take down a braid out with just your hands in this phase, you protect the pattern that the set built overnight. Tools come in the next step.
Step 3. Separate for volume and keep definition
Once every braid is open, resist the urge to separate everything at once. Work through one section at a time to keep control over both the volume and the definition you built overnight.
Pull apart with intention
Take a single unraveled section and hold it at the root with one hand. With your other hand, split the section into two or three pieces by pressing your fingers in and gently pulling outward, not downward. Pulling downward stretches the curl and flattens it. Pulling outward expands the pattern without disrupting it. Repeat this across every section before reaching for your wide-tooth comb.
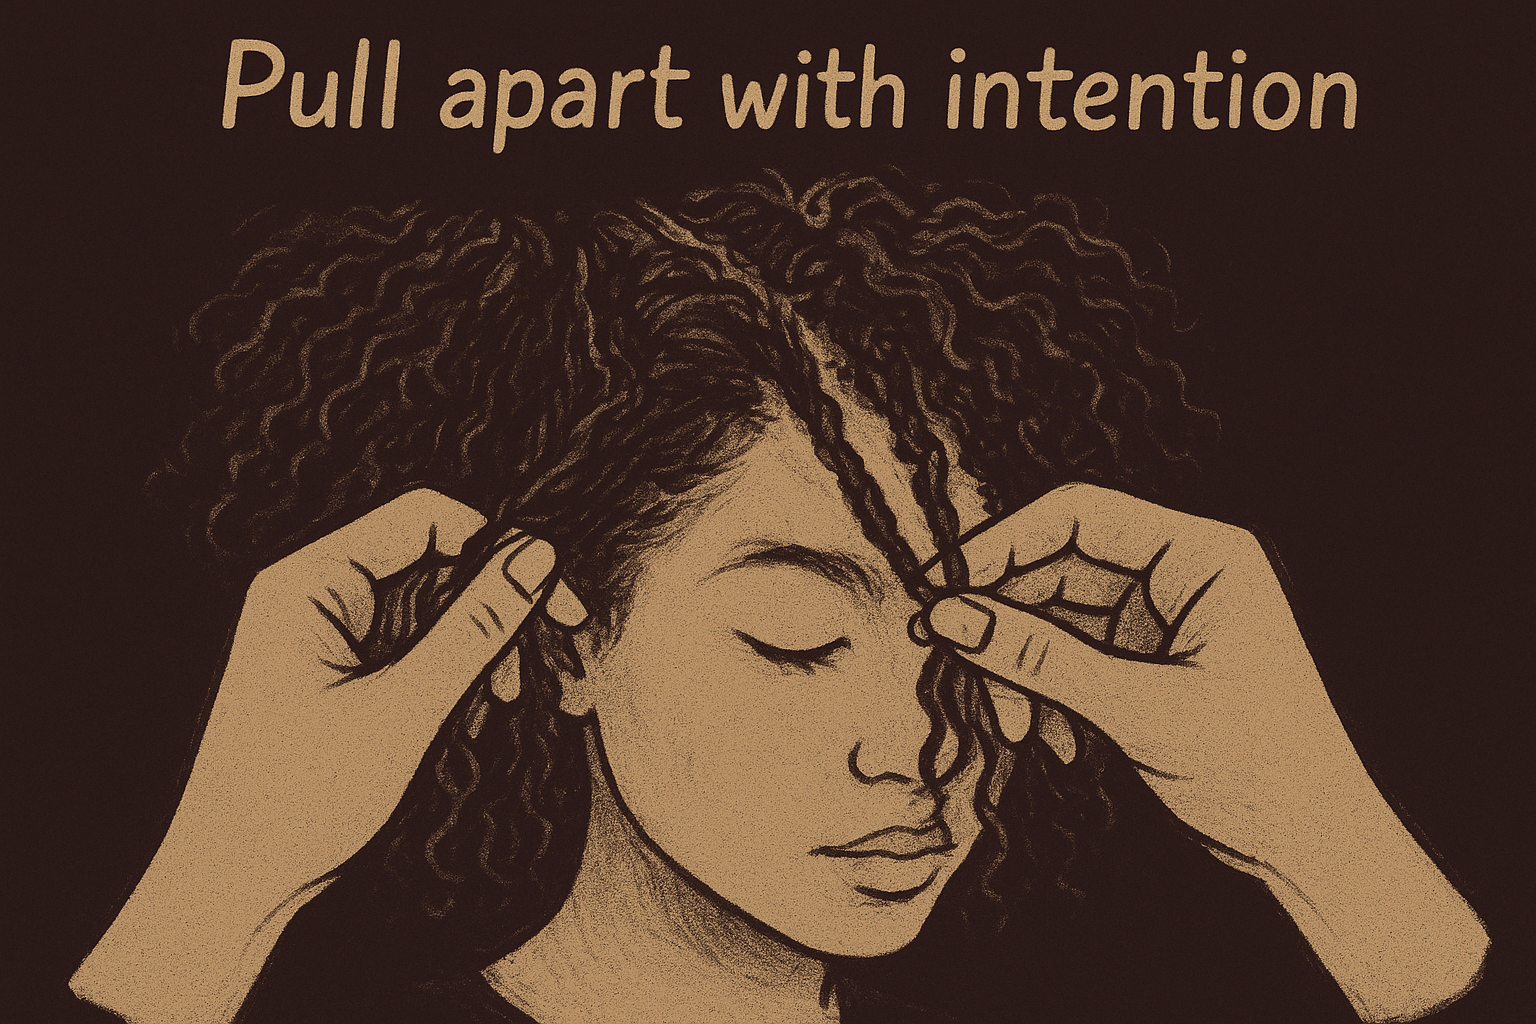
Separating outward instead of downward is what gives braid outs their signature volume without sacrificing curl shape.
Shape each section after separation
Once you've pulled apart a section, lightly run your wide-tooth comb through the mid-lengths and ends to blend the pieces together. Skip the roots. Combing through the roots after you learn how to take down a braid out is one of the fastest ways to erase your pattern at the crown. Let the roots sit undisturbed so they keep their natural lift.
If a few sections look flat or lose their shape, add a small amount of curl refresher and scrunch gently from ends upward. That restores definition without restarting the whole section.
Step 4. Finish the takedown and protect your hair
You're through the hard part. Every braid is open, every section is separated, and now your job is to set the shape and make sure this style holds. Finishing correctly is what keeps the volume from collapsing by mid-afternoon.
Fluff your roots and lock in your shape
Work through your roots with your fingertips only, lifting gently at the scalp in small circular motions. This builds height at the crown without disturbing the definition lower down. Once you've lifted the roots across your entire head, tilt your head forward and shake lightly to let the hair fall into its natural shape. That shake redistributes volume evenly and reveals where you still need to separate or lift.
This is the step most people skip, and it's exactly why their braid out falls flat before the day is done.
Protect the style overnight
Knowing how to take down a braid out cleanly also means protecting it so you get more than one day of wear. At night, loosely gather your hair into a pineapple at the top of your head using a soft scrunchie, not an elastic band. Lay a satin or silk scarf over your edges to keep them smooth while you sleep. This two-step routine preserves volume and definition for a strong second-day style.
Next steps for your hair
Now that you know how to take down a braid out without losing your definition, the next move is keeping that momentum going. Consistency in your technique is what turns a good braid out into a reliable part of your routine. Every time you apply oil before opening, work bottom-up, and separate outward instead of down, you build a repeatable system that gives you the same clean results without the guesswork or frustration.
Your hair also benefits from the right products at every stage of this process. The detailing work you put in during separation only holds if your styling products actually support your texture instead of fighting it. At scatterhair, we're formulating a line of performance-driven styling products built specifically for textured hair, designed to make every step feel more controlled and effortless. Get early access to Scatter and be the first to know when they launch in 2026.