

6 Protective Styles For Curly Hair That Prevent Breakage
Your curls deserve better than constant manipulation and heat damage. Finding protective styles for curly hair that actually work, without sacrificing your look, can feel like an endless search. Whether you're rocking 3B waves or 4C coils, the right style keeps your ends tucked away and your hair health on track.
That's exactly why we created scatterhair: to make styling textured hair effortless, not exhausting. While our custom-formulated products are launching soon, we're here to help you protect what you've got right now.
This guide breaks down six protective styles that prevent breakage and promote growth. You'll find options for sleeping, working out, surviving summer humidity, and everything in between. Each style works with your natural texture instead of fighting it, because embracing the mess is kind of our thing.
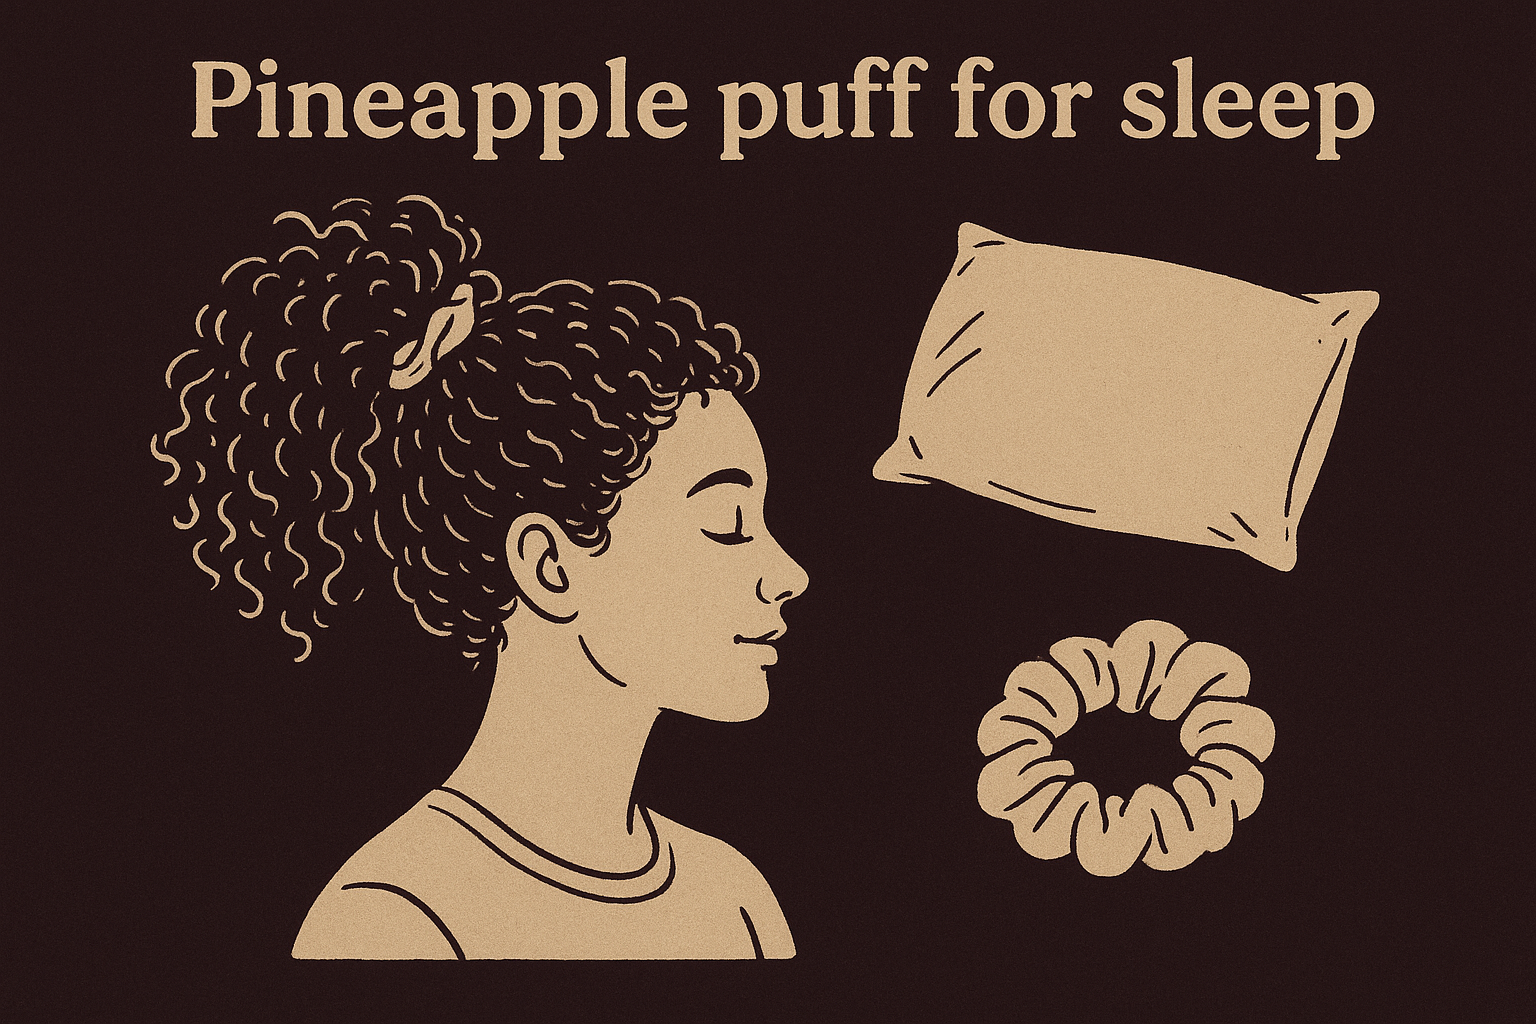
1. Pineapple puff for sleep
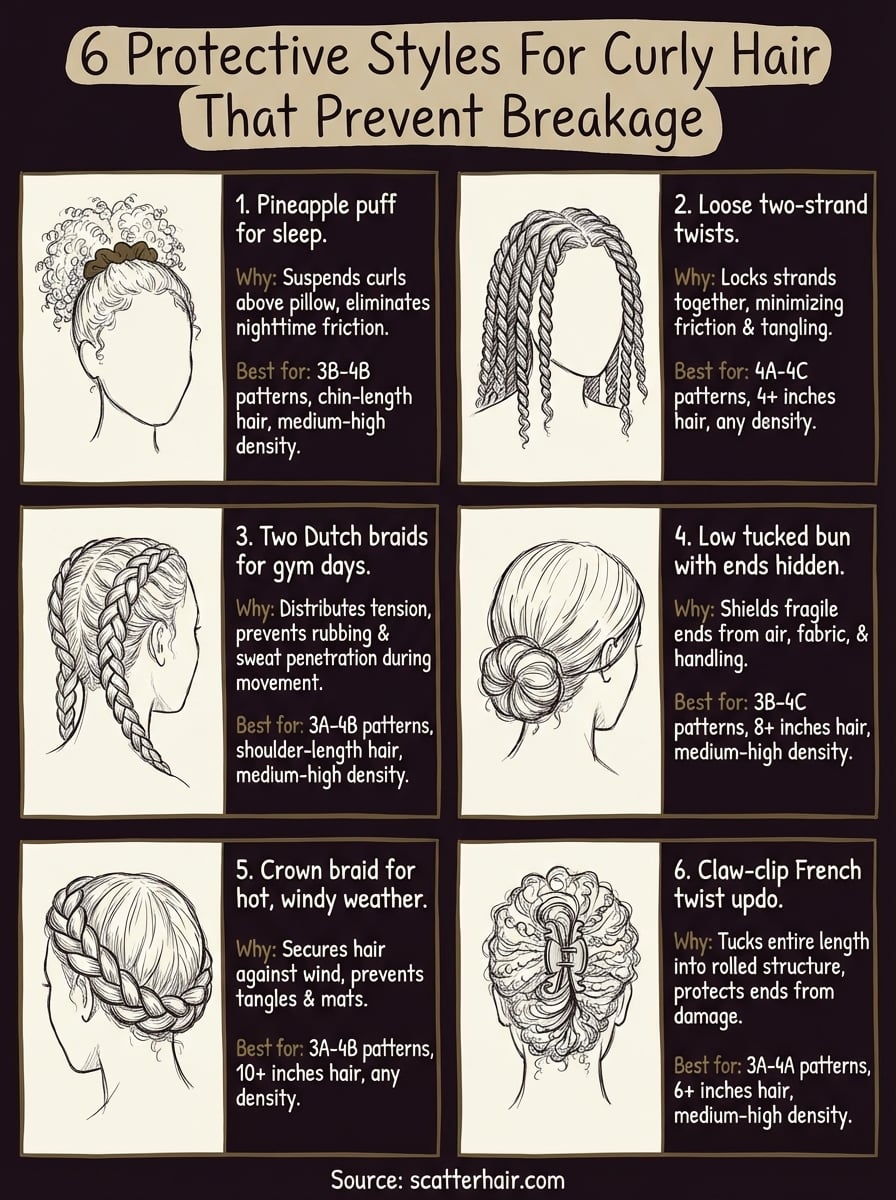
The pineapple puff transforms your nighttime routine into a breakage prevention strategy. You gather your curls into a loose, high ponytail at the crown of your head, creating a fountain of hair that protects your curl pattern while you sleep. This simple move keeps your hair off cotton pillowcases and prevents the friction that leads to split ends and frizz.
Why it prevents breakage
Your hair experiences the most mechanical stress when you toss and turn at night. The pineapple puff eliminates this problem by keeping your curls suspended above the pillow surface. Cotton and other rough fabrics create friction that damages your cuticle layer, but this style keeps most of your hair elevated and protected throughout the night.
Best for curl patterns, length, and density
This protective style works best for 3B through 4B curl patterns with medium to high density. You need at least chin-length hair to gather the puff comfortably at your crown. Looser curl patterns (3A) can use this method, but tighter coils (4C) might need a modified approach with multiple pineapples or a different securing method.
How to do it without crushing curls
Flip your head forward and gather your hair at the highest point of your head using your fingers, not a brush. Secure the puff with a satin scrunchie using only one or two loose loops. Your ponytail should feel stable but never tight. The goal is to create a fountain effect where your curls cascade freely without tension at the base.
The looser your scrunchie, the better your curl definition will be in the morning.
Accessories that make it more protective
Pair your pineapple with a satin or silk bonnet for maximum protection. Satin pillowcases add an extra layer of defense if your bonnet slips off during the night. Jumbo satin scrunchies distribute pressure more evenly than small elastics, preventing dents and creases in your curl pattern.
Common mistakes to avoid
Never secure your pineapple with regular elastic bands that snag and break your hair. Positioning your puff too low creates flat spots at your crown. Wrapping the scrunchie more than twice creates unnecessary tension that defeats the protective purpose. Skip this style if your hair is freshly washed and soaking wet, as the weight can stretch and damage your curl pattern overnight.
2. Loose two-strand twists
Two-strand twists deliver serious protection without the commitment of braids or the complexity of other protective styles for curly hair. You separate your hair into sections and twist two strands around each other from root to tip. This technique keeps your ends tucked away while maintaining access to your scalp for moisturizing and care throughout the week.
Why it prevents breakage
Twists lock your hair strands together in a way that minimizes friction and tangling. Your hair stays in defined sections that prevent individual strands from rubbing against each other or catching on fabric. The continuous spiral pattern distributes tension evenly along the hair shaft instead of creating stress points that snap and break.
Best for curl patterns, length, and density
This style works for 4A through 4C curl patterns with any density level. You need at least four inches of hair for twists that stay secure without unraveling. Medium to high density hair holds twists better, but fine hair can achieve good results with smaller sections and proper product application.
How to twist for low tension and smooth ends
Start each twist on freshly moisturized hair without pulling tight at the roots. Divide a section into two equal parts and rotate them around each other using consistent, gentle movements. Apply a small amount of styling cream to your ends as you reach them, then continue twisting past the natural endpoint and allow the ends to spiral together naturally.
Loose twists last longer and cause less damage than tight ones that pull on your scalp.
How to keep twists neat overnight
Wrap your twists in a satin bonnet or tie them down with a silk scarf before bed. You can also gather them into a loose pineapple if they're long enough. Refresh any frizzy sections in the morning by applying a light oil and gently re-twisting just the ends.
Common mistakes to avoid
Never twist soaking wet hair that will take days to dry inside the style. Starting with excessive tension at the roots causes traction alopecia and hairline damage. Keeping twists in for more than two weeks without proper moisture maintenance leads to dry, brittle hair that breaks when you take them down.
3. Two Dutch braids for gym days
Dutch braids keep your curls secure and out of your face during high-intensity workouts. You create this style by braiding three sections of hair while adding new pieces from the sides, but unlike French braids, you cross the strands under instead of over. This technique sits flat against your scalp and handles sweat better than loose styles that create tangling and matting at the gym.
Why it prevents breakage
The braiding pattern distributes tension across your scalp instead of concentrating stress on specific areas. Your hair stays contained in a structure that prevents the rubbing and friction that happens when loose curls move against your shoulders and back during exercise. Sweat can't penetrate the braided sections as easily, which reduces the hygroscopic swelling that weakens your hair shaft.
Best for curl patterns, length, and density
This protective style works for 3A through 4B curl patterns with medium to high density. You need at least shoulder-length hair to create braids that stay secure during movement. Lower density hair benefits from this style because the Dutch method creates volume and fullness at the crown.
How to braid without pulling your hairline
Start each braid two inches back from your natural hairline instead of at the edge. Keep consistent, moderate tension throughout without yanking at the roots. Use your fingers to guide new sections into the braid rather than pulling them with force.
Braids that feel comfortable going in will protect your hairline during your workout.
Sweat and frizz control during workouts
Apply a water-based gel to your edges before braiding to seal in moisture and create a barrier against sweat. The braided structure keeps your hair from expanding and frizzing when humidity rises. Your scalp stays accessible for post-workout cleansing without disrupting the style.
Common mistakes to avoid
Never braid on bone-dry hair that will snap during the tension of styling. Starting too close to your hairline creates traction that damages your most vulnerable hair. Keeping braids in for multiple consecutive workouts without refreshing leads to product buildup and scalp irritation.
4. Low tucked bun with ends hidden
The low tucked bun sits at the nape of your neck and keeps your most fragile hair completely enclosed. You gather your curls into a soft, low ponytail, then wrap the length around itself and tuck the ends underneath the base. This style works as one of the most versatile protective styles for curly hair because it transitions from professional settings to casual weekends without modification.
Why it prevents breakage
Your hair ends experience the most damage from environmental exposure and friction. A low bun shields these vulnerable areas from air, fabric, and handling throughout the day. The tucked position eliminates the constant movement that wears down your cuticle layer and causes split ends.
Best for curl patterns, length, and density
This style works best for 3B through 4C curl patterns with medium to high density. You need at least eight inches of hair to create a bun that tucks and pins securely. All density levels can achieve this look with proper pinning techniques.
How to build a bun that stays loose and secure
Gather your hair at the nape using your hands instead of a brush to maintain natural volume. Twist the length gently, then wrap it around the base in a circular motion. Tuck your ends underneath the bun and secure everything with large bobby pins that distribute pressure evenly.
A loose bun that moves slightly is protecting your hair better than a tight one that never shifts.
How to protect edges and the nape area
Skip the gel on your baby hairs and edges when creating this style. Use a satin scarf during the first hour to smooth flyaways without tension. The low position naturally protects your nape area, but avoid securing the initial ponytail too tightly.
Common mistakes to avoid
Never create this style on tangled or dry hair that will matt inside the bun. Using small bobby pins that dig into your scalp creates pressure points. Keeping the same bun in for multiple days without releasing and remoisturizing leads to dryness and breakage.
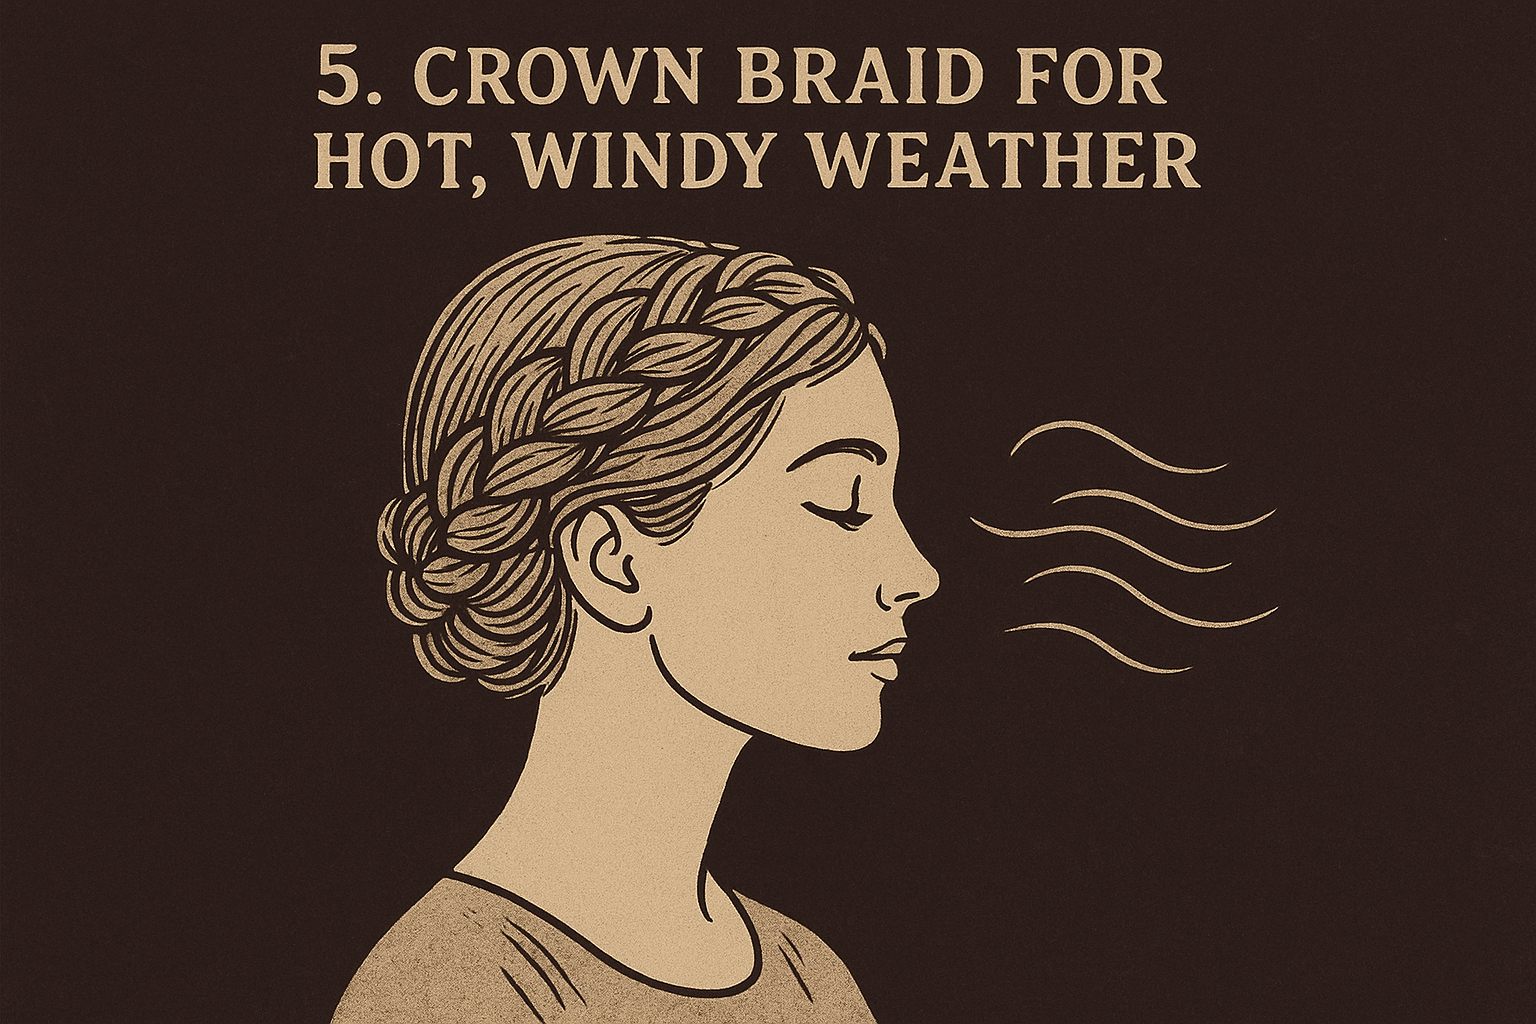
5. Crown braid for hot, windy weather
The crown braid wraps around your entire head like a halo, keeping every strand secured against wind and humidity. You create this style by braiding sections of hair around the perimeter of your head, then tucking the ends underneath the braid itself. This protective approach keeps your hair completely off your neck while summer heat and gusts work against unprotected styles.
Why it prevents breakage
Wind creates constant movement that tangles and mats your curls into knots that snap when you detangle. The crown braid eliminates this movement by securing your hair flat against your scalp in a continuous pattern. Heat and humidity can't penetrate the braided structure as easily, which prevents the hygroscopic swelling that weakens your hair shaft and leads to breakage.
Best for curl patterns, length, and density
This style works for 3A through 4B curl patterns with any density level. You need at least ten inches of hair to wrap around your head and create a full crown. Lower density hair benefits from this style because the braiding technique creates fullness and dimension.
How to tuck and pin ends so they don't snag
Braid all the way to your actual ends instead of stopping early. Tuck the final section underneath the starting point of your braid and secure with large bobby pins that slide in the same direction as your hair. Apply a small amount of oil to your ends before tucking to create slip.
Ends that stay hidden inside the braid structure get maximum protection from environmental damage.
How to keep the style comfortable all day
Part your hair in a way that feels natural to your scalp instead of forcing an unfamiliar pattern. Keep consistent, moderate tension throughout the braid without pulling tight at any single point. Position the crown slightly back from your hairline to avoid edge stress during extended wear.
Common mistakes to avoid
Never create this style on completely dry hair that lacks flexibility for braiding. Braiding too tightly around your head creates a headache and damages your follicles. Leaving the style in for more than three days without moisturizing leads to dryness and makes takedown difficult.
6. Claw-clip French twist updo
The claw-clip French twist combines the elegance of an updo with the quick convenience of a single accessory. You gather your curls into a vertical twist along the back of your head, then secure everything with a large claw clip that holds the style without elastic bands or pins. This approach stands out among protective styles for curly hair because it takes under two minutes while keeping your ends completely protected.
Why it prevents breakage
The French twist keeps your entire length tucked inside a rolled structure that shields every strand from environmental damage. Your hair stays stationary instead of moving and rubbing throughout the day. The claw clip distributes pressure across a wide surface area instead of concentrating tension on individual strands like elastic bands do.
Best for curl patterns, length, and density
This style works for 3A through 4A curl patterns with medium to high density. You need at least six inches of hair to create a twist that the clip can hold securely. All density levels can achieve this look with the right clip size.
How to twist and clip without creating stress points
Gather your hair at the center back of your head without pulling tight. Twist the length upward in a continuous motion while keeping moderate tension. Open your claw clip, position it vertically over the twist, then snap it closed from bottom to top to distribute grip evenly.
A clip that feels comfortable immediately will protect your hair throughout the day.
How to make it work on thick and fine hair
Thick hair needs jumbo claw clips with strong tension springs that can grip the full volume. Fine hair works better with medium clips that won't slip but won't create dents either. Apply a light styling cream before twisting to add grip and control for both hair types.
Common mistakes to avoid
Never use small clips that concentrate pressure on limited sections of your twist. Twisting bone-dry hair creates friction and breakage during the styling process. Positioning the clip horizontally instead of vertically creates an unstable structure that falls apart within hours.
Next steps for healthier curls
These six protective styles for curly hair give you options for every situation without compromising your hair health. You can rotate between styles based on your schedule, activity level, and weather conditions throughout the week. Each method keeps your ends protected while maintaining access to your scalp for moisture and care.
Your curls deserve products that work as hard as these protective styles do. That's exactly what we're building at scatterhair: custom-formulated styling products that make textured hair effortless to manage. Join our email list to get exclusive early access when we launch in 2026, plus behind-the-scenes content and styling guides you won't find anywhere else.
Start with one style that matches your immediate needs, then expand your rotation as you get comfortable with each technique. Your hair will show visible improvement within weeks when you consistently protect it from the friction and manipulation that causes breakage.