

Styling Long Curly Hair: Step-By-Step Frizz-Control Routine
Long curly hair has a mind of its own. One day it's bouncy and defined; the next, it's a frizzy cloud that refuses to cooperate. If you've spent hours watching tutorials only to end up with results that look nothing like what you expected, you're not alone. Styling long curly hair takes more than just the right products, it requires understanding your curl pattern, mastering specific techniques, and building a routine that actually fits your life. The good news? Frizz isn't your enemy; it's just a signal that your curls need something different.
At scatterhair, we're obsessed with making styling effortless for people with textured hair. That means cutting through the noise and giving you real, technique-driven advice that works, not generic tips recycled from outdated beauty guides. Whether you're rocking tight coils or loose waves that fall past your shoulders, the principles in this guide apply to you. We believe in embracing the mess, working with your natural texture, and finding your version of perfect.
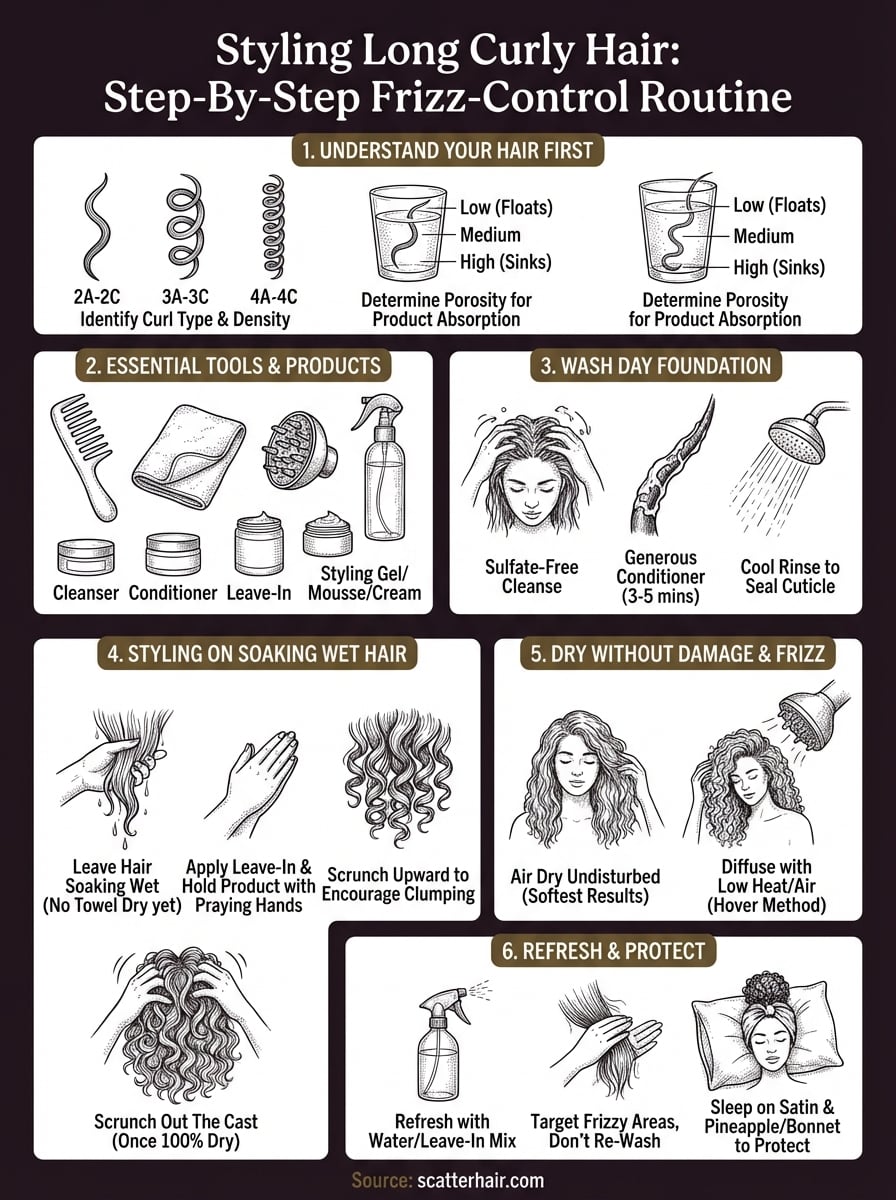
This guide breaks down a complete frizz-control routine from wash day to refresh day. You'll learn how to prep your curls, apply products in the right order, dry without damage, and maintain definition between washes. Each step includes specific techniques you can adapt based on your curl type and density. By the end, you'll have a repeatable system that takes the guesswork out of styling, so you can spend less time fighting your hair and more time actually living your life.
What to know before you start
Before you dive into styling long curly hair, you need to understand what you're working with. Your curl pattern, hair density, and porosity level all influence which techniques work and which products your hair actually absorbs. Skipping this step is like following a recipe without checking if you have the right ingredients. You'll end up frustrated when the results don't match your expectations, not because the method is wrong, but because you're applying it to the wrong hair type.
Identify your curl type and density
Your curl pattern falls somewhere between wavy (2A-2C), curly (3A-3C), or coily (4A-4C). Wavy hair tends to lose definition quickly and needs lighter products, while tighter curl patterns require heavier creams and more moisture. But the pattern alone doesn't tell the full story. Your hair density (how many strands you have per square inch) and strand thickness matter just as much. Fine, high-density hair behaves completely differently from thick, low-density hair, even if the curl patterns look similar.
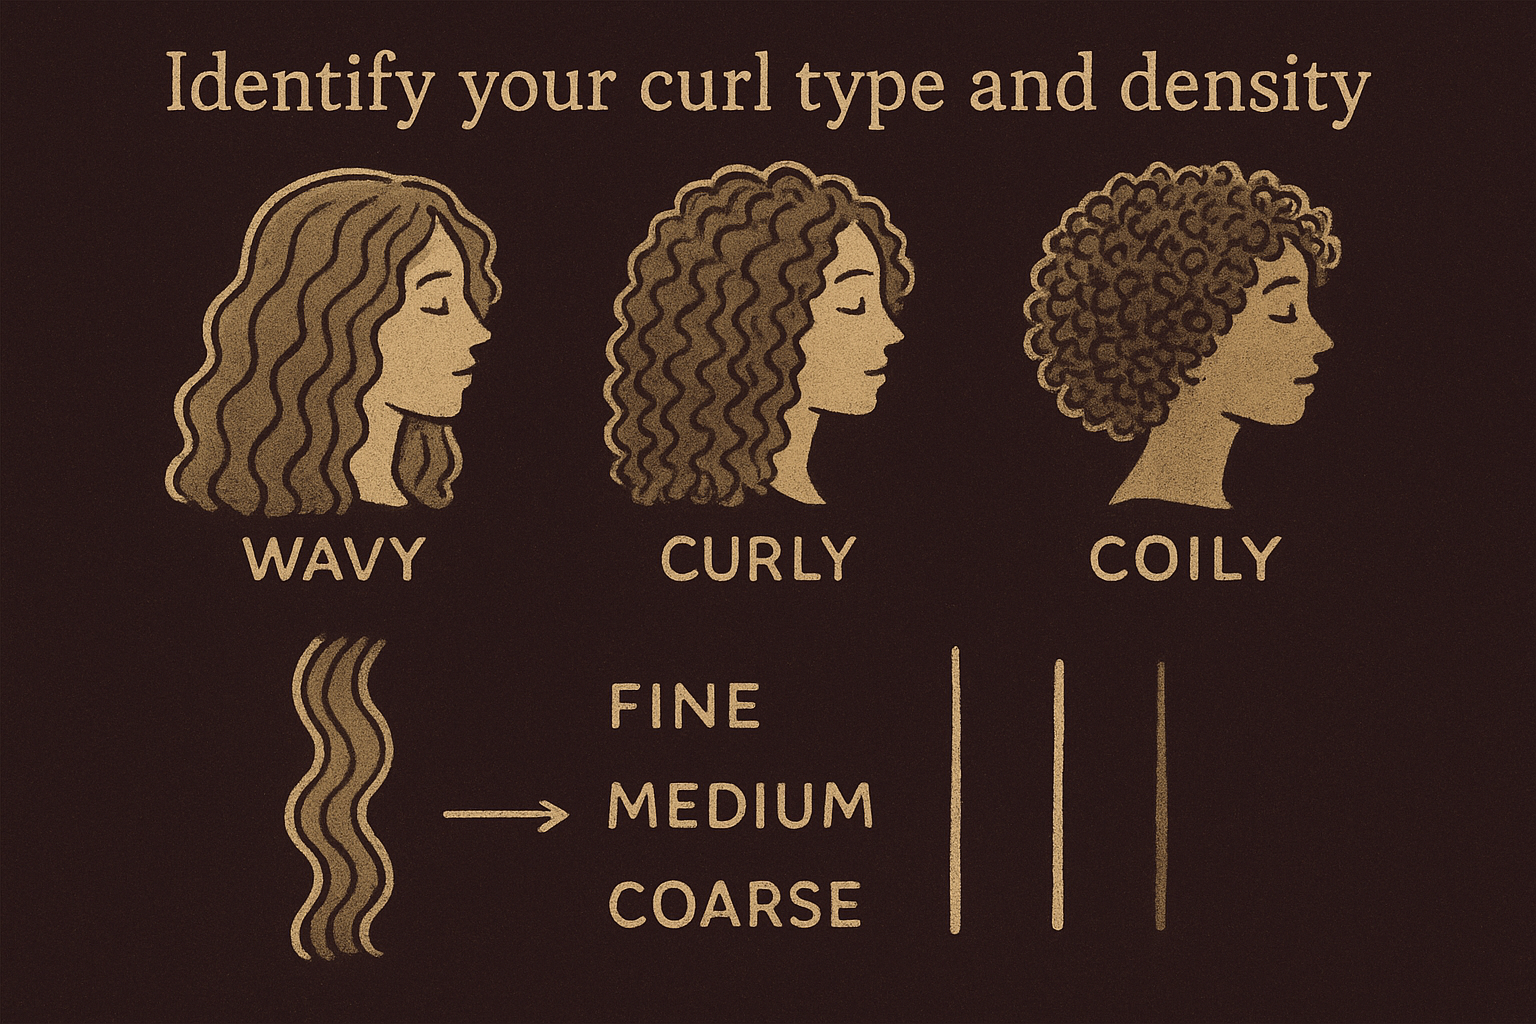
Pull a single strand from your head and compare it to a piece of thread. If it's thinner, you have fine hair. If it's about the same width, you have medium hair. Thicker than thread means you have coarse hair. Fine hair gets weighed down easily and needs lighter styling products. Coarse hair can handle heavier creams and oils without looking greasy. Understanding this prevents you from buying products that work against your hair's natural tendencies.
The biggest mistake you can make is copying someone else's routine without accounting for the differences in your hair structure.
Understand your hair's porosity level
Porosity determines how well your hair absorbs and retains moisture. Low-porosity hair has tightly closed cuticles that resist product absorption. It takes forever to dry, and products sit on top instead of sinking in. High-porosity hair has lifted cuticles that absorb moisture quickly but lose it just as fast. It dries in minutes and always feels thirsty. Medium porosity falls between these extremes and typically responds well to most techniques.
Test your porosity by dropping a clean strand of hair into a glass of water. If it floats after several minutes, you have low porosity. If it sinks immediately, you have high porosity. If it hovers in the middle, you're in the medium range. This simple test tells you whether you need heat to help products penetrate, whether you should focus on sealing moisture in, or whether your hair accepts products without extra help. Low-porosity hair benefits from warm water and lightweight products applied to soaking-wet hair. High-porosity hair needs heavy creams, butters, and oils to seal the cuticle and trap moisture inside.
Set realistic expectations for results
Your first attempt won't look like a professional blowout. Styling long curly hair takes practice, and your results improve as you learn how your hair responds to different techniques. Some people see immediate definition, while others need three or four tries before their routine clicks. Length adds complexity because the weight of your hair pulls curls straight at the roots while the ends spiral tightly. You'll probably deal with inconsistent curl patterns at first, with some sections looking perfect and others falling flat.
Plan for at least 30 to 45 minutes on wash day, plus drying time. If you air dry, that's another two to four hours depending on your density and porosity. Diffusing cuts drying time to 30 to 60 minutes but requires technique to avoid frizz. Between washes, refreshing takes five to ten minutes once you have your system down. These time estimates aren't meant to scare you off. They're here so you can block out enough time and avoid rushing through steps that need patience. Rushing leads to skipped techniques, uneven product application, and frizz that could have been prevented.
What you need for long curly hair styling
You don't need a bathroom full of products to get frizz-free curls, but you do need the right combination of tools and products that match your hair's needs. Most people overcomplicate styling long curly hair by buying every product they see on social media, then wonder why nothing works together. The truth is simpler: you need a basic toolkit that covers moisture, hold, and definition, plus a few essential tools that make application easier. What works for someone with wavy, fine hair won't work for you if you have thick, coily curls, so your specific setup depends on the porosity and density you identified earlier.
Essential tools for wet styling
Your hands are your most important tool, but a few items make the process faster and more consistent. You need a wide-tooth comb or detangling brush for working through knots without ripping out half your curls. A microfiber towel or cotton t-shirt replaces regular towels that rough up your cuticle and create instant frizz. If you want to speed up drying, a diffuser attachment for your blow dryer concentrates airflow without blasting your curls apart. For sectioning, grab a few large claw clips that hold hair without leaving creases.
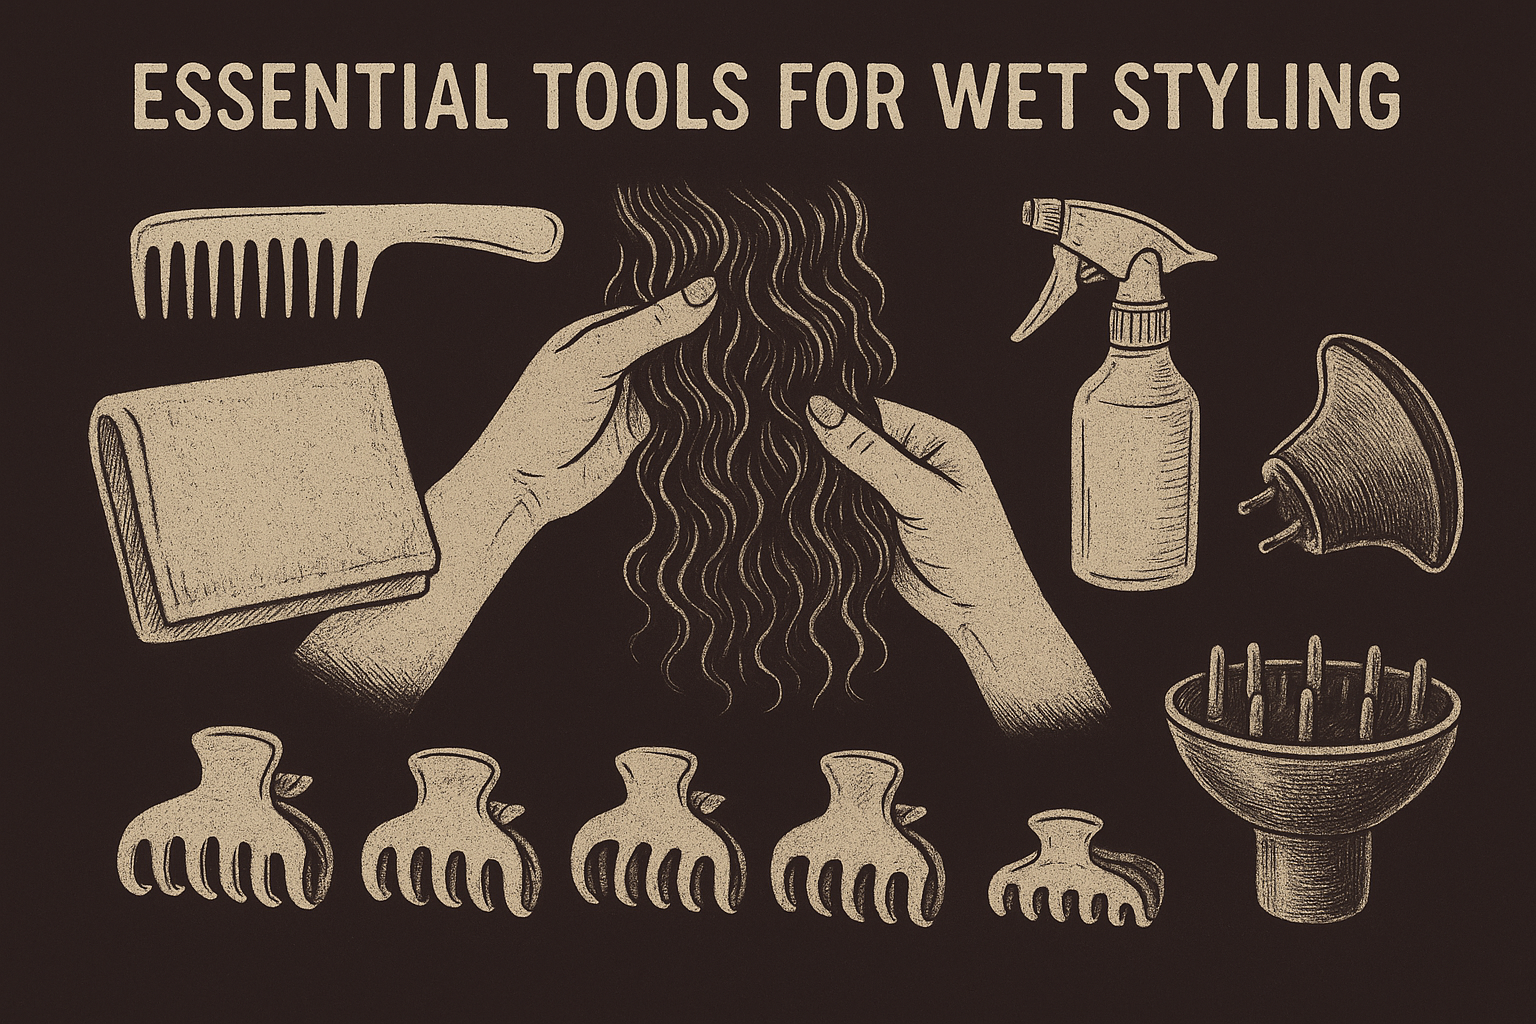
Here's what belongs in your styling toolkit:
- Wide-tooth comb or Felicia Leatherwood detangling brush
- Microfiber towel or old cotton t-shirt
- Spray bottle filled with water for refreshing
- Diffuser attachment (bowl or hand-shaped style)
- 4 to 6 large claw clips for sectioning
- Satin or silk pillowcase for sleep protection
Products that actually control frizz
You need four product categories: cleanser, conditioner, leave-in treatment, and styling product. Your cleanser removes buildup without stripping natural oils (look for sulfate-free formulas or co-washes). Your conditioner adds slip for detangling and provides the first layer of moisture. A leave-in conditioner or cream goes on soaking-wet hair to lock in hydration before you apply styling products. Finally, your styling product (gel, mousse, or cream) creates hold and definition that lasts between washes.
Match product weight to your hair density. Fine hair needs lightweight, water-based products that won't weigh down your pattern. Thick, coarse hair handles heavier creams, butters, and oils without looking greasy. High-porosity hair benefits from products containing proteins and humectants that fill in gaps along the cuticle. Low-porosity hair needs products that penetrate easily, so avoid heavy butters and opt for lighter oils like argan or jojoba.
Your product lineup should work together as a system, not compete for space on your strands.
Detangle and prep without causing frizz
Detangling makes or breaks your entire curl routine. If you rip through knots on dry hair or skip this step entirely, you'll create surface frizz that no amount of product can fix later. The goal isn't just removing tangles; it's redistributing your natural oils from root to tip while keeping your cuticle layer smooth and intact. Most people detangle too aggressively or at the wrong time, which is why their curls look fuzzy and undefined even after styling long curly hair with expensive products. Getting this step right takes five extra minutes but saves hours of frustration when your curls actually cooperate.
Work on damp hair, never fully dry
Your hair needs slip to detangle without snapping. Spray each section with water until it feels damp (not soaking), then apply a generous amount of conditioner or detangling spray. The product creates a coating that lets the comb glide through knots instead of catching on every tangle. Dry hair has too much friction, and you'll hear that awful cracking sound as strands break instead of separate. On the other hand, soaking-wet hair stretches too easily and loses elasticity, so you want that middle ground where your hair feels pliable but not waterlogged.
If your hair dried since your last wash, hop in the shower and let water run over your head for 30 seconds, or fill a spray bottle and mist each section thoroughly. You don't need to rewash; you just need enough moisture for your comb to move freely.
Section your hair for even coverage
Divide your hair into four to eight sections depending on density and length. Thick, long hair needs more sections because you can't reach the underlayers without proper division. Clip each section away with a large claw clip that won't leave creases. This prevents you from missing tangled areas and keeps detangled sections from re-tangling while you work through the rest of your head. Start with the bottom sections at your nape since these areas tangle most and need the most attention.
Use the right technique to minimize breakage
Hold each section at the ends and work your wide-tooth comb or detangling brush through the last two inches first. Once the ends move freely, move up a few inches and repeat. Keep working your way toward the roots in small increments instead of dragging the comb from root to tip in one motion. This method prevents you from piling all the tangles at the ends, which creates a matted mess that's ten times harder to fix. Apply more conditioner or detangling spray if you hit resistance.
Your comb should glide through each section without pulling or snagging; if it doesn't, add more product and work slower.
Wash day routine for clean, bouncy curls
Your wash day sets the foundation for every styling technique that follows. If you strip your hair with harsh cleansers or skip conditioning steps, you'll fight frizz all week no matter how perfectly you apply products later. The goal is removing buildup and dirt while preserving enough natural oils to keep your cuticle smooth and your curls hydrated. Most people either over-wash (stripping their hair completely) or under-wash (leaving residue that blocks moisture), which is why their styling long curly hair efforts fall flat by day two. Getting your wash routine right means choosing products that clean without damage and following a sequence that prepares your curls for maximum definition.
Choose the right cleansing method
Your scalp needs cleansing, but your ends need protection. Use a sulfate-free shampoo or co-wash (cleansing conditioner) that removes buildup without stripping natural oils. Apply cleanser directly to your scalp and massage with your fingertips in small circular motions for 60 to 90 seconds. Let the suds rinse down your length instead of scrubbing the ends, which creates unnecessary friction and frizz. If you use heavy styling products, you need a clarifying shampoo once every two to four weeks to remove silicone and wax buildup that regular cleansers miss.
Co-washing works for people who style daily and need gentle cleansing between deep washes. Alternate between co-wash and sulfate-free shampoo based on how much product you use and how oily your scalp gets.
Condition for slip and moisture
Apply conditioner from mid-shaft to ends, avoiding your roots unless your scalp is extremely dry. Use enough product so your hair feels slippery and coated. This is when you do your final detangling pass with fingers or a wide-tooth comb, working through each section while the conditioner provides slip. Let the conditioner sit for three to five minutes so the moisturizing ingredients penetrate your cuticle. If you have high-porosity hair, this step is critical because your cuticle absorbs conditioner faster than other hair types.
Rinse temperature matters more than you think
Rinse with cool or lukewarm water to close your cuticle and seal in moisture. Hot water feels good but lifts the cuticle layer, which invites frizz and makes your hair lose definition faster. Flip your head upside down and let water run through your hair without scrubbing or roughing up the surface. You want to remove excess conditioner while leaving a thin coating that provides slip for styling. Your hair should feel slightly slick, not squeaky clean.
The squeaky-clean feeling means you removed too much conditioner and your cuticle is wide open for frizz.
Apply leave-in and style on soaking wet hair
Your hair needs to be soaking wet when you apply leave-in products, not just damp. Most people squeeze out too much water before applying products, which means the product sits on the surface instead of absorbing into each strand. Water is your transport system. It carries leave-in conditioner and styling creams deep into your cuticle where they actually work. When you apply products to damp or barely wet hair during styling long curly hair, you'll see white residue, uneven coverage, and curls that dry frizzy no matter how much product you pile on. The solution is counterintuitive: your hair should be so wet that water drips when you touch it.
Keep maximum water in your hair
After rinsing out conditioner, flip your head upside down and squeeze your hair gently using a scrunching motion (cupping sections and pressing toward your scalp). Don't wring or twist, which creates frizz before you even start styling. You want to remove just enough water so it's not streaming down your back, but your hair should still feel saturated and heavy. If you squeezed too much out, spray sections with water from your spray bottle until they're dripping again. This step confuses people because every instinct says to remove excess water, but that instinct works against curl formation.
Apply leave-in in thin layers
Pour a quarter-sized amount of leave-in conditioner or curl cream into your palm (adjust based on hair density). Rub your hands together to distribute the product evenly across both palms and fingers. Rake the product through one section from roots to ends using your fingers like a wide-tooth comb. Go slowly and make sure every strand gets coated. Use the praying hands method by sandwiching each section between your palms and smoothing from root to tip. This technique encourages curl clumping and distributes product more evenly than raking alone.
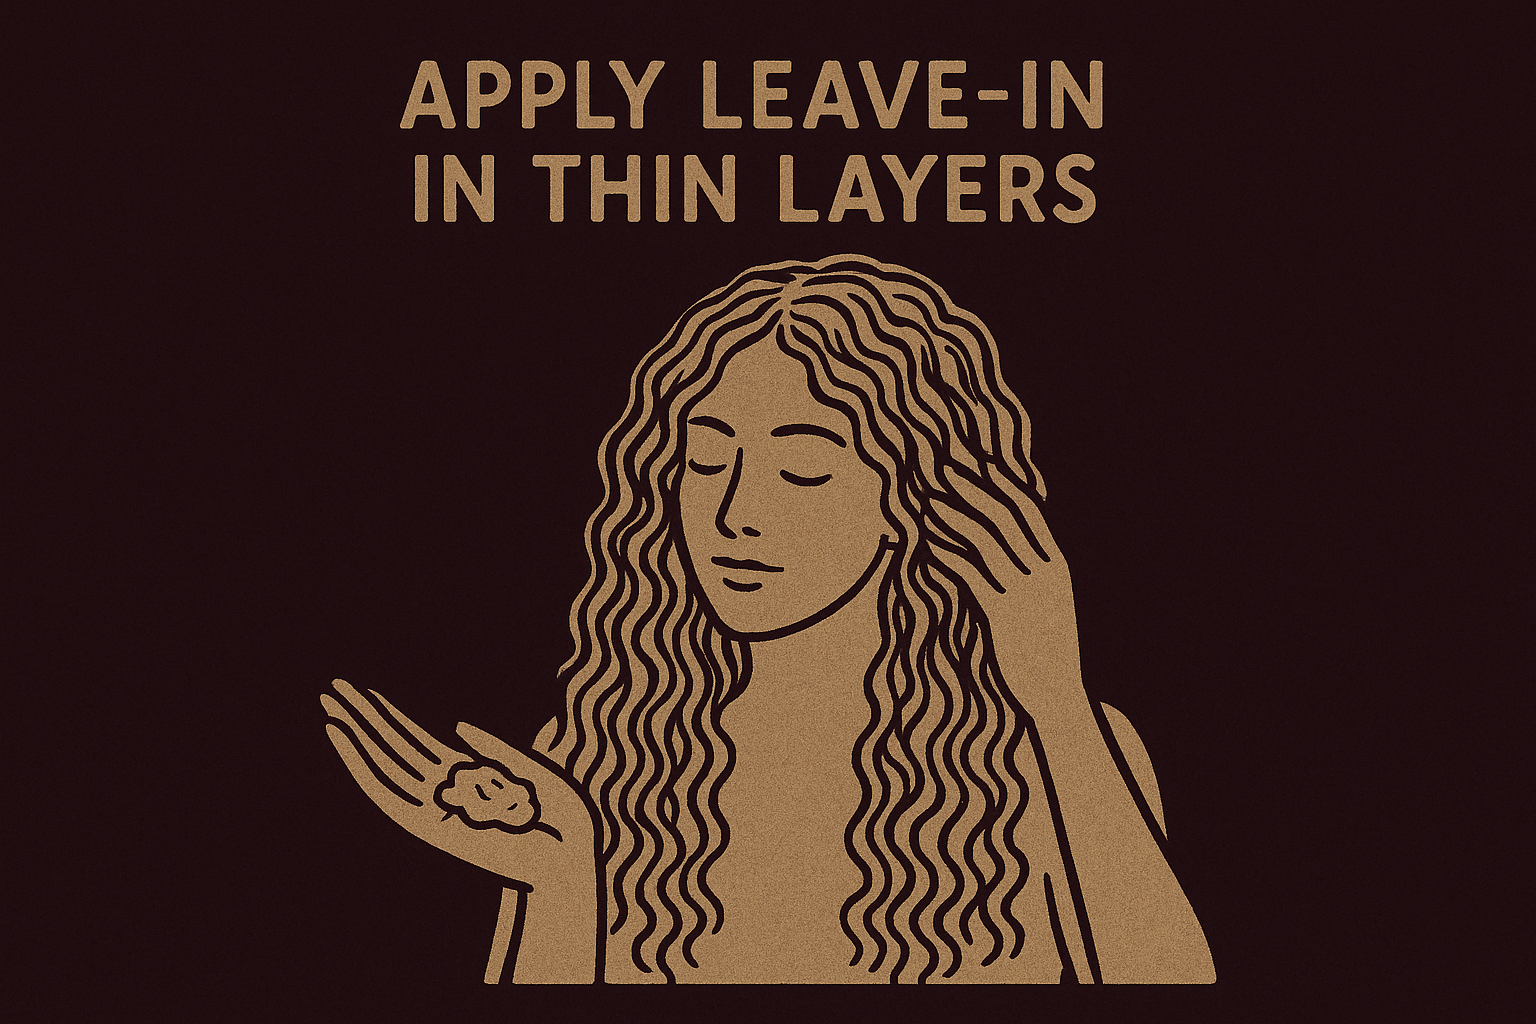
Your curls clump best when each strand is coated with product while surrounded by water molecules.
Repeat this process for each section, applying more product as needed. Thick, long hair needs more passes than fine, short hair. You'll know you used enough product when your hair feels slick and defined curls start forming naturally without manipulation.
Build hold with gel, mousse, or cream
Your leave-in provides moisture, but you need a holding product to lock your curl pattern in place and prevent frizz as your hair dries. Gel, mousse, and cream each create different levels of hold and finish, so your choice depends on whether you want soft, touchable curls or maximum definition that lasts for days. Most people skip this step or apply holding products incorrectly, which is why their curls fall flat by afternoon or turn into a crunchy mess. The key is choosing the right product for your density and curl pattern, then applying it while your hair is still soaking wet from the previous step. This creates a cast (a temporary crunchy layer) that protects your curls while they dry and gets scrunched out later for soft, defined results.
Choose your hold product based on curl needs
Gel creates the strongest hold and works best for tight curl patterns (3B to 4C) or anyone who needs definition that lasts multiple days. It forms a firm cast that feels crunchy until you scrunch it out, but it locks your curl pattern exactly where you placed it. Mousse gives medium hold with more volume and bounce, making it ideal for wavy to loose curly hair (2B to 3A) that needs lift without weight. Cream provides the softest hold and works when you want flexible, touchable curls that move naturally but still have some structure.
Fine hair needs lighter products like mousse or water-based gels. Thick, coarse hair handles heavy creams and strong-hold gels without looking weighed down. You can also layer products for custom hold: apply cream first for moisture and definition, then add gel on top for extra hold where you need it most.
Apply using scrunching, not smoothing
Pour a palm-full of your holding product into your hands and rub them together. Flip your head upside down and scrunch the product into your hair using upward, squeezing motions. Cup sections in your palms and push toward your scalp, then hold for two seconds before releasing. This technique encourages curl clumping and distributes product evenly without disrupting the curl pattern you created with your leave-in. Apply more product to the areas that tend to frizz first (usually around your face and at the crown).
Scrunching upward forms curls; smoothing downward stretches them out and invites frizz.
Your hair should feel coated and slightly crunchy if you're using gel. With mousse or cream, it feels soft but structured. That coated feeling is normal and exactly what you want before moving to the drying stage of styling long curly hair.
Dry curls fast without puffiness or crunch
Drying takes the longest and causes the most damage if you do it wrong. Your curls are fragile when wet, and the drying method you choose determines whether you end up with defined spirals or a frizzy triangle. Air drying takes three to six hours depending on your hair's density and porosity, but it gives you the softest results with minimal manipulation. Diffusing cuts that time to 30 to 60 minutes but requires specific technique to avoid disrupting your curl pattern. Most people blast their hair with heat on high speed, which creates instant puffiness and frizz that no amount of product can fix after the fact. The solution is controlling airflow, temperature, and how you position your hair inside the diffuser.
Air drying without losing definition
Let your hair dry naturally if you have time and your climate isn't humid. After applying your holding product, don't touch your hair at all. Touching breaks the cast forming around each curl and invites frizz. Your curls need to dry completely undisturbed to set in the pattern you created during styling. This method works best for people with low to medium porosity who want maximum softness and natural movement. High-porosity hair takes too long to air dry and often loses definition before it fully dries.
Diffuse with low heat and hover technique
Set your dryer to low or medium heat with low airflow. High heat and high speed blast your curls apart and create frizz. Attach your diffuser and flip your head to one side. Cup a section of curls inside the diffuser bowl and bring it close to your scalp without touching. Hold for 30 to 60 seconds, then release and move to the next section. This hover and hold method dries your roots first while supporting curl formation at the ends.
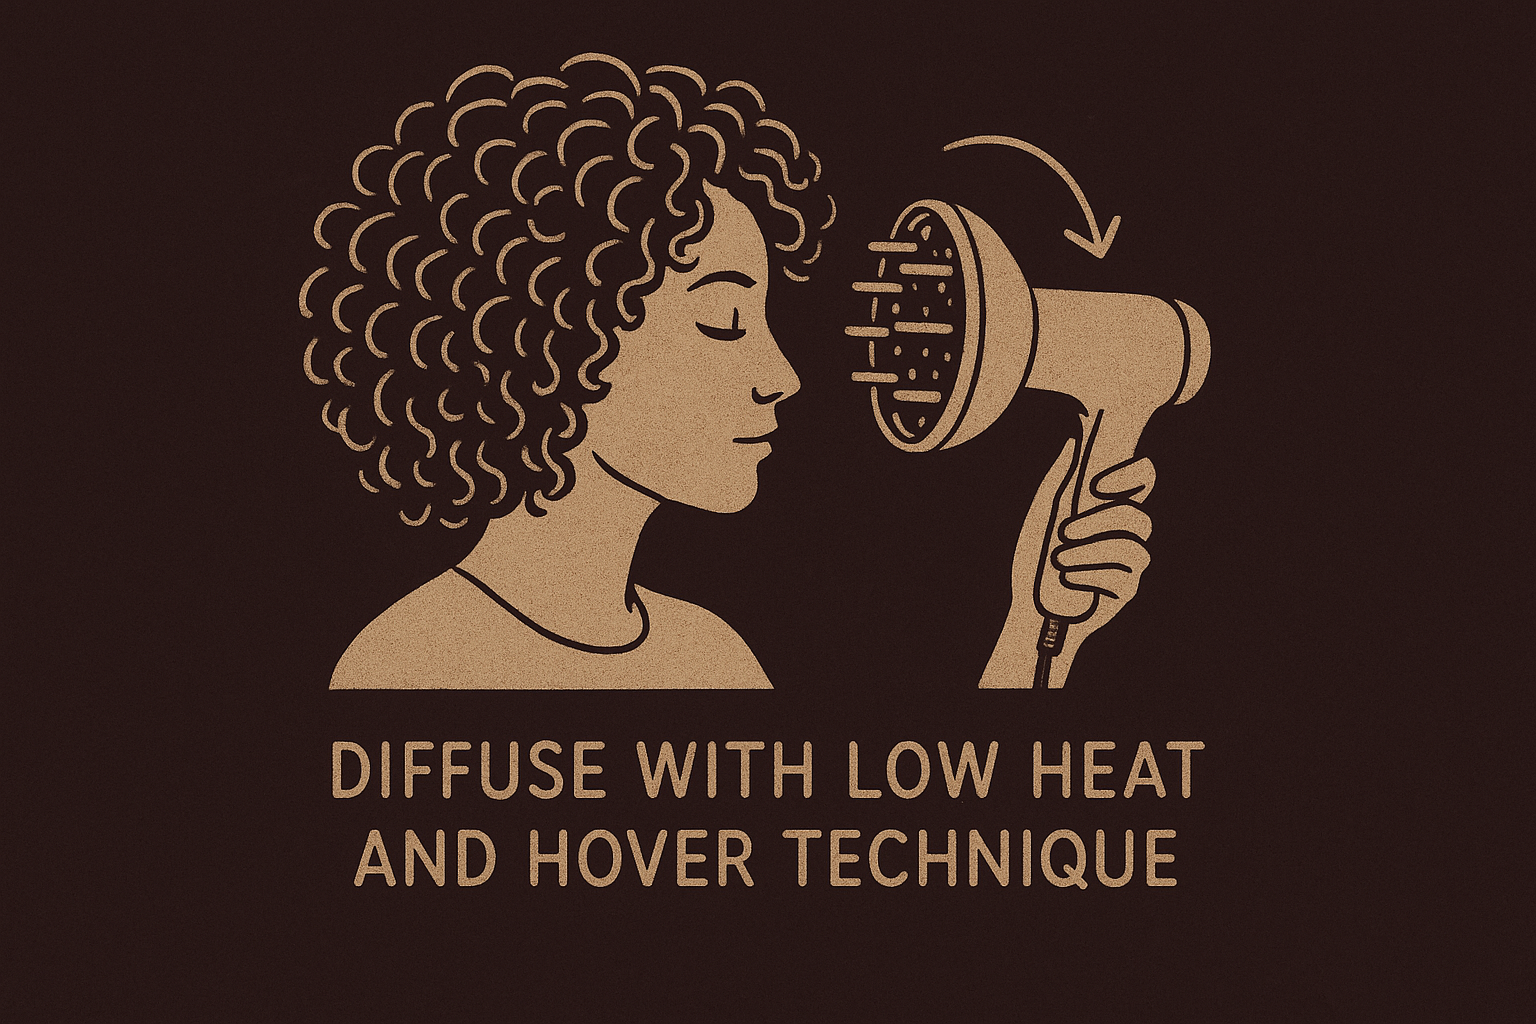
Work in sections around your entire head, spending extra time on dense areas that hold more water. Your hair should feel about 80% dry when you finish diffusing. Let the last 20% air dry to prevent over-drying, which causes crunch and stiffness. The cast should feel firm but not rock-hard when you're done.
Patience during drying pays off with curls that hold their shape for days instead of falling flat by afternoon.
Speed up drying with micro-plopping
Before diffusing, try micro-plopping to remove excess water without disturbing your curl pattern. Take your microfiber towel or t-shirt and scrunch sections of hair upward, holding for five seconds to absorb water. This technique speeds up drying time by 30% and works especially well for styling long curly hair that takes forever to dry naturally. Repeat on all sections before you start diffusing or air drying.
Finish the look and scrunch out the cast
Your curls look stiff and crunchy after drying because the gel or mousse formed a protective cast around each strand. This cast isn't a mistake; it's exactly what locked your curl pattern in place and prevented frizz while your hair dried. Now you need to break that cast to reveal soft, defined curls underneath. Most people panic when they see the crunchy texture and immediately touch their hair while it's still damp, which destroys all the work they put into styling long curly hair correctly. The key is patience and knowing the exact moment to scrunch.
Wait until hair is completely dry
Touch your hair at the roots, mid-lengths, and ends to check for dampness. If any section feels cool or wet, your hair isn't ready yet. Scrunching too early breaks the curl formation before it sets, which means your curls fall flat and frizz takes over. Your hair needs to be 100% dry and the cast should feel firm like a shell when you touch it. This usually takes 20 to 30 minutes after you finish diffusing, or four to six hours if you air dried.
High-porosity hair dries faster than low-porosity hair, so your timing depends on what you identified at the start. Check the underlayers at your nape since these areas stay damp longest and fool you into thinking your whole head is dry when the top layers already set.
Scrunch out the crunch properly
Flip your head upside down and cup sections of hair in your palms. Squeeze gently using the same scrunching motion you used during styling, working from ends toward roots. You'll hear a slight crackling sound as the cast breaks. This releases the hold product coating and reveals soft curls with natural movement. Apply a tiny amount of lightweight oil (like argan or jojoba) to your palms if your curls still feel slightly stiff after scrunching. Rub the oil between your hands until it's barely visible, then scrunch it through your ends.
Scrunching out the cast transforms crunchy spirals into touchable, defined curls that move naturally.
Add volume at the roots if needed
Your roots probably look flat because the weight of long, wet hair pulled them down while drying. Shake your head gently to lift roots away from your scalp, or use your fingers to gently lift sections at the crown. You can also clip your roots during drying (before scrunching out the cast) by sectioning hair and placing clips at the base for extra lift.
Refresh long curls in the morning without rewashing
Your curls rarely wake up looking the same as day one. Some sections flatten against your pillow, others frizz out at weird angles, and the back of your head probably looks like you stuck your finger in an electrical socket. Most people assume they need to rewash completely or suffer through bad hair days, but refreshing takes five to ten minutes and restores definition without starting over. The trick is knowing which areas need moisture, which need hold, and how to apply products without destroying the curl pattern you worked so hard to create during styling long curly hair on wash day. Your refresh technique depends on how many days passed since your last wash and whether your curls lost moisture or just got reshaped by sleep.
Assess what your curls actually need
Look at your hair in natural light and identify problem areas. Frizzy curls need water and leave-in conditioner to smooth the cuticle. Flat or stretched sections need reactivation with water and a small amount of holding product. Curls that still look defined but feel dry just need a light mist of water and oil to restore shine. Touch different sections to check texture. If your hair feels rough or crunchy, you need moisture. If it feels limp and loose, you need hold.
Check these specific areas that typically need the most attention:
- Front sections around your face that rub against pillowcases
- Crown area where hair lies flattest during sleep
- Underneath layers at the nape that get compressed
- Ends that dried out or lost definition overnight
Rehydrate with water and product mix
Fill your spray bottle with three parts water and one part leave-in conditioner. Shake it thoroughly so the mixture combines evenly. Spray the problem sections until they feel damp but not dripping. Use your hands to scrunch upward using the same motion from your wash day routine. This reactivates the products already in your hair and encourages curl reformation. Let your hair air dry for ten to fifteen minutes, or diffuse on low heat for five minutes if you need faster results.
Refreshing reactivates the products already coating your strands instead of piling new products on top of old ones.
Target frizzy areas without soaking everything
Apply a rice-grain amount of gel or curl cream to your palms and emulsify it by rubbing your hands together until the product feels thin and spreadable. Smooth it over frizzy sections using the praying hands method, then scrunch to reform curls. Focus only on areas that need help instead of applying product to your entire head, which creates buildup and weighs down curls that still look good. Your goal is blending refreshed sections with untouched sections so your whole head looks cohesive.
Sleep, workouts, and protective styles that work
Your curls face constant threats between wash days. Sleeping flattens sections against your pillow, workouts create sweat and friction that invite frizz, and daily activities expose your hair to humidity and environmental damage. Most people protect their curls during styling long curly hair but ignore the maintenance that happens between those sessions. The result is definition that lasts one day instead of five, forcing you back to the wash basin far more often than necessary. Smart protection strategies extend your style and reduce the manipulation that causes breakage and frizz over time.
Protect curls while you sleep
Switch to a satin or silk pillowcase that lets your hair glide instead of catching on cotton fibers. Cotton absorbs moisture from your curls and creates friction that roughens your cuticle overnight. Before bed, gather your hair on top of your head and secure it loosely with a satin scrunchie or buff. This pineapple method keeps curls from getting crushed under your head's weight while you sleep. For extra protection, wrap your hair in a silk or satin bonnet that covers everything completely.
Never use regular elastic bands that create dents and breakage. Your pineapple should feel loose enough that you barely notice it but secure enough that hair stays on top of your head. Extremely long hair may need two scrunchies placed at different heights to prevent the weight from pulling everything down.
Keep curls intact during workouts
Tie your hair in a high bun or pineapple before exercising to minimize sweat contact with your lengths. Your scalp will sweat regardless, but keeping your curls elevated prevents the ends from absorbing moisture and frizzing out. After your workout, spray a light mist of water mixed with leave-in conditioner on any sections that got damp, then scrunch to reactivate your styling products. This refresh technique takes two minutes and prevents you from needing a full rewash just because you hit the gym.
Protection between washes matters more than perfect wash day technique because damage accumulates from daily friction and exposure.
Protective styles that maintain definition
Braids, twists, and buns give your curls a break from daily manipulation while still looking polished. A loose side braid keeps hair contained without pulling at your roots or creating tension headaches. Two-strand twists section by section maintain your curl pattern and create definition when you take them down. Low buns secured with spin pins distribute weight evenly and prevent the root flatness that ponytails cause. These styles work for multi-day wear and protect your ends from rubbing against clothes and bags throughout the day.
Fix the most common long curl problems
Every curly person faces recurring issues that make styling long curly hair feel impossible some days. Your roots go flat while your ends spiral tightly, mid-lengths snap off without warning, or your curls shrink up to half their actual length. These problems aren't random bad luck; they're predictable patterns that happen when specific needs go unmet. The difference between someone whose curls always look defined and someone fighting the same battles every wash day comes down to identifying which problem you're actually dealing with and applying the exact fix that addresses the root cause. Most curl problems have straightforward solutions once you stop treating symptoms and start fixing what's broken in your routine.
Handle uneven curl patterns across your head
Your hair has multiple curl patterns because different sections experience different levels of damage, porosity, and manipulation. The back of your head rubs against pillows and chair backs constantly, which loosens the curl pattern and creates frizz. Your crown gets the most sun exposure and environmental damage, making those curls drier and tighter. Front sections around your face get touched, tucked, and manipulated throughout the day, stretching out the natural pattern. Fix this by adjusting your product application based on each zone's needs. Apply heavier cream and more gel to looser sections that need extra hold. Use lighter products on tighter sections that form spirals naturally. Your underlayers probably need more moisture than your top layers because they don't get the same access to conditioning products during application.
Section your hair into four quadrants and treat each one as a separate styling project. The back sections need stronger hold products, crown sections need extra moisture and protein, and front sections benefit from lighter application that won't weigh down curls you touch frequently.
Stop mid-length dryness and breakage
Your mid-lengths snap because that's where your oldest hair lives and where natural oils from your scalp stop reaching. This section also takes the most mechanical damage from styling, sleeping, and daily friction against clothing. Add a protein treatment every four to six weeks to rebuild the internal structure of damaged strands. Between treatments, focus your conditioning efforts on mid-lengths instead of just the ends. Apply leave-in conditioner starting at ear level and working down, then seal with a lightweight oil that prevents moisture loss throughout the day.
Breakage happens at weak points where protein and moisture balance tips too far in either direction.
Reduce shrinkage without heat damage
Your curls shrink because they're forming their natural spiral pattern, but you can elongate without straightening by using stretching techniques during styling. Apply products in a downward raking motion instead of scrunching to encourage length retention. Try the shingling method by taking small sections and smoothing product from root to tip while gently pulling each curl straight. Banding works by wrapping fabric hair ties down the length of your ponytail at two-inch intervals while your hair dries, which stretches curls without heat. Twist-outs and braid-outs create definition with less shrinkage than wash-and-go styles because the twisting or braiding action stretches hair while it sets.
Quick wrap-up
You now have a complete system for styling long curly hair that controls frizz and builds definition from wash day through refresh. Start by understanding your curl type, porosity, and density so you choose techniques that match your specific hair structure. Apply products to soaking wet hair in thin layers, build hold with gel or mousse, and dry without disrupting your curl pattern. Between washes, refresh with water and product mixes instead of rewashing completely. Protect your curls during sleep and workouts using satin materials and loose updos that prevent friction and flattening.
Your first few attempts won't look perfect, but your technique improves each time you practice these methods. Focus on consistency over perfection and adjust products based on what you observe after each styling session. Your hair tells you exactly what it needs if you pay attention to how it responds.
At scatterhair, we're building products specifically for people with textured hair who want styling to feel effortless instead of exhausting. Join our community for exclusive guides, playlists, and early access when we launch in 2026.