

Curly Hair Styling for Beginners: A Simple Step-by-Step
So you've decided to stop fighting your curls and actually work with them. Good call. Curly hair styling for beginners can feel overwhelming at first, there are a thousand products, conflicting advice from every corner of the internet, and techniques that seem to require a cosmetology degree. But here's the thing: it doesn't have to be that complicated.
Most of the confusion comes from not having a clear starting point. You don't need ten products or three hours in front of a mirror. You need a basic routine that actually works and an understanding of what your curls want from you. Once that clicks, styling becomes less of a chore and more of a five-minute habit you don't think twice about.
That's exactly the philosophy we're building scatterhair around, styling products for textured hair that cut through the noise and make the whole process feel effortless. We believe your texture should be something you rock, not something you wrestle with. And whether you're rocking tight coils or loose waves, the fundamentals covered here apply across the board.
This guide walks you through everything step by step: figuring out your curl type, picking the right products, building a wash-day routine, and styling your curls with confidence, even if you've never done it before. No fluff, no gatekeeping. Just the stuff that actually matters.
What beginners should know about curls
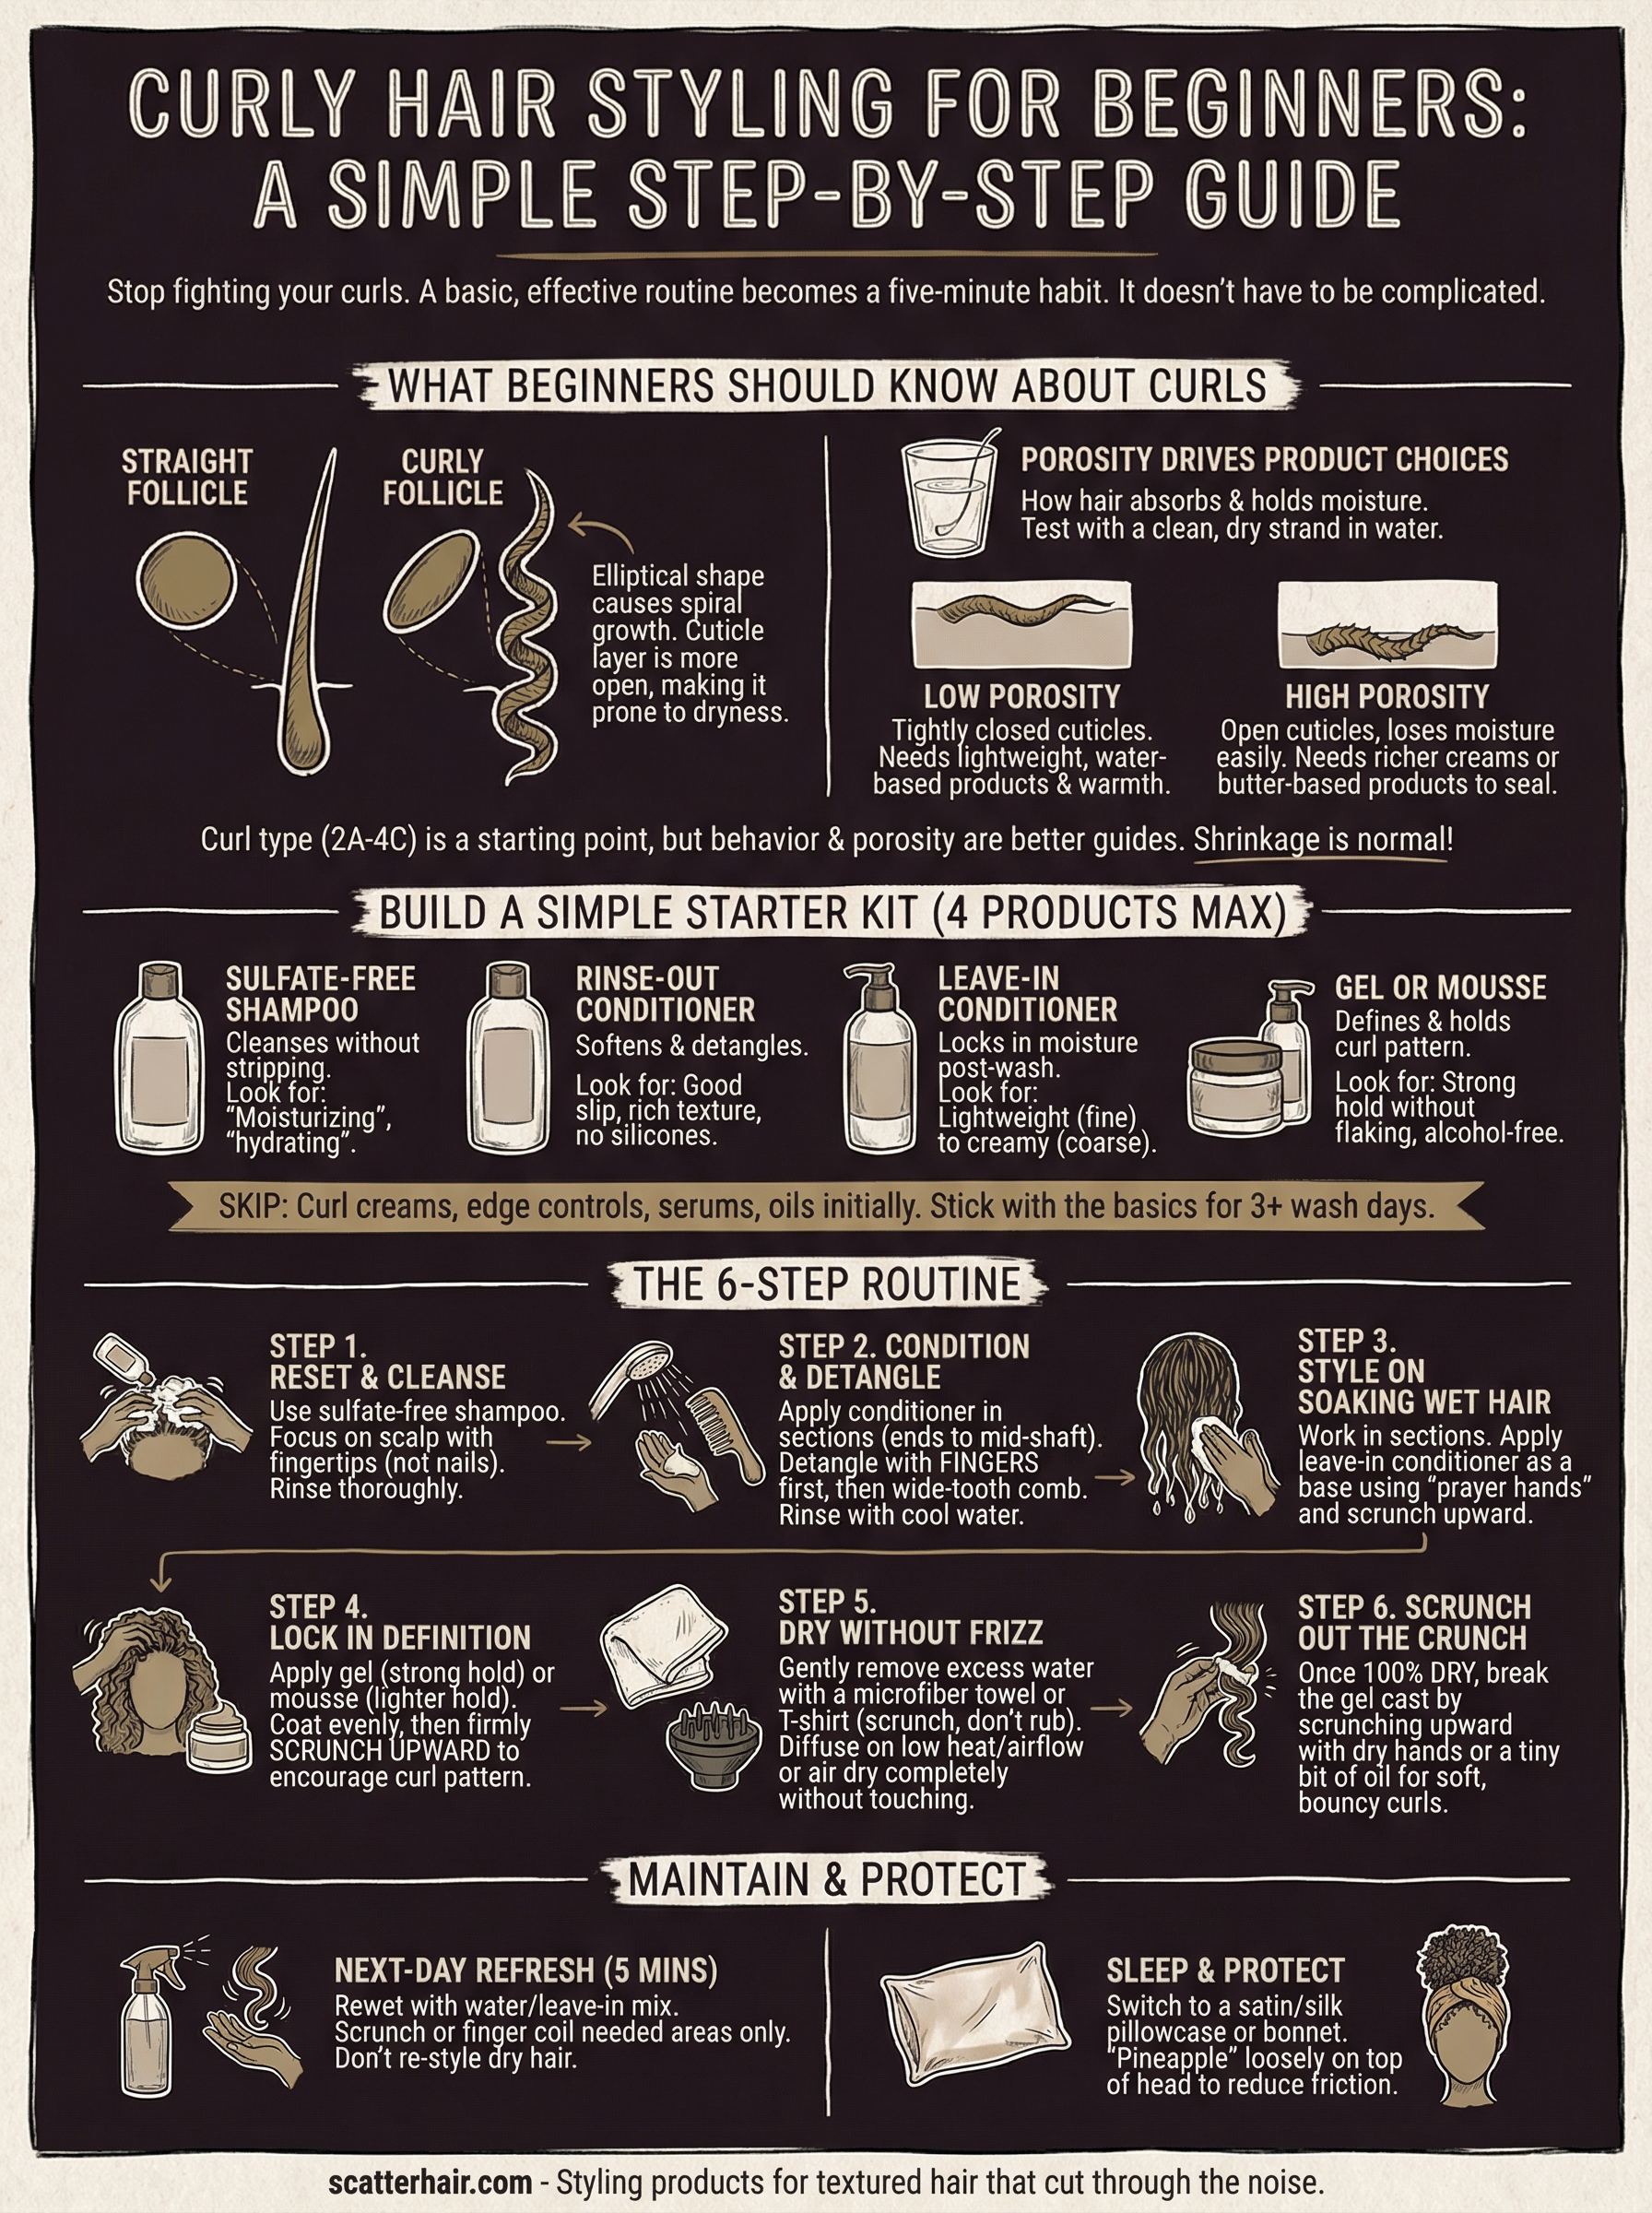
Before you touch a single product, it helps to understand what makes curly hair different from straight hair and why the same rules don't apply. Curly hair has a naturally elliptical or asymmetrical follicle shape, which causes the strand to grow in a spiral or wave pattern. That shape also means the cuticle layer sits open in more places, making it harder for natural oils to travel down the shaft. This is why curly hair tends to run dry, and why moisture is the foundation of every solid curly hair routine.
Your curl type is a starting point, not a rule
The curl typing system categorizes curls from 2A (loose waves) to 4C (tight coils). You've probably seen these numbers thrown around online. They're useful for understanding your general texture, but they're not the whole picture. Two people with the same curl type can have completely different hair behavior depending on strand thickness, density, and how their hair reacts to humidity.
Knowing your curl type helps you shop smarter, but your hair's actual behavior in real conditions is always the better guide.
| Curl Type | Description | Common Behavior |
|---|---|---|
| 2A-2C | Loose to defined waves | Prone to going flat; needs lightweight products |
| 3A-3B | Loose to medium curls | Balanced moisture needs; responds well to creams |
| 3C-4A | Tight curls to coils | Higher shrinkage; needs richer moisture |
| 4B-4C | Tight coils to zig-zag | Most prone to dryness; benefits from layering products |
Use this table as a reference, not a rulebook. Curly hair styling for beginners works best when you stay curious about what your specific hair responds to, rather than following a type-based prescription to the letter.
Porosity is what actually drives your product choices
Porosity refers to how well your hair absorbs and holds onto moisture. Low porosity hair has tightly closed cuticles, so water and products tend to sit on the surface rather than soak in. High porosity hair has cuticles that open easily but also let moisture escape just as fast. Most people fall somewhere in the middle, but knowing roughly where you land changes which products will actually perform for you.
You can get a rough read on your porosity by dropping a clean, dry strand into a glass of room-temperature water. If it floats after a few minutes, you likely have low porosity hair. If it sinks quickly, you likely have high porosity hair. Low porosity hair benefits from lightweight, water-based products and a warm shower to help the cuticle open. High porosity hair does better with heavier creams or butter-based products that seal moisture in after it's absorbed.
Shrinkage is normal, not a problem
One thing that catches a lot of beginners off guard is shrinkage, the way curly hair appears much shorter dry than it does soaking wet. This is completely normal and actually a sign of healthy, elastic curl structure. Tight curl patterns like 3C through 4C can shrink anywhere from 50 to 75 percent of the hair's actual length. Trying to stretch your curls to fight shrinkage is an option, but it's not something you need to focus on from day one.
Building realistic expectations around shrinkage saves you a lot of frustration early on. Your wet length and your dry length will always look different, and that's part of working with textured hair rather than against it. Once you accept that, you can start focusing on what really matters: curl definition, hydration, and frizz control, which is exactly what the rest of this guide covers.
Build a simple starter kit
One of the biggest mistakes beginners make is buying fifteen products before they know what their hair actually needs. Curly hair styling for beginners starts with less, not more. You need a short list of core products that cover the basics, then build from there once you understand how your hair responds. Overloading your routine upfront makes it impossible to figure out what's working and what isn't.
Keep your starting kit to four products maximum. More products don't equal better results.
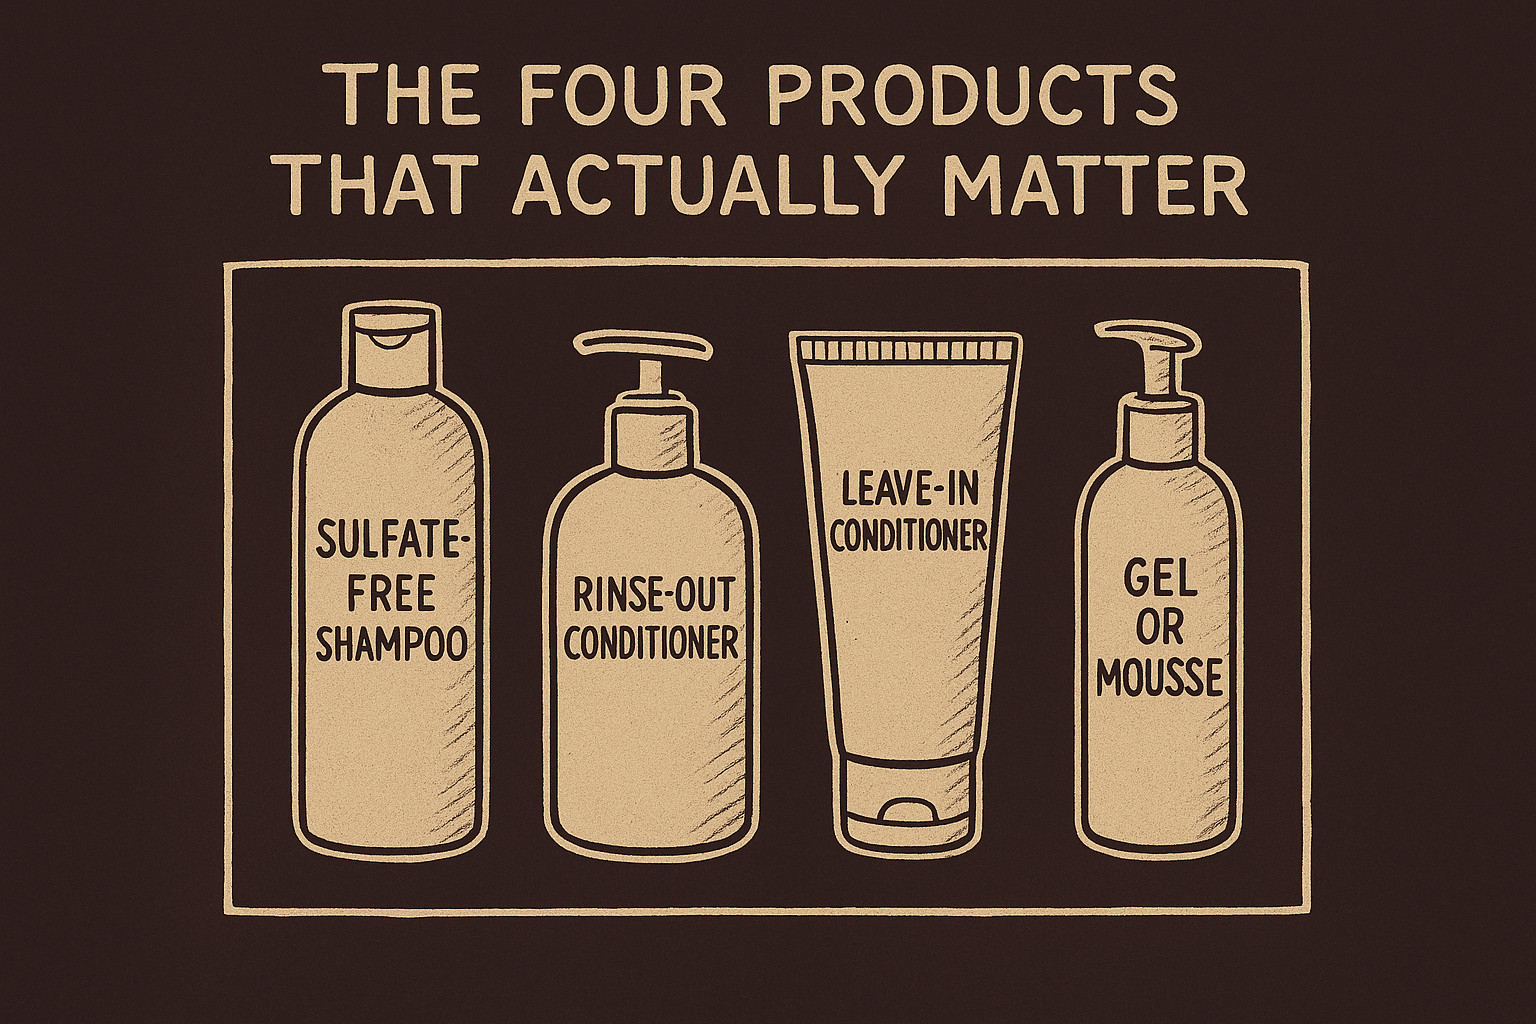
The four products that actually matter
Your starter kit needs to cover four core functions: cleansing, conditioning, styling, and hold. Everything else is optional until you get those four working together consistently. Here's what each slot does and what to look for:
| Product | Function | What to Look For |
|---|---|---|
| Sulfate-free shampoo | Cleanses without stripping | "Moisturizing" or "hydrating" on the label |
| Rinse-out conditioner | Softens and detangles | Good slip, rich texture, no silicones |
| Leave-in conditioner | Locks in moisture post-wash | Lightweight for fine curls, creamy for coarser textures |
| Gel or mousse | Defines and holds curl pattern | Strong hold without flaking |
Silicone-free formulas matter here because silicones build up on the hair shaft over time and block moisture from getting in. Alcohol-free products are also worth checking for, since drying alcohols like SD alcohol or denatured alcohol strip moisture out of the hair faster than you can put it back.
What to skip when you're starting out
Skip the curl creams, edge controls, serums, and hair oils until you nail the basics. Adding too many products at once leaves you with buildup, unpredictable results, and no real sense of which product is helping or hurting. Your hair tells you what it needs over time, but only if you give it a clean, consistent baseline to work from first.
Once you have your four core products, stick with them through at least three full wash days before making any swaps or additions. Three wash days gives your hair enough time to adjust and gives you enough data points to spot actual patterns in how it behaves.
Step 1. Reset and cleanse without stripping
Wash day starts with a clean slate, and how you shampoo your curls matters more than most beginners expect. Conventional shampoos loaded with sulfates strip away the natural oils that curly hair already has trouble holding onto, leaving your strands dry and frizzy before you even get to the styling stage. In curly hair styling for beginners, the cleanse sets the tone for everything that follows, so getting this step right is worth slowing down for.
Using a sulfate-free shampoo is not a trend or an upsell. It's the baseline requirement for a cleanse that doesn't undo itself.
Choose the right shampoo for your texture
Not every sulfate-free shampoo performs the same way, and picking the wrong one for your texture leads to either greasy, product-heavy buildup or hair that still feels stripped after washing. Fine, wavy hair does better with a lightweight, volumizing formula that clears buildup without adding weight. Coarser, denser textures from 3C through 4C benefit from a richer, creamier formula that hydrates while it cleanses. Check the ingredient list before buying: look for water at the top, a gentle cleanser like sodium cocoyl isethionate, and at least one humectant such as glycerin or aloe vera listed among the first several ingredients.
| Hair Type | Shampoo Style to Look For |
|---|---|
| Fine or wavy (2A-2C) | Lightweight, volumizing, sulfate-free |
| Medium curls (3A-3B) | Moisturizing, sulfate-free |
| Tight curls and coils (3C-4C) | Creamy, co-wash friendly, sulfate-free |
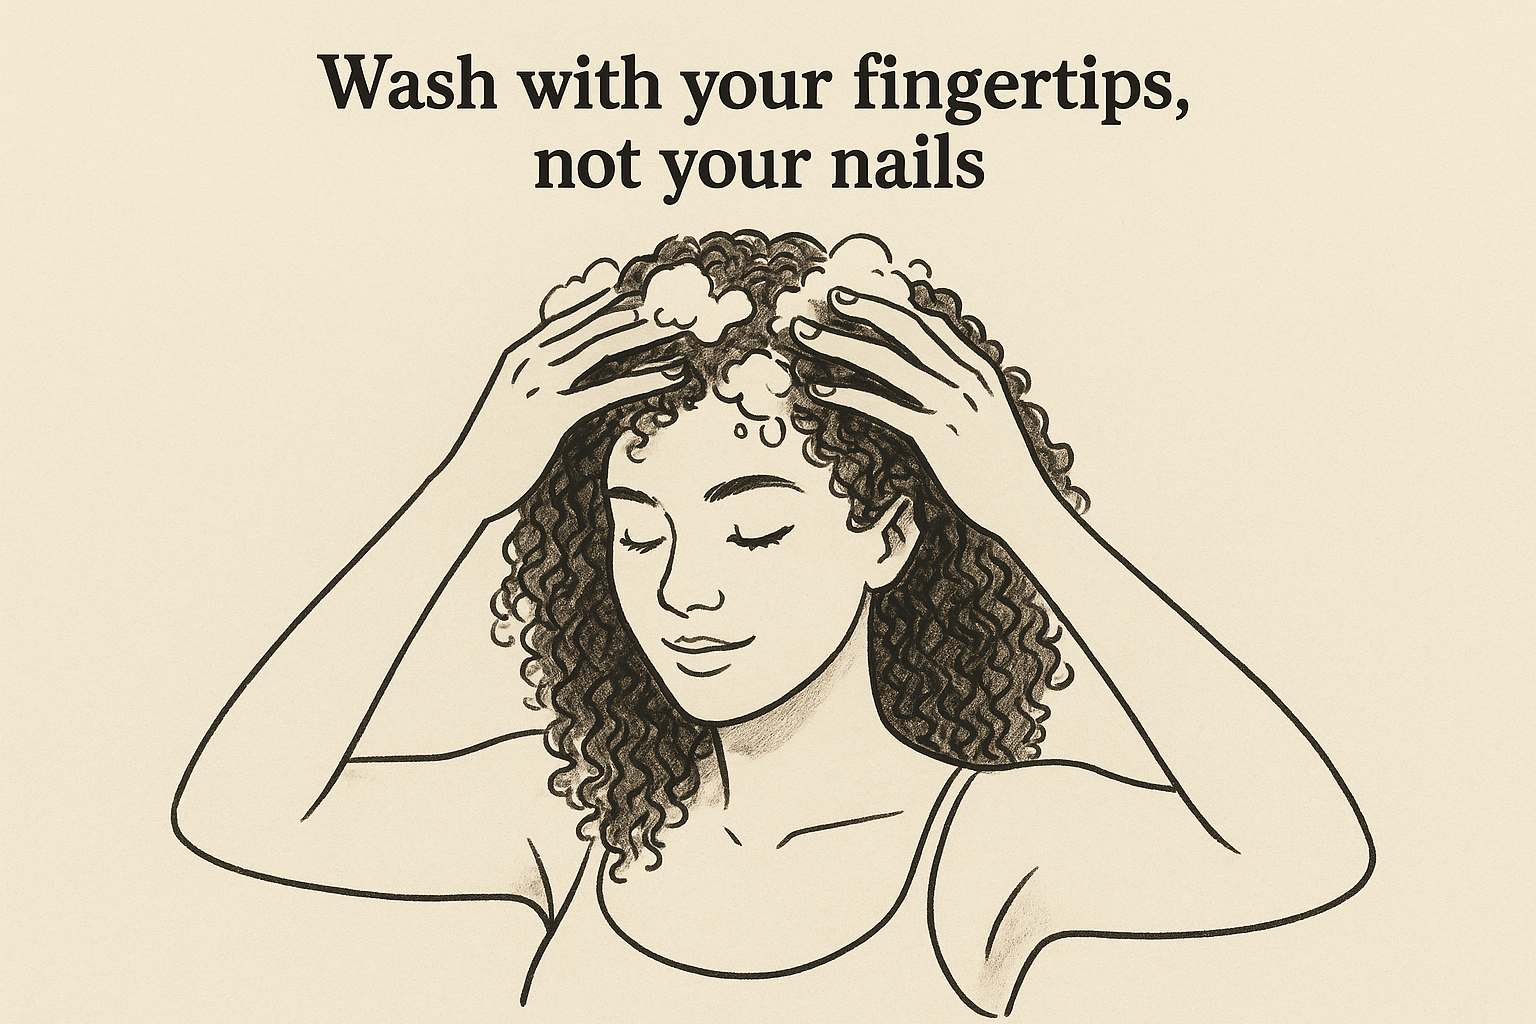
Wash with your fingertips, not your nails
Your technique during the cleanse matters as much as the product you use. Apply shampoo directly to your scalp and work it in using the pads of your fingertips in small circular motions across your entire scalp. This lifts buildup and dirt without roughing up the hair cuticle the way scrubbing with your nails would. Avoid applying shampoo directly to your ends since the suds that rinse down the length of your hair clean it adequately without the need for direct application.
Divide your hair into two or three sections if you have dense or longer curls. Shampooing everything in one go leads to missed spots near the nape and the crown. Rinse with warm water until it runs completely clear, then gently squeeze out the excess with your hands before moving on to conditioner. Leaving shampoo residue behind is one of the most common reasons curls come out looking dull or feeling coated after wash day, so take an extra ten seconds on the rinse.
Step 2. Condition and detangle in the shower
Conditioner is where curly hair gets back the hydration it lost during the cleanse. Rinse-out conditioner does two jobs at once: it softens the cuticle to prep your curls for styling, and it gives your fingers or a wide-tooth comb enough slip to work through knots without snapping strands. In curly hair styling for beginners, this step is where the most damage tends to happen, so slowing down here pays off.
Detangling on dry or barely damp hair without conditioner is the fastest way to break your curl pattern and generate unnecessary frizz.
Apply conditioner section by section
After rinsing out your shampoo, divide your hair into two to four sections depending on your density. Apply a generous amount of conditioner to each section, starting at the ends and working toward the mid-shaft. Avoid applying conditioner directly to your scalp unless your scalp is extremely dry, since buildup at the root weighs curls down and can lead to irritation over time.
Smooth the conditioner through each section with your fingers to make sure every strand is coated before you start working through any knots. If your hair feels particularly dry or tangled, let the conditioner sit for two to three minutes before moving on to detangling.
Detangle with your fingers first
Start detangling with your fingers, not a comb. Finger detangling lets you feel where the knots are and gently work through them without pulling on multiple strands at once. Work from the ends upward, loosening small sections at a time before moving higher up the shaft.
Once your fingers move through a section freely, follow up with a wide-tooth comb if you want more definition or a smoother finish. Narrow combs and brushes cause unnecessary breakage on wet curly hair and should stay out of your shower entirely.
| Tool | Best Use | When to Avoid |
|---|---|---|
| Fingers | First-pass detangling | N/A |
| Wide-tooth comb | Follow-up smoothing | On dry curls |
| Fine-tooth comb | Straight or relaxed hair | All curly textures |
| Paddle brush | Blowouts | Wet curly hair |
Rinse with cool water
After detangling, rinse with cool water rather than warm. Cool water causes the cuticle to close and lie flat, which directly reduces frizz before you even step out of the shower. A noticeable temperature drop for the last fifteen to thirty seconds of your rinse is all it takes to make a real difference in how your curls look once they dry.
Step 3. Style on soaking wet hair
The timing of when you apply your styling products is one of the most important variables in curly hair styling for beginners. Soaking wet hair is the window you want to work in: not damp, not towel-dried, but actively dripping. Curl products applied at this stage distribute evenly through the hair shaft while the cuticle is still open and receptive, which means better product absorption and less frizz when your hair dries.
Waiting until your hair is even slightly damp before applying products is one of the most common beginner mistakes that leads to inconsistent results.
Work in sections, not all at once
Trying to style your entire head in one go leads to uneven product distribution and some sections drying out before you finish. Divide your hair into two to four sections depending on how thick or dense your hair is, and clip the sections you are not working on out of the way. Doing one section at a time gives you control and ensures every curl gets an equal amount of product while your hair is still fully wet.
Start at the back and work your way forward. The nape of your neck dries fastest because it gets the least air circulation, so applying product there first ensures that area gets full treatment before you move on to the rest.
Apply leave-in conditioner as your base layer
Leave-in conditioner is the first product that goes onto your soaking wet hair after you step out of the shower. Squeeze out excess water from each section with your hands before applying, but do not towel dry. Take a quarter-sized amount of leave-in for fine to medium hair, or a slightly larger amount for coarser textures, and smooth it through the section from mid-length to ends.
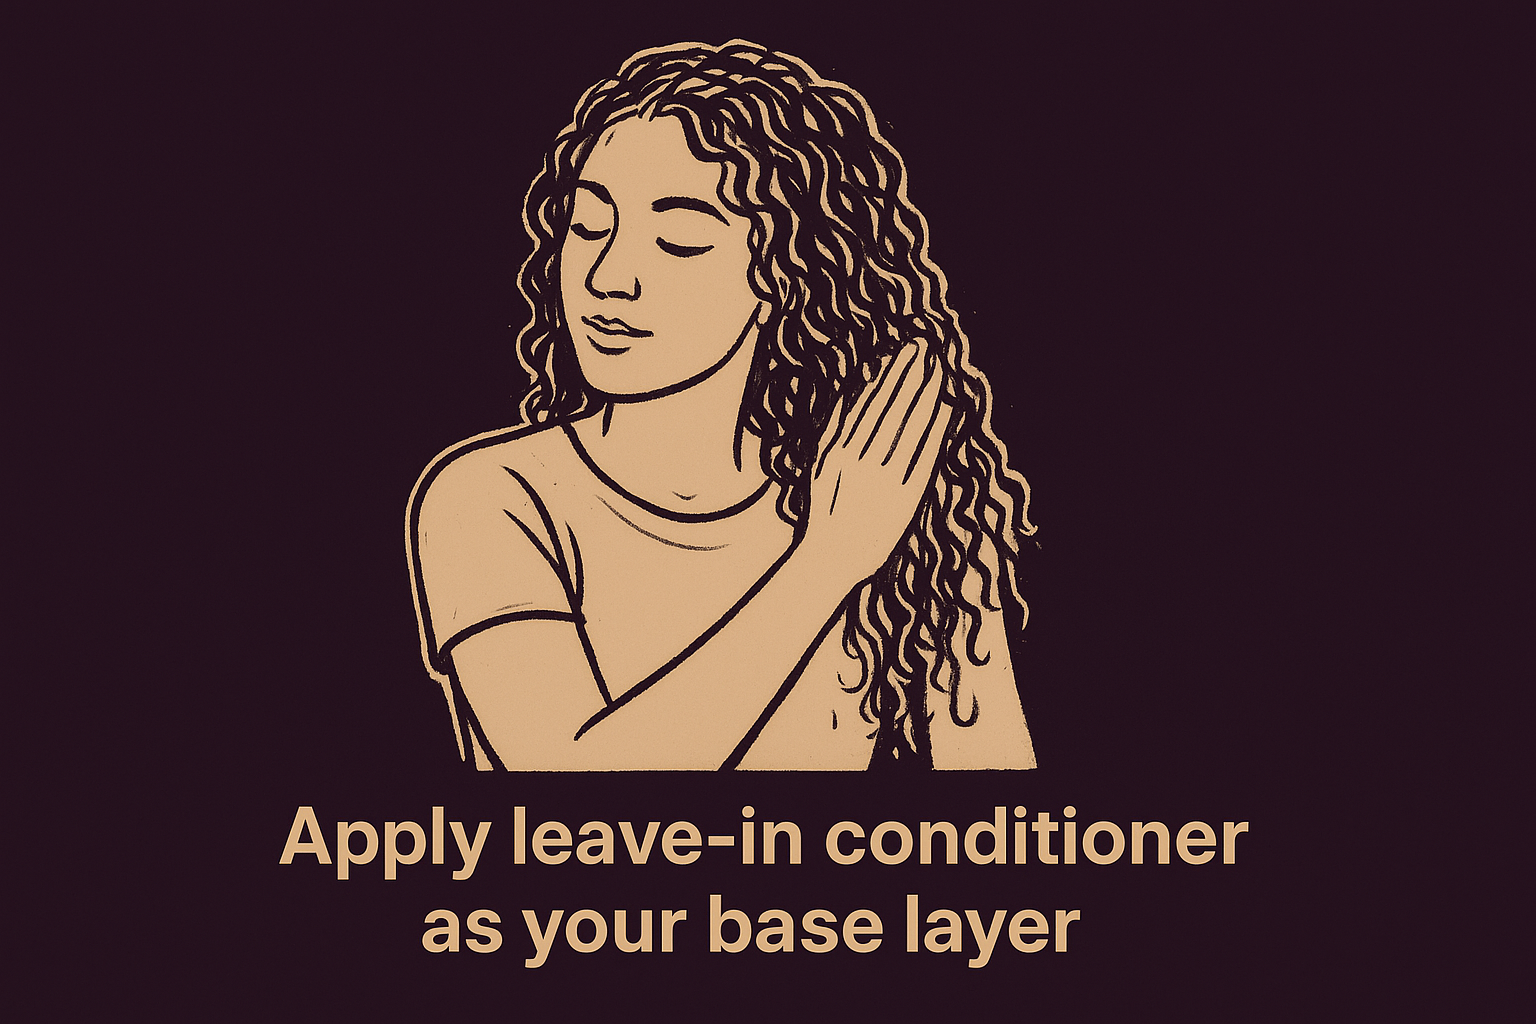
Use the "prayer hands" technique to apply the leave-in: hold a section of hair flat between both palms pressed together, then smooth your hands down the length of the section. This seals the product around each strand rather than roughing up the cuticle. Once the leave-in is distributed, scrunch the section upward from the ends toward your scalp three or four times to encourage your curl pattern to form before you move to the next section.
Step 4. Lock in definition with gel or mousse
Gel or mousse is what takes your curls from loosely formed to actually defined, and applying it correctly is one of the skills that separates a good wash day from a frustrating one. In curly hair styling for beginners, this step feels intimidating mostly because people worry about ending up with crunchy, stiff curls. The crunch is temporary and something you address later. Your job right now is to coat each curl evenly so the hold ingredient can do its job while your hair dries.
Apply your gel or mousse immediately after your leave-in conditioner while your hair is still soaking wet.
Choose between gel and mousse
Gel and mousse both hold your curl pattern in place, but they work differently on the hair. Gel creates a stronger hold and tends to produce more defined curls with a visible cast when it dries. Mousse gives a softer, lighter hold that works especially well on fine or wavy hair that gets weighed down easily. Neither is universally better than the other. Your hair density and the amount of definition you want are what determine which one fits your routine.
| Product | Best For | Hold Level |
|---|---|---|
| Gel | Medium to dense curls (3A-4C) | Medium to strong |
| Mousse | Fine, wavy, or low-density curls (2A-3B) | Light to medium |
| Gel + mousse layered | Coarser textures wanting definition without stiffness | Medium to strong |
How to apply gel or mousse for maximum definition
Start with a dime to quarter-sized amount of gel per section, or a golf-ball sized amount of mousse per section. Rub the product between your palms first so it distributes evenly across your hands before touching your hair. Press your palms flat against a section and smooth downward once, then scrunch upward firmly from the ends to the root. The upward scrunch is what actually presses the product into the curl and encourages it to spring into its natural pattern.
Repeat this process through each section individually rather than applying product across your entire head at once. By the time you finish the last section, the first section will have started to set, which is exactly what you want. Avoid touching or separating curls after applying gel or mousse since that breaks the cast forming around each curl and introduces frizz before the curl has any chance to hold.
Step 5. Dry without frizz
How you dry your curls has just as much impact on the final result as the products you apply. Regular terry cloth towels are one of the biggest frizz triggers in any curly hair routine because the rough looped fabric disrupts the cuticle and breaks apart the curl pattern while the gel cast is still forming. In curly hair styling for beginners, the drying stage is where a lot of the hard work from previous steps either holds or falls apart, so the tool and technique you use here matter just as much as anything you did in the shower.
The method you use to dry your hair matters just as much as anything you applied during the styling steps.
Use a microfiber towel or cotton T-shirt first
Before you diffuse or air dry, you need to remove the dripping excess water without disturbing your curls. Microfiber towels and old cotton T-shirts are the two best options because both have a much smoother surface than terry cloth and cause far less friction against the hair shaft. Take your towel or T-shirt and gently scrunch sections upward toward your scalp. Avoid rubbing or squeezing in a back-and-forth motion since that movement directly breaks apart the curl clumps your products just worked to form.
Spend about thirty to sixty seconds per section, just enough to stop the active dripping without pulling real moisture out of the hair. Your curls should still feel wet and weighted when you finish, not damp.
Diffuse on low heat or air dry
Once you remove the excess water, you have two options: use a blow dryer with a diffuser attachment or let your hair air dry completely. Diffusing is faster and tends to produce more defined, voluminous results. Air drying is gentler on the hair but takes longer and can sometimes produce a flatter finish depending on your curl type and density.
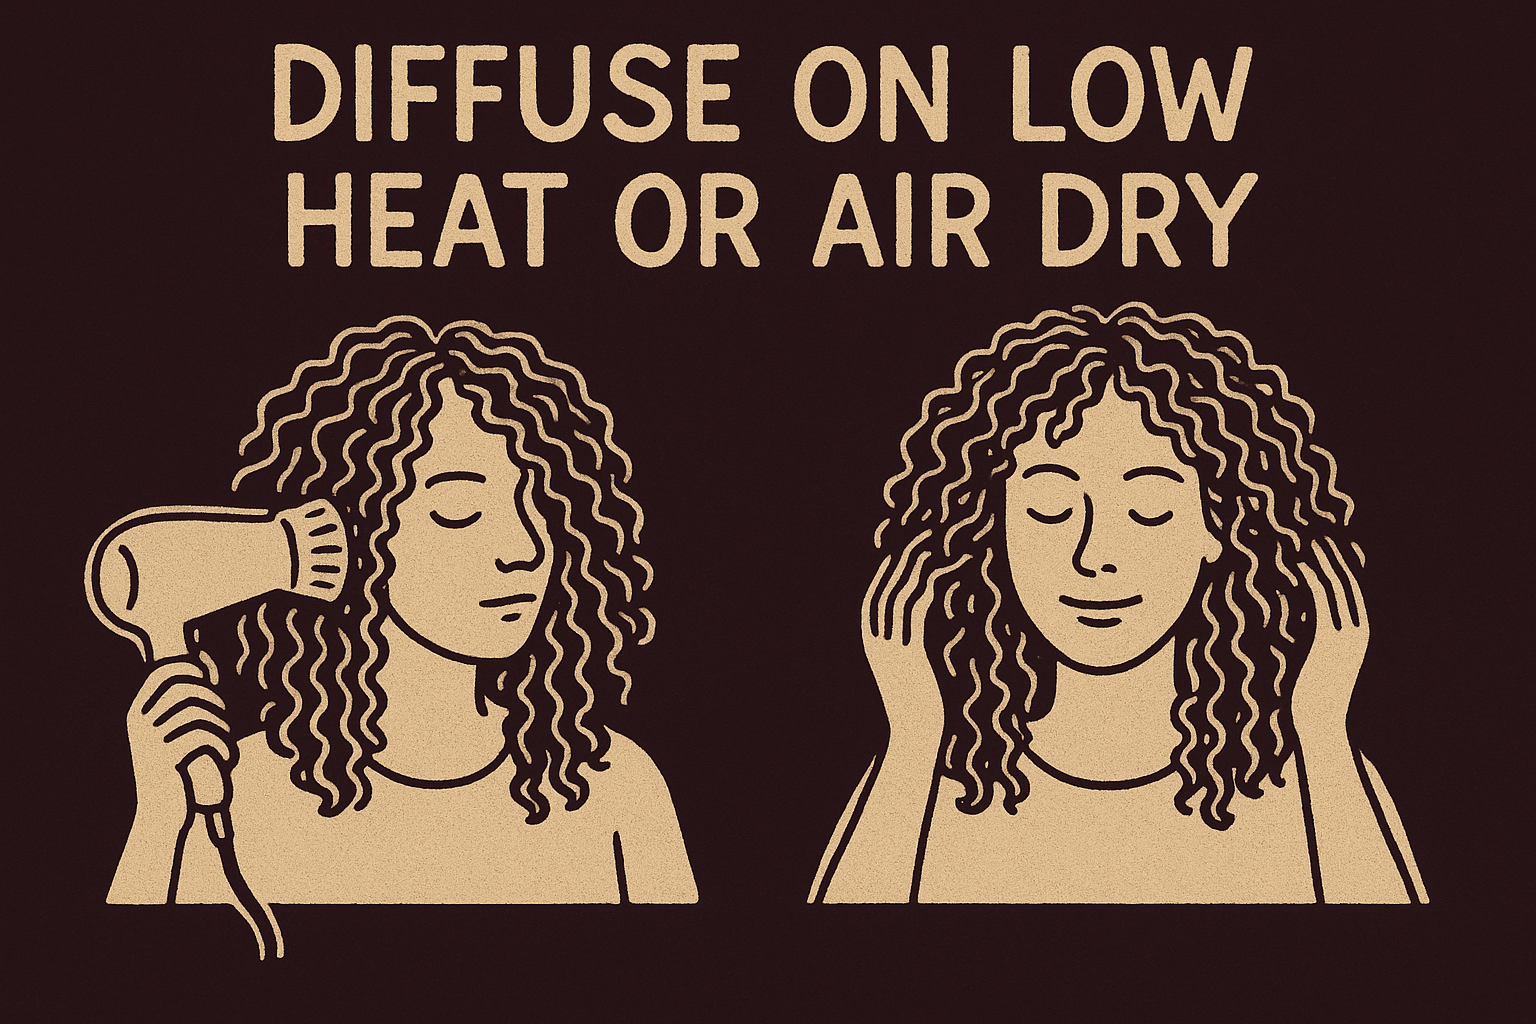
If you choose to diffuse, attach a bowl-shaped diffuser to your blow dryer and set it to low heat and low airflow. Hold sections of your hair inside the bowl and lift toward your scalp rather than moving the dryer constantly around your head. Stay in each spot for fifteen to twenty seconds before moving to the next section. Constant movement causes frizz by disturbing the cast before it sets. Do not touch or scrunch your hair while it is drying regardless of which method you choose, since handling curls mid-dry breaks the definition you built during the styling steps.
Step 6. Scrunch out the crunch and finish
After your curls dry, you will notice they feel stiff and crunchy to the touch. This is the gel cast forming around your curl pattern, and it is supposed to happen. The cast is not a mistake or a sign that you used too much product. It is actually doing its job by locking your curl definition in place while your hair dries. The final step in curly hair styling for beginners is breaking that cast to reveal soft, bouncy curls underneath.
Never scrunch out the cast while your hair is still damp. Breaking it too early lets frizz back in before the curl pattern has fully set.
How to know your curls are fully dry
Your curls need to be completely dry before you touch them, not 80 percent dry, not mostly dry. Running your fingers through hair that still has moisture at the core will break apart your curl clumps and leave you with a frizzy, undefined finish. To check, press a single curl between two fingers. If it feels even slightly cool or wet at the center, your hair needs more time. Fully dried curls feel the same temperature as the rest of your body and bounce back when you gently compress them.
Scrunch out the cast the right way
Coat your palms lightly with a small drop of hair oil or a tiny amount of a light serum before scrunching. The slip this adds helps you break the cast smoothly without pulling on individual strands. Flip your hair forward so gravity works in your favor, then scrunch sections firmly upward from the ends toward the root using both hands. You will feel and hear the cast breaking as you go. Work through the entire head section by section rather than all at once.
Once you scrunch through every section, flip your hair back and gently separate any large clumps into smaller ones using just your fingertips at the root. Pull the clump apart slowly from the base, not the middle or the ends, since pulling from the wrong point creates frizz. Stop separating once you reach a size and shape you like.
Final check before you walk out
Run a small amount of lightweight oil across your fingertips only, then lightly smooth any flyaways along your hairline or crown. Do not rake your fingers through your curls at this point. One pass with the fingertips is enough to clean up the silhouette without disturbing everything you just built.
Next-day refresh in 5 minutes
Second-day curls rarely look as defined as wash-day curls straight out of the gate, and that is completely normal. Humidity, sleep, and movement all break down your curl pattern overnight, but you do not need to wash your hair again to get it back. For anyone working through curly hair styling for beginners, the next-day refresh is one of the most practical skills you can build because it extends your wash day results by one or two extra days without adding extra time or product to your routine.
You should never re-style dry curls with product. Water is the reset button, not more gel.
Rewet with water first
Your curls need water before they need anything else on day two. Dry or barely damp curls will not respond to product the same way they did on wash day because the cuticle is closed and any styling product you add will sit on top rather than absorb. Fill a spray bottle with plain water and mist each section evenly until your curls feel damp all the way through, not soaking, but clearly wet to the touch. If your hair tends toward dryness, add a small amount of leave-in conditioner to the spray bottle before filling it with water. A 50/50 split of leave-in and water gives you a lightweight misting solution that reactivates your curl pattern and adds a small boost of hydration at the same time.
Scrunch and reshape
Once your curls are damp, take a small amount of the same gel or mousse you used on wash day and apply it to any sections that lost definition overnight. Focus on the areas that look the most disrupted rather than applying product across your entire head. Scrunch each section firmly upward from the ends toward the root using both hands, the same motion you used during your original styling step. Finger coiling a few individual curls that lost their shape helps rebuild definition faster than scrunching alone. To finger coil, wrap a single strand around one finger from root to tip and hold it for a few seconds before releasing. Work through three or four of the most disrupted curls in each section, then let your hair air dry or diffuse on low for a few minutes to reset the pattern.
Spot fix without touching everything
Resist the urge to work through your entire head if only a few sections need attention. Touching curls that already look good disrupts them and creates more work. Handle the flat or frizzy spots only, then leave the rest alone.
Sleep and protect your curls
Eight hours of sleep can undo a full wash day if you do not take two minutes to protect your curls before bed. Cotton pillowcases are the main offender: the rough fiber texture creates friction against your hair shaft all night, which breaks apart your curl pattern and pulls moisture out of the strands while you sleep. Adding a simple protective step to your nighttime routine keeps your curls intact and makes your next-day refresh significantly easier.
Switch to a satin or silk pillowcase
The single most effective change you can make for overnight curl protection is swapping your pillowcase. Satin and silk surfaces create far less friction against the hair than cotton, so your curls slide across the pillow rather than snagging and distorting. Satin is the more affordable option and works just as well for most people. Silk is naturally temperature-regulating, which some people prefer if they run warm at night, but either material gets the job done.
If you are not ready to switch your pillowcase, a satin-lined sleep cap or bonnet covers your entire head and accomplishes the same thing. Bonnets are particularly useful for anyone with longer or denser hair since they hold your curls in place more completely than a pillowcase alone.
Pineapple your hair before bed
The pineapple method is the standard overnight technique in curly hair styling for beginners, and it takes about thirty seconds. Flip all of your hair to the top of your head and secure it loosely with a soft scrunchie or a satin-covered hair tie, not a regular elastic band, which dents and breaks your curl pattern at the point of contact. The goal is to keep your curls bundled and off your neck without flattening them from the weight of your head during sleep.
Use the loosest setting possible when securing your pineapple. Pulling it too tight compresses the curls at the base and creates a flat spot at the crown that takes extra time to fix the next morning.
For shorter curls that are too short to gather into a full pineapple, multiple mini pineapples work just as well. Divide your hair into two to four sections and secure each one individually at the top of its section. This keeps the curls lifted and protected without requiring enough length to reach the crown.
Where to go from here
You now have everything you need to get started. Curly hair styling for beginners comes down to a handful of repeatable steps: cleanse without stripping, condition and detangle, style on soaking wet hair, lock in hold, dry without touching, and scrunch out the cast. Run those six steps consistently and your curls will show up more reliably every single wash day.
From here, your job is to run the routine and pay attention to how your hair responds. Small adjustments, like swapping a product or tweaking the amount you apply, make a bigger difference than scrapping everything and starting over. Give each change at least three wash days before you decide whether it is working or not. Your hair needs time to show you patterns, and you need time to read them.
When you are ready to take your products further, explore what Scatter is building for textured hair. Early access is available now, and the full product lineup launches in 2026.