

How To Define Curls Without Frizz: Easy Routine That Lasts
You've probably been there, you walk out of the shower with curls that look incredible, only to watch them puff into a frizzy cloud within the hour. Figuring out how to define curls without frizz is one of those things that sounds simple but trips up even seasoned curl veterans. The problem usually isn't your hair. It's a combination of technique, timing, and product choices that either work together or completely fall apart.
Curls shouldn't be this hard. And honestly, they don't have to be.
This guide breaks down the full process: washing, applying product, drying, and maintaining definition that actually holds. You'll get a step-by-step routine built around real techniques, not vague tips, along with the reasoning behind each step so you understand why it works. Whether your curls are loose waves or tight coils, the principles stay the same. Let's get into it.
What makes curls frizz and lose definition
Before you can fix frizz, you need to understand what's actually causing it. Most people blame their hair type or assume frizz is just inevitable for curly textures. Neither is true. Frizz happens for specific, identifiable reasons, and once you understand them, the path to defined curls becomes a lot clearer.
The hair cuticle and moisture balance
Your hair's outer layer is made up of overlapping cuticle scales, similar to roof shingles lying flat against each other. When those scales lie flat, your hair reflects light, stays smooth, and your curls clump together in defined spirals. When those scales lift, moisture from the air enters the hair shaft unevenly, individual strands swell and separate, and that separation is what you see as frizz.
The key to knowing how to define curls without frizz starts here: keeping the cuticle sealed is the single most important factor in reducing frizz.
Moisture imbalance is the main reason cuticles lift in the first place. Hair that's too dry will constantly seek moisture from the air, which causes swelling and frizz. But hair that's over-moisturized can suffer from hygral fatigue, where the hair shaft repeatedly swells and contracts until it loses elasticity. Both extremes produce the same result: undefined, puffy curls that won't hold a pattern. Your goal is a balanced moisture level that keeps the cuticle relaxed and closed.
How technique creates frizz during styling
The way you handle your hair while it's wet determines a large part of your final result. Rubbing your hair with a regular terry cloth towel is one of the most common frizz triggers people overlook. The rough texture physically lifts the cuticle and separates curl clumps before they've had a chance to form. Touching your hair too much while it's drying, or applying products on hair that's already started to air dry, produces the same outcome.
Disrupting the natural clumping process is another technique mistake that gets less attention. Curls want to group together in spirals as they dry. When you rake your fingers through damp hair without proper product slip, or when you try to fix your style mid-dry, you're pulling apart the curl groups that were forming. Those separated strands dry individually and produce the classic frizzy, undefined look instead of clean curl definition.
Here's a quick reference for the technique mistakes that cause the most damage:
- Rubbing hair dry with terry cloth instead of using a microfiber towel or cotton t-shirt
- Applying products when hair has already gone from soaking-wet to just damp
- Touching your curls or flipping your hair after products are applied
- Scrunching aggressively mid-dry without a deliberate technique
Environmental factors that work against you
Humidity is the most talked-about frizz trigger, and for good reason. When the air carries high moisture content, dry or porous hair absorbs it rapidly. The result is uneven swelling across your curl pattern, which breaks apart definition and creates flyaways at the surface. But low humidity is equally problematic: dry air pulls moisture out of your hair, causing the cuticle to lift and rough up in the opposite direction.
Temperature also plays a real role in your results. Heat styling without a protectant, or blow-drying with too much direct heat, roughens the cuticle and disrupts your natural curl pattern over time. Even the water you wash with matters more than most people realize. Hard water, which contains elevated levels of calcium and magnesium minerals, leaves buildup on the hair shaft that blocks products from absorbing properly and leaves curls looking dull, coated, and frizzy regardless of how good your technique is.
Before you start: assess your hair and climate
Jumping straight into a curl routine without knowing what you're working with is like cooking without tasting. Two factors determine your starting point more than anything else: your hair's porosity and the climate where you live. Getting clear on both before you buy products or commit to a technique will save you a lot of wasted time, failed wash days, and money spent on the wrong formulas.
Understand your hair porosity
Porosity describes how easily your hair absorbs and retains moisture, and it's the single most relevant piece of information for figuring out how to define curls without frizz. Low-porosity hair has tightly closed cuticles that resist moisture, which means products sit on the surface rather than absorbing. High-porosity hair absorbs moisture quickly but loses it just as fast, making frizz a constant battle. Medium or normal porosity sits in between and tends to be the most cooperative when it comes to product absorption and curl definition.
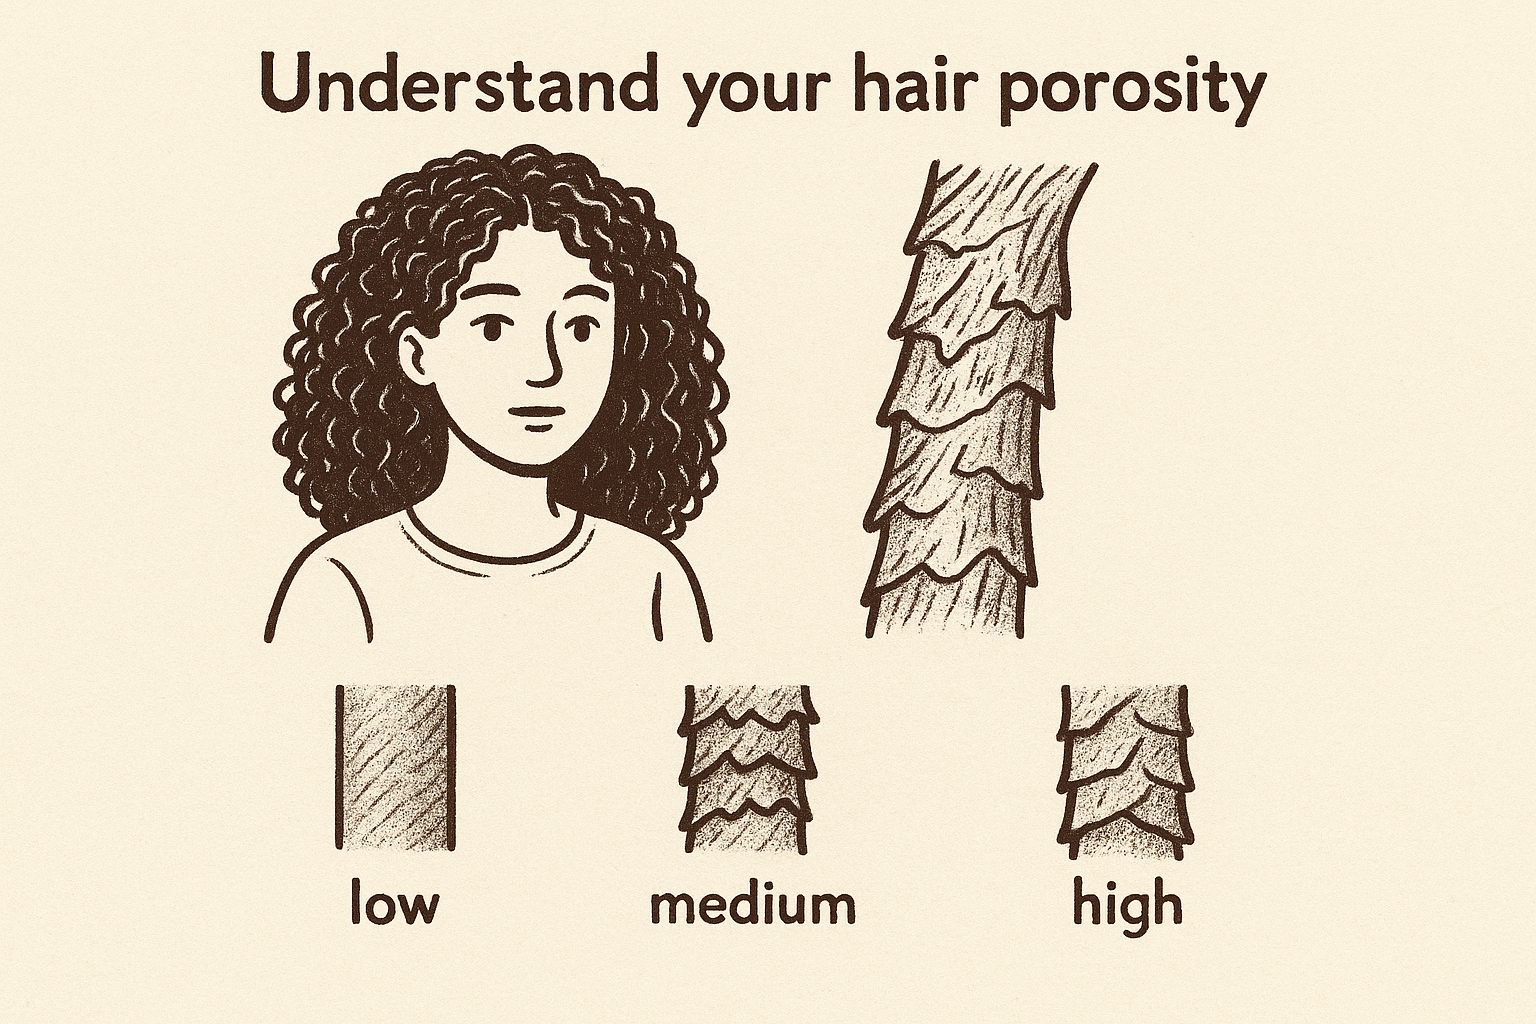
You can test your porosity at home by dropping a clean, shed strand of hair into a glass of water. If it floats before slowly sinking, you likely have low porosity. If it sinks quickly, your porosity is high.
Here's how porosity changes your product strategy:
| Porosity | Key Trait | Product Approach |
|---|---|---|
| Low | Cuticles resist moisture entry | Lightweight products, warm water rinses to open cuticle |
| Medium | Balanced absorption and retention | Most product types work; focus on technique |
| High | Absorbs fast, loses moisture fast | Rich creams, butter-based sealants, protein support |
Read your environment before styling
Where you live and the current season directly affect which products will perform well on your hair. High-humidity climates call for products with anti-humectant properties or a firm hold to block excess moisture from entering the hair shaft. Dry climates call for heavier moisturizers and sealants that slow down water loss. Ignoring your climate is one of the biggest reasons a routine that works for someone else fails completely for you.
Pay attention to the humidity percentage on styling days. Most weather apps display relative humidity. A day above 70% calls for a different product weight and layering strategy than a day sitting below 40%. Tracking your styling results alongside the weather conditions for a few weeks gives you a clear pattern of what your hair actually needs, so your decisions are based on real data instead of guesswork.
Step 1. Reset with the right wash schedule
Your wash day sets the foundation for everything that follows. If you start with buildup-coated hair or a stripped, dry scalp, no amount of styling technique will give you defined, frizz-free curls. The goal here is to clean your hair thoroughly enough that products can actually absorb, without removing the natural oils your curls need to stay moisturized and clumped together.
Find your ideal wash frequency
Washing too often strips the scalp's natural sebum production, which leaves curls dry and prone to frizz. Washing too infrequently allows product buildup to block moisture from reaching the hair shaft. Most people with textured hair find that washing once every five to ten days hits the sweet spot, but your scalp activity, lifestyle, and product usage will shift that window.
If you work out regularly or use heavy creams and butters, lean toward the shorter end of that range to prevent buildup from dulling your curl pattern.
A practical way to track this: note the day you wash, then check in on days three, five, and seven. If your scalp feels itchy or your curls feel coated and heavy before day five, wash more frequently. If your hair feels dry and brittle by day three, try stretching to seven days and using a light water-based refresher spray in between wash days instead.
Choose the right cleanser for your hair
Not every shampoo works the same way on textured hair. Sulfate-free shampoos clean the scalp without stripping the hair shaft the way harsh detergents do. If your hair runs dry or you have high porosity, a co-wash (conditioner-only wash) works well between full wash days to refresh without removing oils. If you use heavy stylers or live in a humid climate where buildup accumulates fast, a clarifying shampoo used once a month resets the slate.
Here's a simple framework to match your cleanser to your situation:
| Hair Situation | Cleanser to Use | Frequency |
|---|---|---|
| Normal buildup, average scalp | Sulfate-free shampoo | Every 5-7 days |
| Dry, high-porosity hair | Co-wash | Every 3-5 days |
| Heavy buildup or hard water | Clarifying shampoo | Once a month |
When you apply shampoo, focus the product directly on your scalp and let it rinse down through the lengths instead of piling hair on top of your head and scrubbing. That scrubbing motion tangles curl clumps and lifts the cuticle before you even get to styling. Understanding how to define curls without frizz starts with this kind of deliberate, low-friction washing from the very first step.
Step 2. Condition and detangle for curl clumps
Conditioning is where curl clumps actually start to form. Most people treat it as a quick, forgettable step, but the way you apply conditioner and detangle while your hair is still wet determines how well your curls group together before you even reach for a styling product. Rush through it and you're already working against yourself before you leave the shower.
Choose and apply conditioner correctly
The conditioner you pick needs enough slip to let detangling happen without resistance and enough moisture to soften the cuticle. Look for conditioners that contain ingredients like cetyl alcohol, shea butter, or panthenol, which coat the hair shaft and help strands move smoothly past each other. Lightweight conditioners work for low-porosity hair; richer, thicker formulas suit high-porosity hair that loses moisture fast.
Apply conditioner to soaking-wet hair in sections, working it through from mid-shaft to ends first, then gently moving it toward the scalp if your scalp tends to run dry.
Leaving conditioner on for at least three to five minutes gives the ingredients time to actually penetrate instead of sitting on the surface. While it sits, your hair softens and becomes easier to work through, which means less mechanical friction during detangling and fewer broken curl clumps by the time you rinse.
Detangle in sections, not all at once
Trying to detangle your entire head at once is one of the fastest ways to destroy curl clumps before they form. Divide your hair into four to six sections using clips, then work through each one individually. Keeping the hair organized reduces the tangles you're fighting and helps curls stay grouped in their natural spiral patterns rather than mixing across sections.
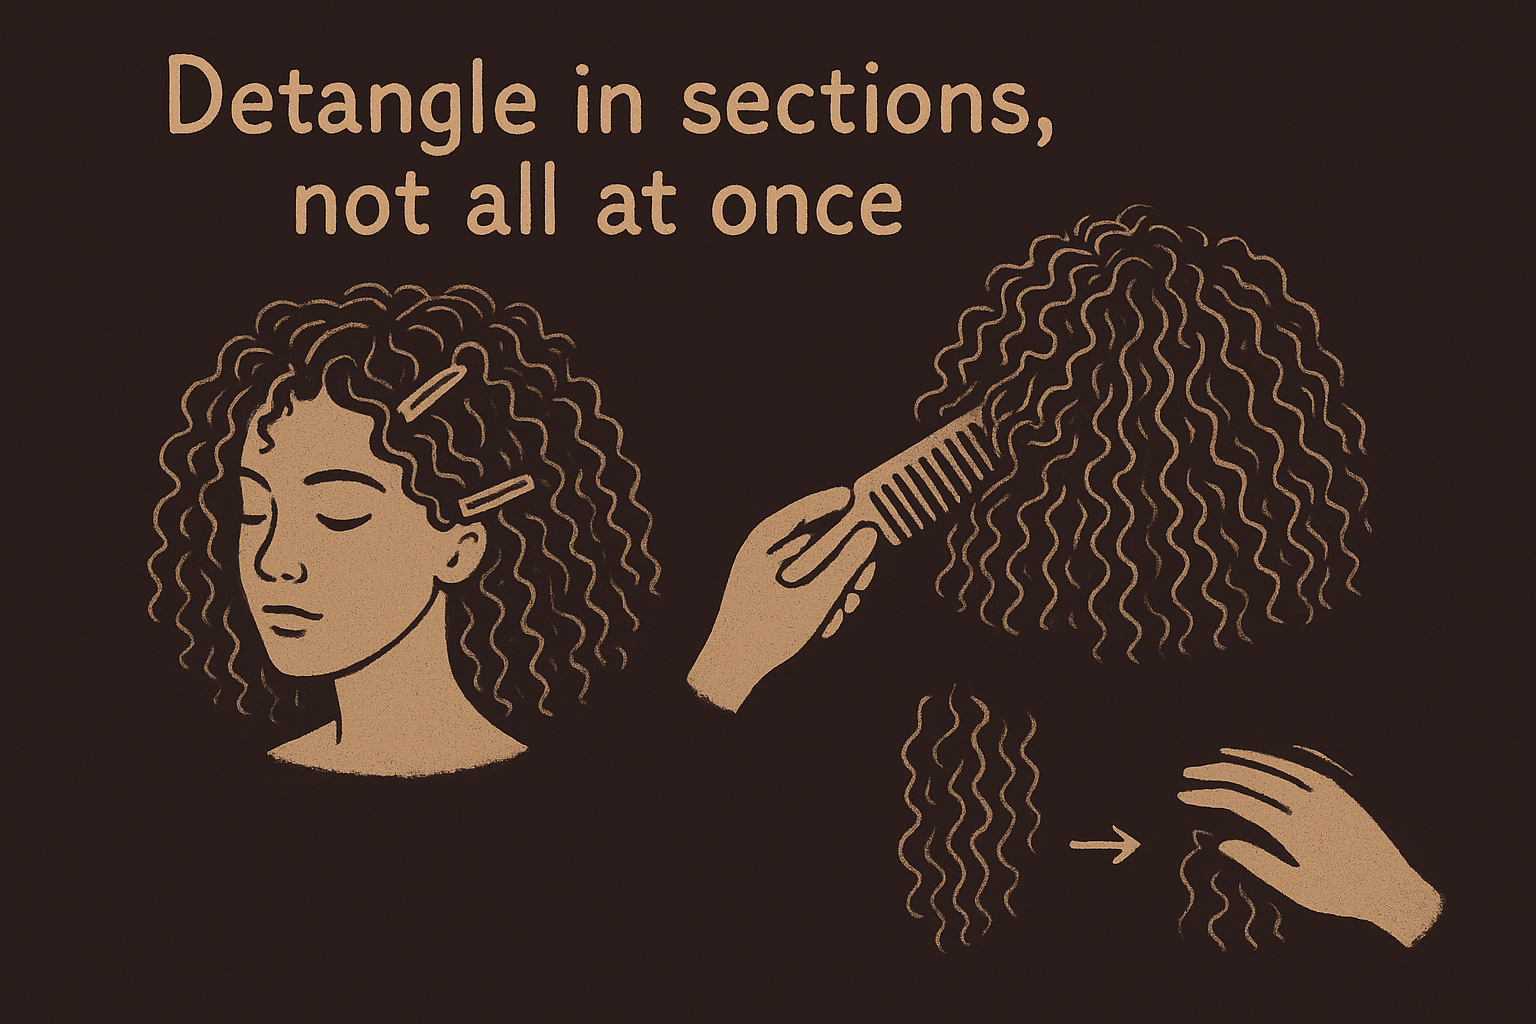
Work from the ends upward using a wide-tooth comb or your fingers. Finger detangling gives you the most control because you can feel knots before you force through them. After each section is detangled, smooth the conditioner through from root to tip with a gentle raking motion using your fingers, which encourages curl clumping naturally.
Here's a simple detangling sequence to follow:
- Clip hair into sections while still soaking-wet and full of conditioner
- Start at the ends and work upward in short passes
- Use fingers first, then a wide-tooth comb only if needed
- Smooth each section downward after detangling to reinforce the clump
- Rinse with cool water to seal the cuticle before moving to styling
Knowing how to define curls without frizz depends heavily on that final rinse temperature. Cool water closes the cuticle after detangling, which locks in the moisture you just added and keeps curl clumps intact all the way through to your styling step.
Step 3. Apply products on soaking-wet hair
Timing is everything when it comes to product application, and the window you want is immediately after you step out of the shower, when your hair is still dripping. Soaking-wet hair accepts product most efficiently because water molecules carry ingredients into the hair shaft before the cuticle has a chance to close back down. Waiting until your hair is just damp, even by a few minutes, reduces absorption and sets you up for frizz before you've even finished styling.
Layer your products in the right order
Knowing how to define curls without frizz means understanding that the sequence you apply products in is not optional. Start with a leave-in conditioner to add moisture and give your next layer something to grip onto. Follow with a cream if your hair needs extra hydration, then finish with a gel or custard to lock the curl shape and seal the cuticle shut. This layering approach, often called the LOC (Liquid, Oil, Cream) or LCO method, keeps moisture trapped inside the hair shaft instead of escaping while your curls dry.
Applying gel directly over a leave-in or cream extends the hold and cuts frizz significantly better than using gel alone on bare, wet hair.
Here's a simple product layering guide to follow on wash day:
| Layer | Product Type | Purpose |
|---|---|---|
| First | Leave-in conditioner | Adds moisture, preps hair for styling |
| Second | Curl cream or butter | Extra hydration, clump support |
| Third | Gel or custard | Hold, definition, frizz seal |
Apply without pulling apart curl clumps
The technique you use to work product through your hair determines whether your curl clumps survive to drying. Praying hands is the most curl-friendly application method: press your palms together with product between them, then smooth both hands along sections of hair from root to tip without raking or separating strands. After smoothing, scrunch upward gently from the ends to encourage the curl to spring back into its natural coil.
Work through your hair in the same sections you used during detangling. Applying product section by section gives you even coverage without over-handling, which is one of the fastest ways to break apart the curl groups you just spent the previous steps building. Once each section is coated and scrunched, leave it alone. Re-working product after the initial application disrupts the curl formation process and introduces frizz at the surface before drying even begins.
Step 4. Use definition techniques that reduce frizz
Once your products are applied, how you physically shape and encourage your curls matters as much as what you put on them. Definition techniques are deliberate hand movements that help individual curl clumps form tightly around each other, sealing the surface of the hair so frizz has fewer entry points. Skipping this step and just leaving product-coated hair to dry on its own usually results in undefined sections and surface texture that catches moisture from the air before your curls have set.
Scrunch and smooth for structured curl clumps
Scrunching is the most effective technique for building clean curl definition without separating curl groups. Cup sections of hair in your palm and press upward toward your scalp firmly but without squeezing hard enough to disturb the curl pattern. Hold the scrunch for two to three seconds, release, and move to the next section. That brief compression encourages the hair to coil around itself and lock into its natural spiral shape before drying begins.
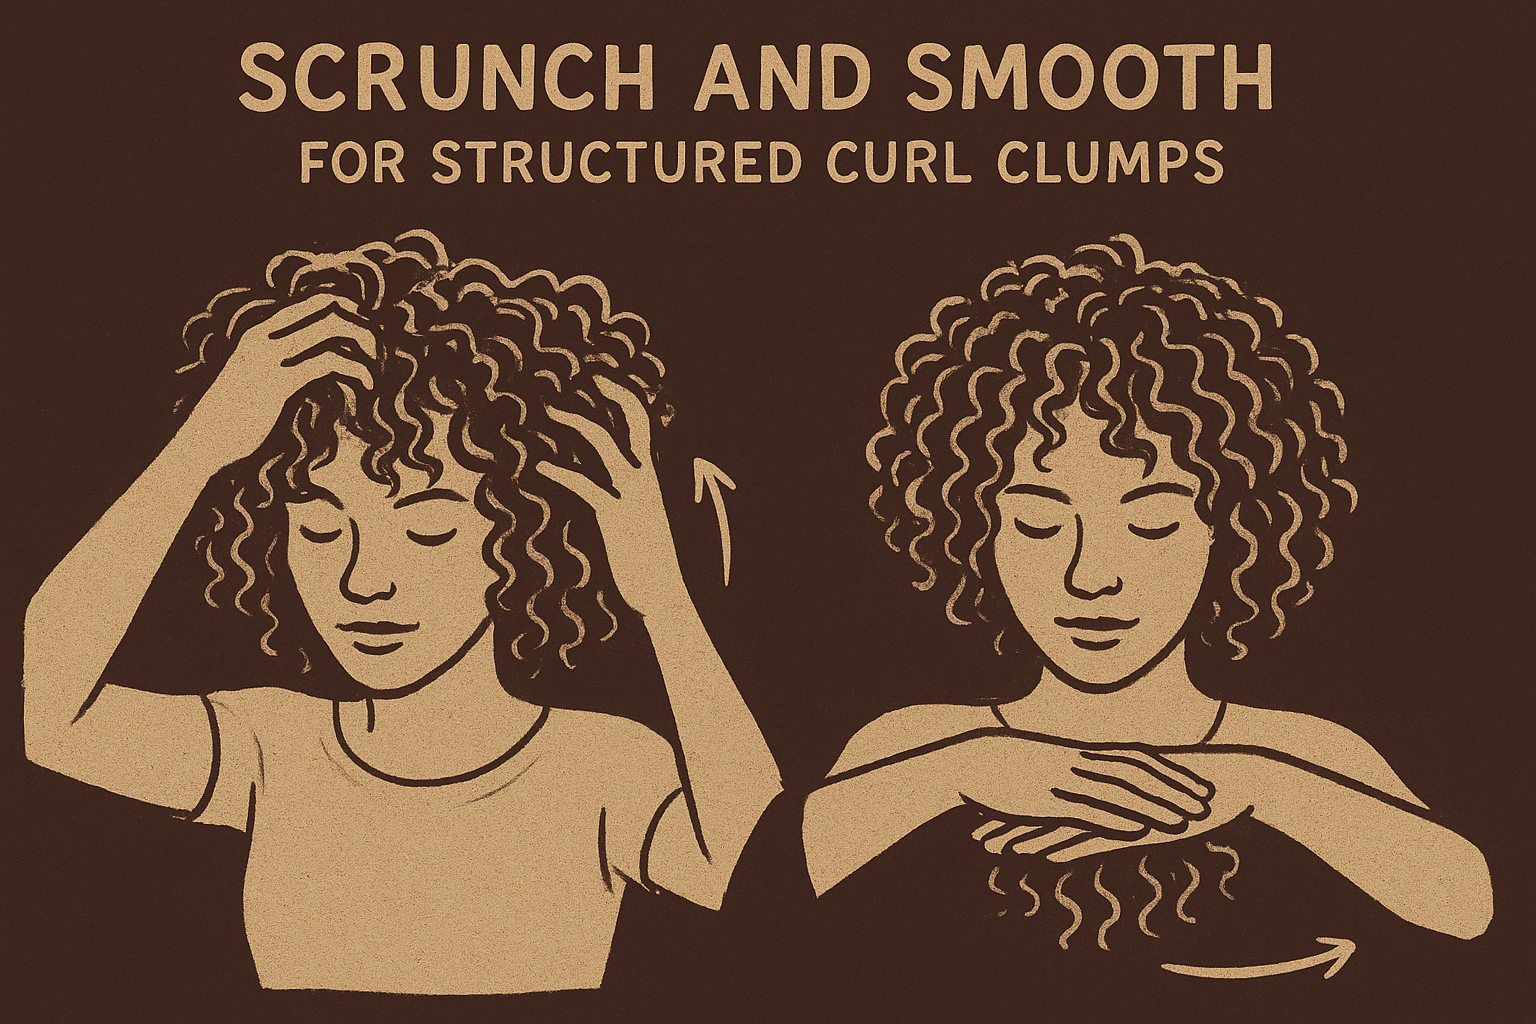
Scrunching works best when your hands are lightly coated with product, so run a small amount of gel across your palms before you start each pass through the hair.
After scrunching a section, follow up with a smoothing pass using the praying hands technique: press the section between both flat palms and slide downward from root to tip without gripping or raking. This move seals any lifted cuticle edges that the scrunching motion may have opened, which directly reduces frizz at the hair surface. Understanding how to define curls without frizz comes down to pairing these two motions consistently across every section.
Fix problem areas without disturbing the rest
Not every section of your hair will respond the same way. Looser sections near the nape or crown often need more attention to get them to clump properly. If you notice a section that looks thin or stringy after scrunching, separate it into a slightly smaller subsection, smooth a small amount of gel through it, and scrunch again. Working with smaller pieces gives you more control over the curl clump size without breaking apart the sections that are already forming well.
Avoid the temptation to comb or rake through any section again once products are applied. Instead, use your fingers to gently guide stray strands into the nearest curl group by pressing them inward. Here's a quick reference for handling the most common problem areas:
| Problem | Technique Fix |
|---|---|
| Stringy, thin section | Split into smaller piece, re-scrunch with added gel |
| Stray surface strands | Press gently into nearest curl group with fingertips |
| Flat section at crown | Flip head forward, scrunch upward from roots |
Step 5. Dry without disturbing the pattern
How you dry your curls can either lock in everything you've built during washing and styling, or unravel it completely. The drying phase is when curl clumps set their shape, which means any friction, heat, or movement you introduce before they're fully dry will show up as frizz and broken definition. Your job during this step is mostly hands-off, and that restraint is what makes the difference between a great wash day and a frustrating one.
Choose your drying method
Your two main options are air drying and diffusing, and both work well when you use the right technique. Air drying is the gentler option because it involves no heat, but it takes longer and leaves your curls vulnerable to frizz if the humidity is high while they dry. Diffusing speeds up the process, sets the curl shape faster, and gives you more lift at the roots, but only if you use a low heat and low airflow setting to avoid disrupting the curl pattern.
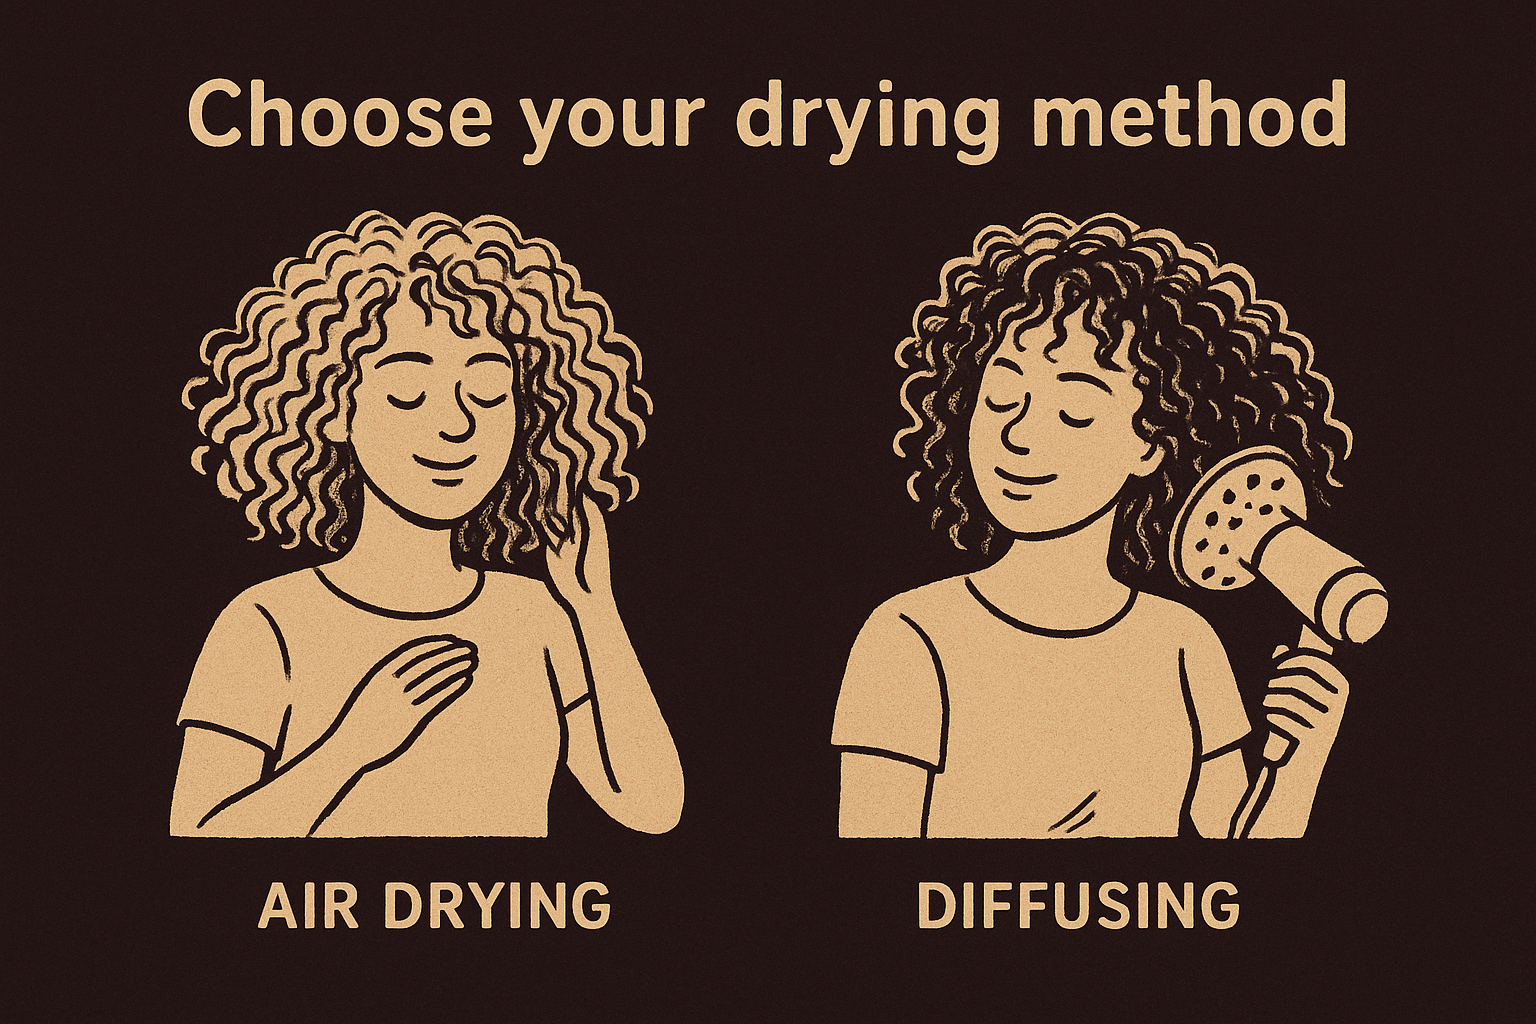
Diffusing on high heat is one of the fastest ways to cause frizz because the forceful airflow physically separates curl clumps before they've set.
Here's a side-by-side breakdown to help you pick the right method for your situation:
| Drying Method | Best For | Key Setting |
|---|---|---|
| Air drying | Low humidity days, low-porosity hair | No heat; avoid touching while drying |
| Diffusing | High humidity days, adding volume | Low heat, low airflow, hover don't press |
| Plopping then air dry | All curl types, reducing dry time | Microfiber towel or t-shirt, 20-30 minutes |
Position your hair while it dries
Where you let your hair sit during drying shapes how your curls fall. Flipping your hair upside down while you diffuse or during the first portion of air drying builds volume at the roots and encourages curls to spiral downward instead of drying flat against your head. Once roots feel about 70% dry, flip back upright so the final shape sets in the direction you want to wear it.
Plopping is another useful positioning technique. Lay a microfiber towel or clean cotton t-shirt flat, lower your hair onto it, wrap the fabric loosely around your curls and secure it at the nape of your neck for 20 to 30 minutes before releasing. This absorbs excess water without friction and holds your curl clumps in a compressed shape while they begin setting. Knowing how to define curls without frizz during the drying phase comes down to this: keep hands off, minimize disruption, and let the product do its job.
Step 6. Set, then scrunch out the crunch
If you've ever finished drying your curls and found them stiff, crunchy, and hard to the touch, that's not a sign something went wrong. That crunch is your gel or custard forming a cast around each curl clump as it dries, and it's exactly what you want to see. The cast holds the curl shape while the hair finishes setting, locking in definition and blocking frizz from breaking through the surface. The last move in your wash day routine is dissolving that cast at the right moment to reveal smooth, defined curls underneath.
Know when your hair is actually done drying
Scrunching out the crunch too early is one of the most common mistakes that undoes an otherwise solid wash day. Your hair needs to be 100% dry before you break the cast, not mostly dry, not almost dry. Touching it before it fully sets causes the curl clumps to lose their structure mid-formation, which creates frizz and weakened definition that no amount of additional product will fix.
Understanding how to define curls without frizz at this stage is simple: patience is the technique. The cast is protecting your curls while they finish forming, so leave it completely alone until the hair feels dry to the touch with zero cool or damp spots near the roots.
Run your fingers gently along the surface of a section near the nape of your neck, which is typically the last area to dry completely. If it feels even slightly cool or flexible in a soft way rather than a stiff, crunchy way, give it more time before moving forward.
Break the cast without breaking the curls
Once your hair is fully dry and uniformly crunchy, coat your palms lightly with a small amount of oil, such as argan or jojoba, to add slip and shine as you work through the cast. Cup sections of hair in your hands and scrunch upward firmly but smoothly, applying even pressure rather than aggressive squeezing. The cast will crumble and dissolve, releasing soft, defined curl clumps underneath.
Work through your hair section by section using the same organized approach you used during product application. Here's a quick reference for getting the scrunch-out right:
| Situation | Adjustment |
|---|---|
| Hair still slightly damp | Wait longer before scrunching |
| Curls feel rough after scrunch-out | Add a drop of oil and scrunch again |
| Frizz appears after breaking cast | Smooth surface gently with flat palm, no raking |
Avoid pulling or separating curl clumps during this step. Each clump should stay intact as the cast releases around it.
Keep definition for days: sleep and refresh
Getting great curl definition on wash day is only half the work. Preserving that definition overnight and refreshing it on days two, three, and beyond is what separates a good curl routine from one that actually fits your life. Most frizz that appears the day after washing isn't from the routine itself; it's from how you slept and whether you gave your curls anything to work with the next morning.
Protect your curls at night
Sleeping on a standard pillowcase is one of the fastest ways to destroy definition you spent an entire wash day building. Cotton fabric creates friction as you move in your sleep, which physically separates curl clumps, lifts the cuticle, and leaves you with a frizzy, flattened result by morning. Switching to a satin or silk pillowcase removes that friction entirely and lets your curls slide instead of catching. A satin bonnet or silk hair wrap gives you even more protection because it fully encloses your hair and holds the curl structure in place through the night.
The way you position your hair before sleeping also matters. Use the pineapple method for longer hair: gather all your curls loosely at the very top of your head and secure them with a soft scrunchie in a low-tension loop. This lifts the curls away from the nape and sides, which are the areas that flatten first.
| Protective Option | Best For | Key Benefit |
|---|---|---|
| Satin pillowcase | All curl types | Reduces friction while sleeping |
| Satin bonnet | Shorter or tighter curls | Full coverage, holds shape |
| Pineapple + silk scrunchie | Longer or looser curls | Lifts curls, prevents flattening |
Refresh without starting over
Knowing how to define curls without frizz on non-wash days comes down to reactivating what's already there rather than layering on more product. Start with a spray bottle filled with water and lightly mist sections of your hair until they feel damp but not soaking. This re-wets the curl enough to reshape it without stripping the product still coating each strand.
Misting one section at a time and scrunching immediately gives you far better results than spraying your whole head at once and hoping for the best.
After misting, scrunch each section upward using the same motion from your original wash day. If a section feels dry or rough after scrunching, work in a fingertip-sized amount of leave-in conditioner or a lightweight gel before scrunching again. Let it air dry or diffuse briefly on low heat to reset the shape without rebuilding the entire routine from scratch.
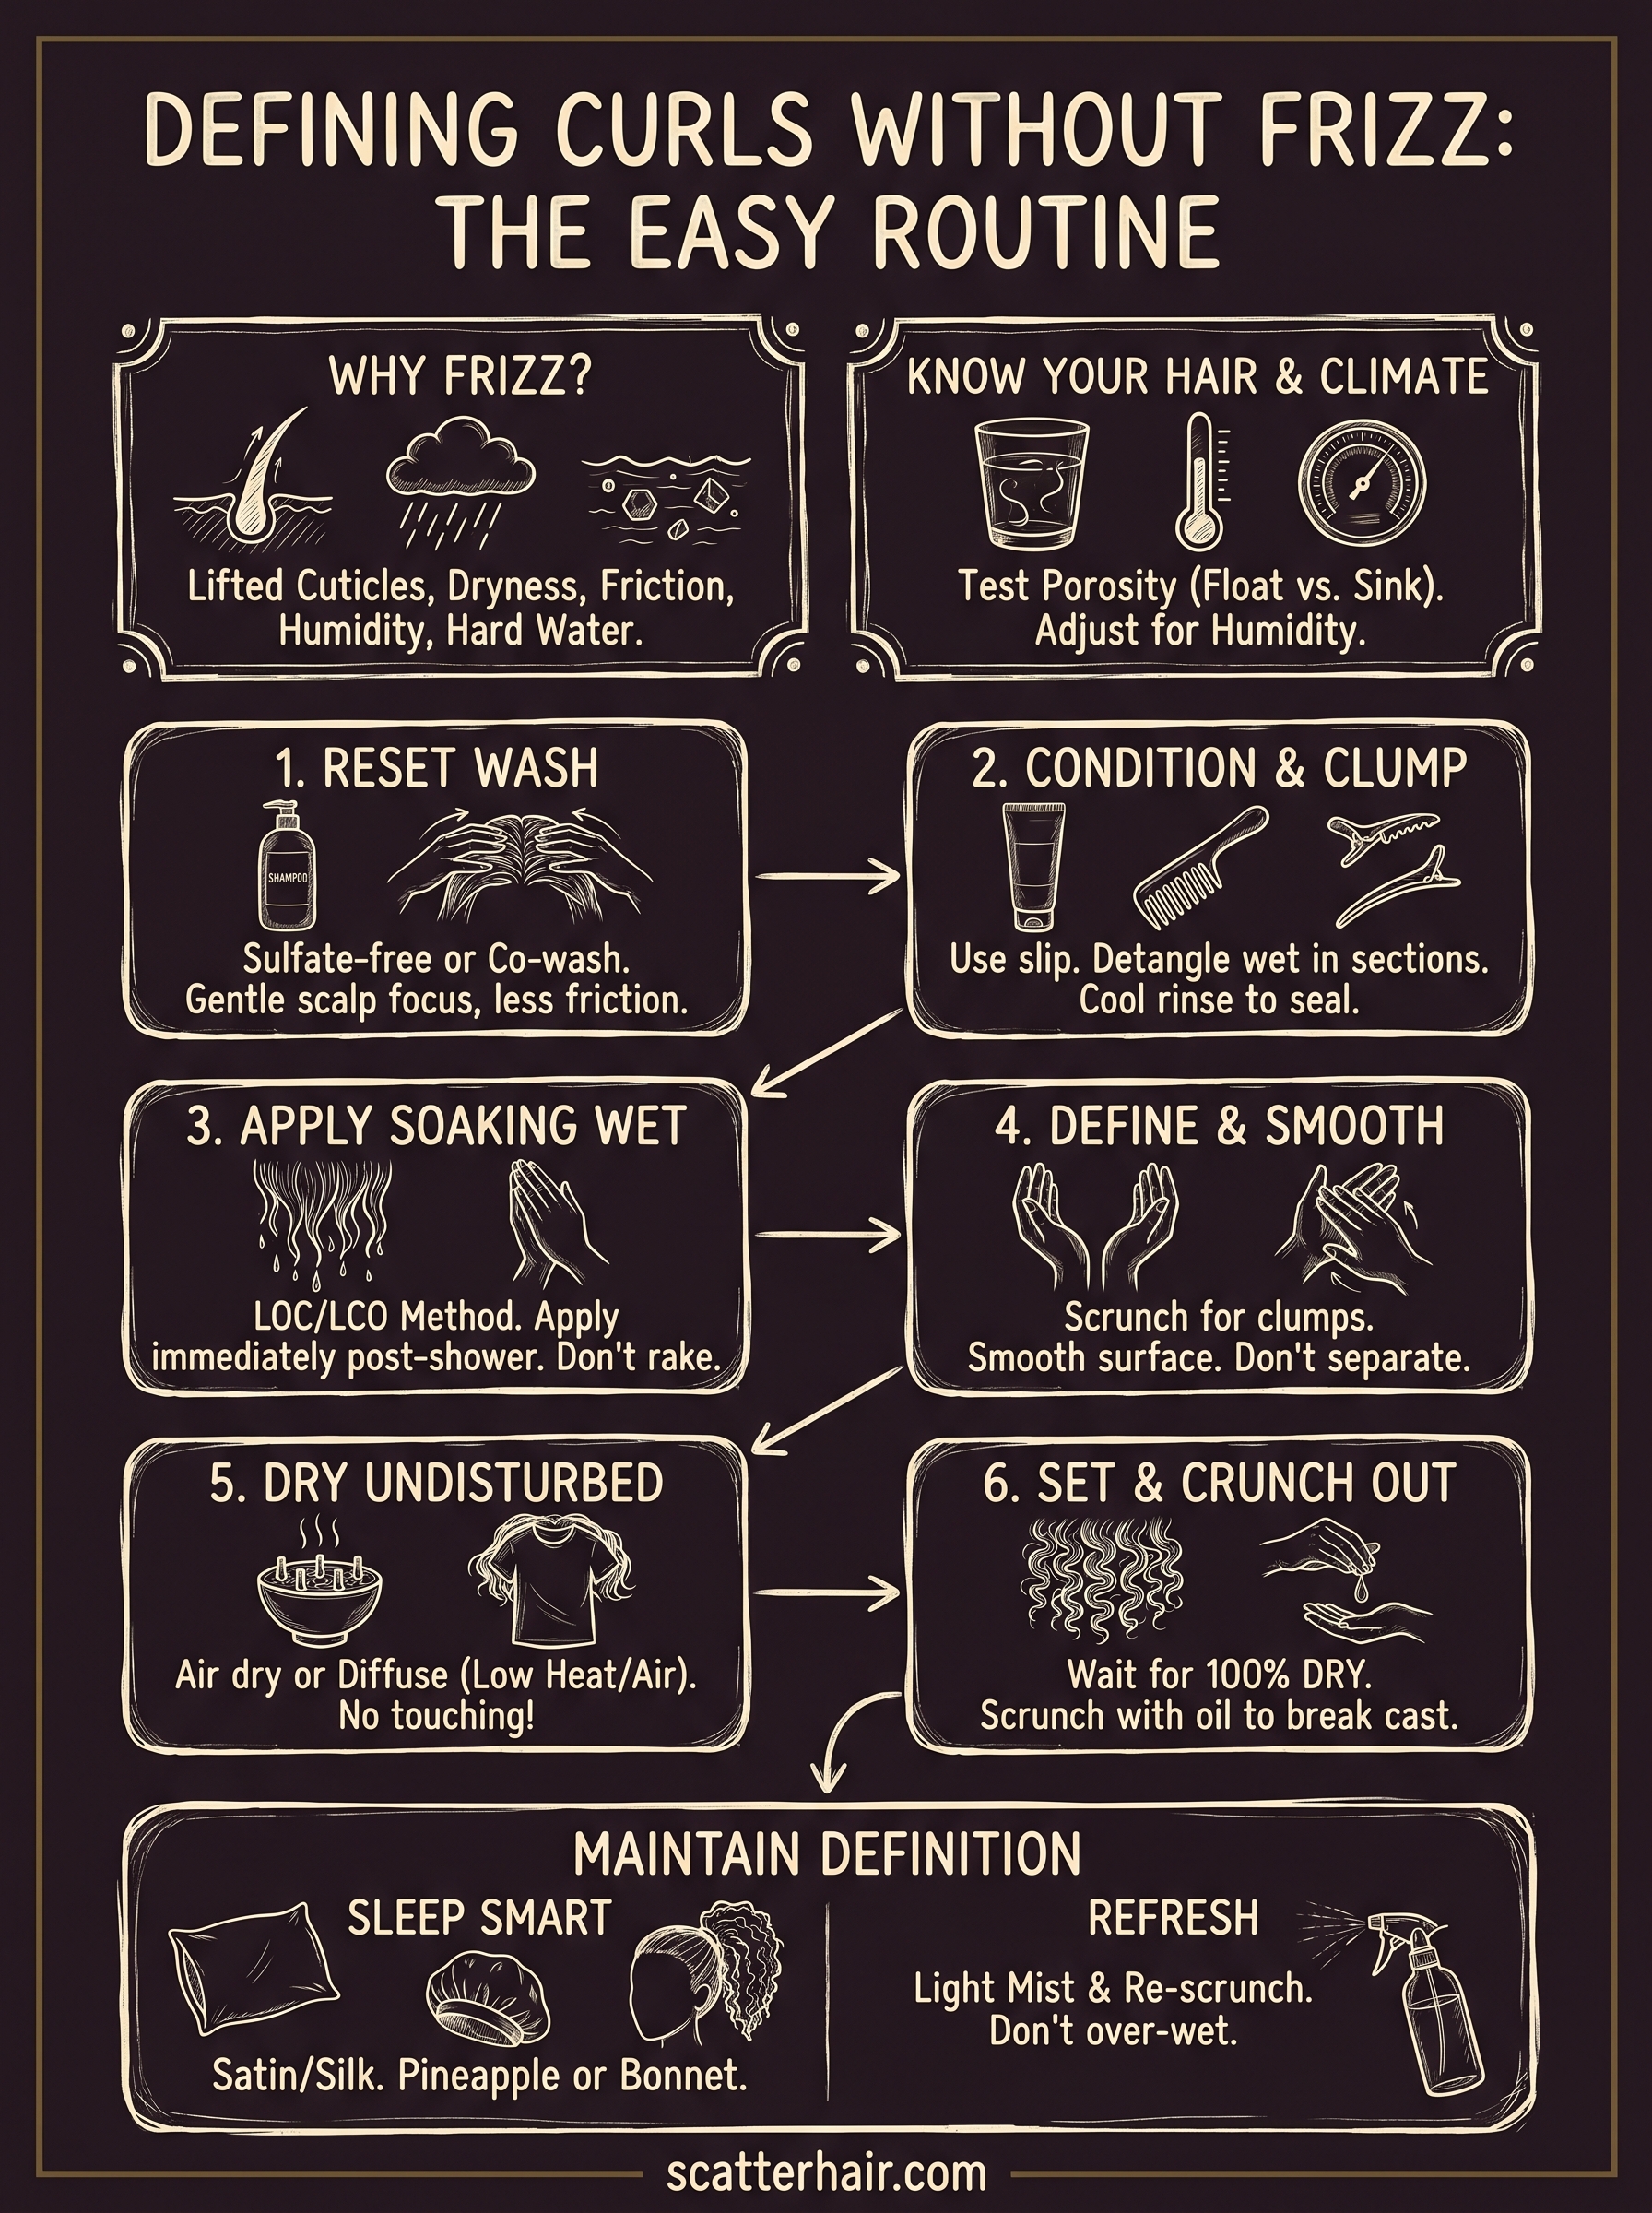
Your frizz-free curl game plan
You now have everything you need to know about how to define curls without frizz, from understanding why frizz happens at the cuticle level to protecting your curls through sleep and refresh days. The routine works because each step builds on the one before it: the wash creates the foundation, the conditioning builds the clumps, the product application locks the shape, and the drying and cast-breaking reveal the result. None of it is complicated once you know the reasoning behind each move.
Start with one wash day using this full sequence, then track what worked and what your hair still needs. Small adjustments to product weight or drying method will get you closer with each session. Scatter's first product is Slip, a 2% hyaluronic acid hair serum. Work it through wet-to-damp hair, then air dry for texture or blow dry for body. It's on pre-order now.